Short answer: Product photo editing follows eight steps: cull the best frames, crop and straighten, remove the background, correct color and white balance, retouch dust and scratches, add a shadow, export to each marketplace’s spec, then name the files and write alt text. Use the same settings on every image so the catalog matches.
Key takeaways
- Work in a fixed order. Cutouts and color come before retouching and shadows; export comes last.
- Amazon main images need a pure white background (RGB 255, 255, 255), the product filling 85% or more of the frame, and 1,000 px or more on the longest side for zoom.
- Shopify recommends 2048 × 2048 px for square product images; Etsy recommends 2000 px on the shortest side; Walmart US recommends 2200 × 2200 px.
- Auto background tools are fine for simple, solid products. Hair, lace, glass, chrome and jewelry need a hand-drawn path or mask.
- Edit small, simple catalogs yourself. Outsource large batches and difficult materials to keep every image consistent.
Product photos do most of the selling in an online store. Shoppers cannot touch the item, so the image has to show its true shape, color and detail. Clean, consistent edits make a listing look trustworthy and help buyers decide faster.
This guide gives you a step-by-step editing workflow, the tool for each step, the image specs for Amazon, Shopify, Etsy and Walmart, and a simple way to decide what to edit yourself and what to send to a product photo editing team.
Getting listings ready for the holiday rush? Our Black Friday and Cyber Monday product photo checklist covers the background, framing, file size and shadow checks to finish before the sales start.
Black Friday falls on November 27, 2026, and Cyber Monday on November 30. Finish edits and re-uploads at least a week ahead, so any image a marketplace rejects can be fixed before traffic peaks.
How do you edit product photos step by step?
Follow these steps in order. Each one depends on the one before it, so skipping ahead usually means redoing work.
- Cull and organize. Pick the sharpest frame for each angle and drop blurry or badly lit shots. Group the files by SKU and keep the RAW originals untouched in a separate folder.
- Crop and straighten. Level the horizon and vertical edges, then crop to the ratio your platform shows best (square works on all four marketplaces below). Keep the same margins on every image. For an Amazon main image, the product should fill 85% or more of the frame.
- Remove the background or draw a clipping path. Automatic selection tools handle simple, solid products. Hard-edged items get a hand-drawn pen path; hair, fur, lace and fringe need a mask. Not sure which one you need? See clipping path vs background removal vs image masking.
- Correct color and white balance. Set white balance from a gray card or a neutral area, then fix exposure with Levels or Curves. Compare the screen with the real product. For a white background, check a few points with the eyedropper: it should read 255, 255, 255.
- Retouch dust, scratches and defects. Use the Spot Healing Brush for small marks and the Clone Stamp for larger areas. Remove lint, fingerprints and packaging creases, but never change the product itself. An item that looks different from its photo comes back as a return.
- Add shadows or reflections. Keep the natural shadow from the shoot, add a soft drop shadow, or add a reflection for glossy items. Build it on its own layer so you can remove it for platforms or slots that need a plain cutout.
- Resize and export per marketplace. Export in sRGB. Use JPEG for photos and PNG when you need transparency. Size each file to the platform table below and compress it so pages load fast.
- Name the files and write alt text. Use short, descriptive file names such as
black-leather-tote-front.jpginstead ofIMG_0412.jpg. Write alt text that says what the product is. Google calls alt text the most important image attribute and warns against keyword stuffing.
Which tool fits each edit, and when should you outsource it?
Swipe sideways to see the full table →
| Edit | DIY tool | When to outsource |
|---|---|---|
| Cull and organize | Lightroom, Adobe Bridge | Rarely. You know your product best. |
| Crop and straighten | Photoshop Crop tool, Lightroom | Hundreds of SKUs that need identical margins |
| Background removal | Photoshop Select Subject, AI background removers | Hair, fur, lace, glass, chains or large batches |
| Clipping path | Photoshop Pen tool | Hard-edged products that must stay clean at full zoom |
| Color and white balance | Camera Raw, Curves, Lightroom | Color-critical items (apparel, cosmetics) shot on different days |
| Retouching | Spot Healing Brush, Clone Stamp | Jewelry, chrome, glass, heavy dust or scratches |
| Shadows and reflections | Separate layer, layer styles | Realistic natural or mirror shadows across a whole catalog |
| Resize and export | Photoshop Export As, Lightroom export presets | Rarely. Save a preset once. |
| Batch consistency | Lightroom copy and paste settings | Sets shot by different photographers or studios |
Too many SKUs, or edges that Select Subject can’t handle?
We edit simple products on white, cut out backgrounds and draw clipping paths for Amazon, Shopify, Etsy and Walmart listings, and we check each image against the platform’s spec before it comes back to you. Retouching, jewelry and other complex items are quoted per image after we see them. From $0.50 per image · exact quote by email after we see the file · 24-hour standard delivery.
What image specs do Amazon, Shopify, Etsy and Walmart require?
These are the numbers each platform publishes in its own help pages. Rules change, so check the platform before a big upload.
Swipe sideways to see the full table →
| Platform | Background | Recommended size | Other rules |
|---|---|---|---|
| Amazon (main image) | Pure white, RGB 255, 255, 255 | 1,000 px or more on the longest side (for zoom) | Product fills 85% or more of the frame |
| Shopify | Your choice (match your theme) | 2048 × 2048 px recommended for square product images | Up to 5000 × 5000 px or 25 MP; under 20 MB; PNG, then JPEG |
| Etsy | Your choice | 2000 px on the shortest side, 72 PPI | Etsy suggests files under 1 MB |
| Walmart US (main image) | Seamless white, 255/255/255 RGB | 2200 × 2200 px; 1500 × 1500 px minimum for zoom | 1:1 square; JPEG, JPG, PNG or BMP; 5 MB or less; RGB |
| Walmart Canada (main image) | Seamless white, 255/255/255 RGB | 2000 × 2000 px at 300 ppi | Below 500 × 500 px, the primary image is unpublished |
For slot-by-slot details, see our Amazon, Shopify, Etsy and Walmart image requirements.
What do the main product photo editing techniques do?
Each technique fixes one specific problem. Cropping, color, cutouts, retouching and shadows apply to almost every product. HDR, focus stacking and 360-degree views only help shiny, detailed or high-consideration items. Here is what each one does and when to use it.
Crop and Resize

Cropping and resizing are crucial steps in product photo editing. To showcase products effectively, it’s important to crop the images to remove any unwanted elements or distractions. Additionally, resizing the images to match the desired dimensions for the eCommerce platform ensures a consistent and professional appearance. Proper cropping and resizing enhance visual appeal and optimize loading times.
Adjust Exposure and White Balance
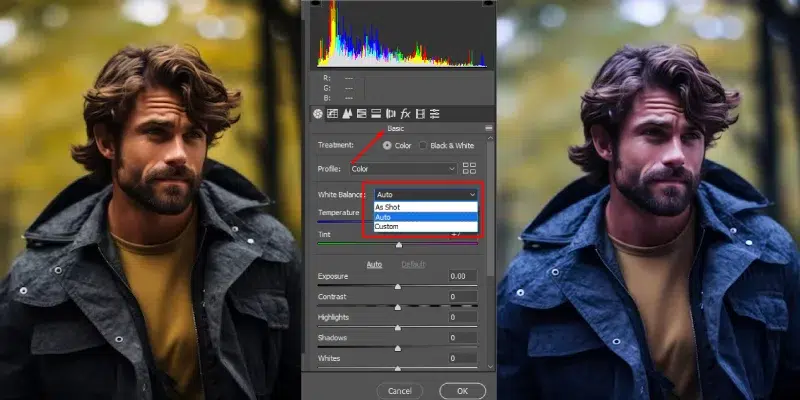
Exposure controls how bright the product looks; white balance removes color casts from the light. Set both first, from a gray card or a neutral area, so the colors on screen match the real item.
Enhance Colors and Contrast

A small lift in color and contrast gives the product depth and helps it stand out from the background. Keep it subtle. Oversaturated colors make the product look different from what the buyer receives.
Remove Background for a Professional Look
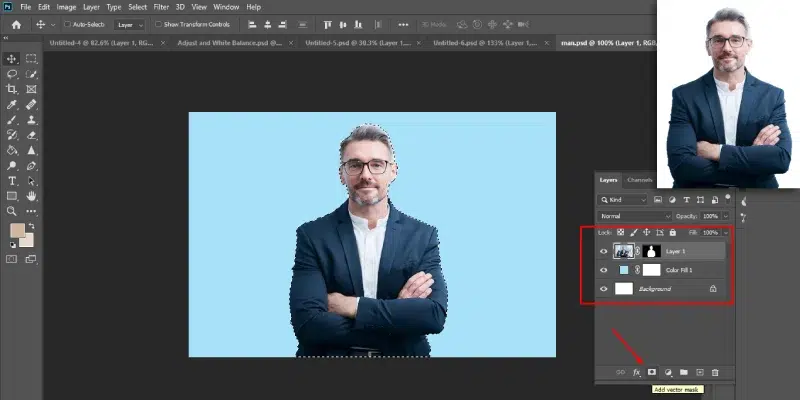
A clean white, solid color or transparent background removes distractions and keeps the focus on the product. It is required for most marketplace main images and makes a catalog look uniform.
Retouch and Remove Imperfections
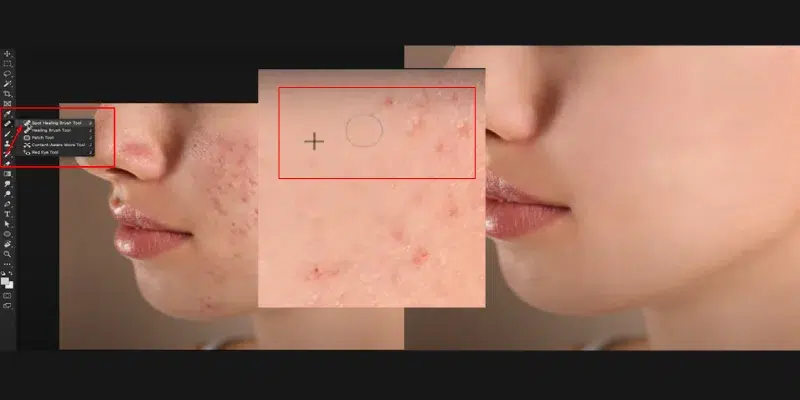
Retouching removes blemishes, scratches and marks so the product looks as it does new. Fix flaws from the shoot, not features of the product. Buyers trust photos that match what arrives.
Add Shadows and Reflections
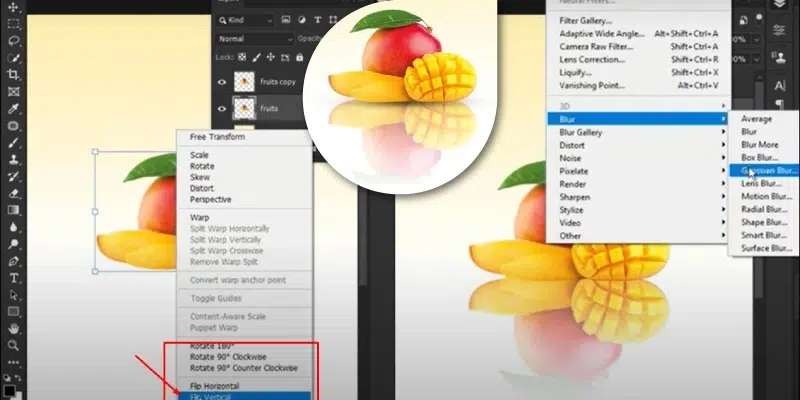
Shadows and reflections give a cutout depth, so it looks like it sits on a surface instead of floating. Keep them soft and consistent across the whole catalog.
Optimize Your Photos to Reduce the Load Time
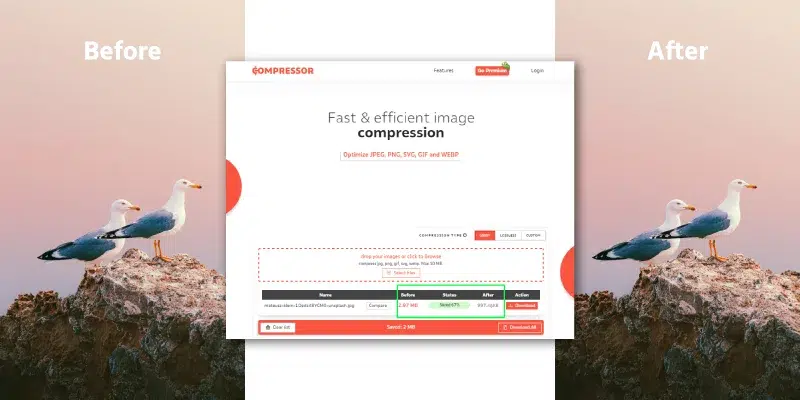
Large images slow your store down. Resize each image to the size the platform displays, compress it, and use JPEG for photos and PNG for images that need transparency. Faster pages are better for shoppers and for search.
Maintain Consistency
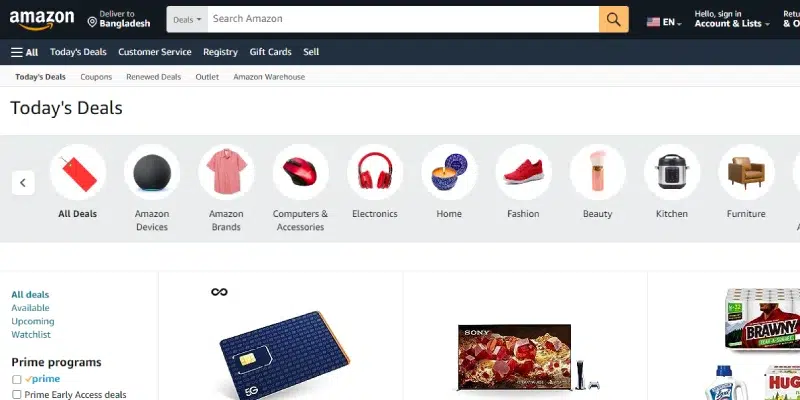
Use the same background, crop, margins and color style on every product image. A consistent catalog looks professional and makes it easier for shoppers to compare items.
Use Clipping Path
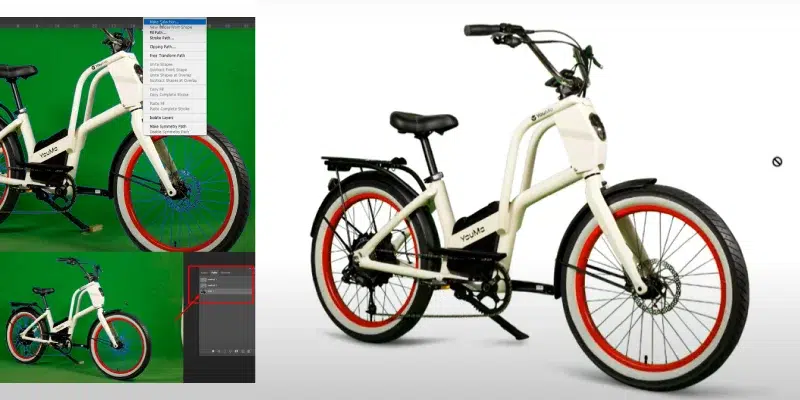
A clipping path is a hand-drawn vector outline that cuts the product out with a precise, clean edge. It works best for hard-edged items and lets you place the product on any background or reuse it in other marketing.
Apply HDR (High Dynamic Range)
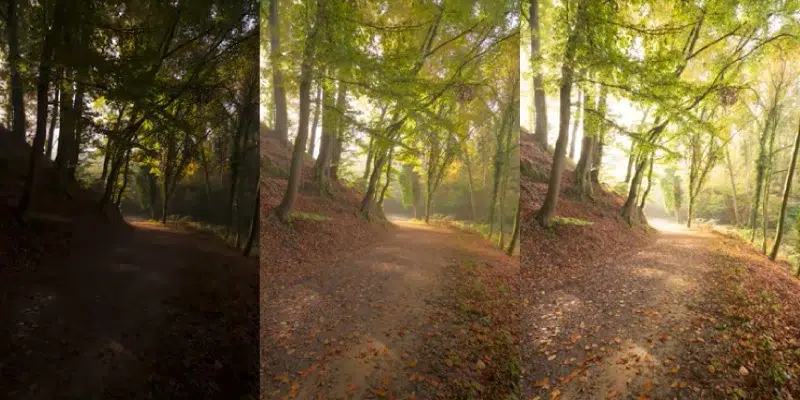
Applying High Dynamic Range (HDR) editing to product photos can significantly enhance their visual appeal. HDR involves merging multiple exposures of the same image to create a balanced and vibrant final result. You can get the dynamic and lifelike product images through this process. This editing process is especially beneficial for showcasing products with intricate details or those in challenging lighting conditions.
Focus Stacking

Focus stacking is a powerful technique used in product photo editing to achieve greater depth of field and sharpness. It involves combining multiple images of the same product, each with a different focal point, to create a final image that is entirely in focus. This method is particularly useful for products with intricate details. By using focus stacking, you can ensure that all parts of the product are sharp and clear.
Add Watermarks or Logos
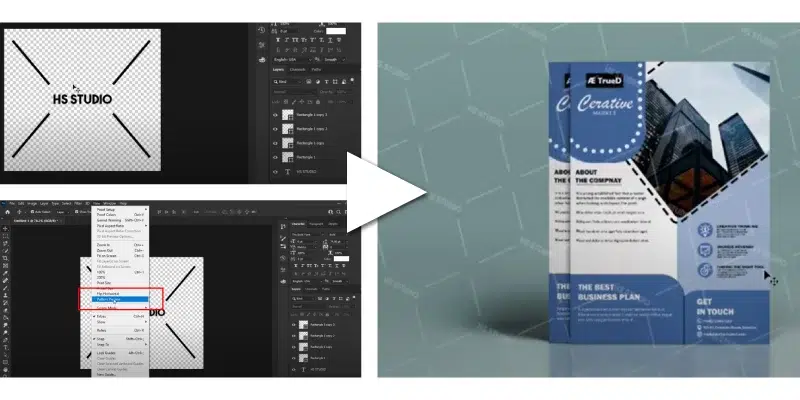
Adding watermarks or logos to product photos is a crucial step in protecting your brand and ensuring proper attribution. By incorporating a unique watermark or logo, you establish ownership and prevent unauthorized use of your images. This practice enhances your brand recognition and safeguards your product photos from misuse in the digital space.
Create 360-Degree Views

Creating 360-degree views of product photos involves capturing multiple images from different angles and stitching them together to offer a comprehensive visual experience. This interactive technique allows customers to virtually explore products, boosting engagement, trust and confidence in their purchase decisions, ultimately enhancing the overall shopping experience.
Batch Editing
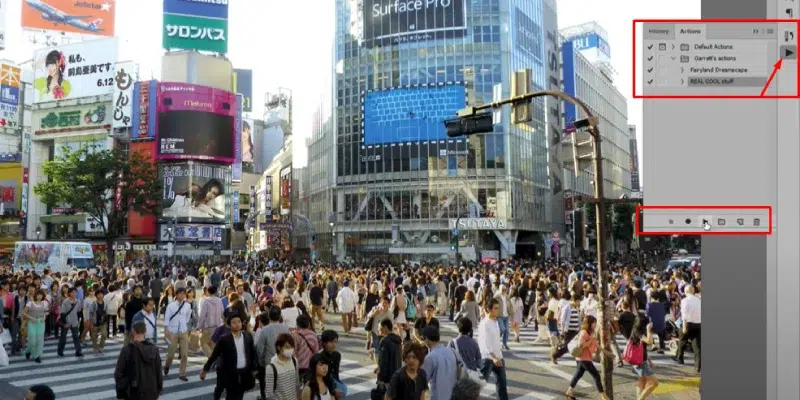
Batch editing applies the same adjustments to many images at once. It saves time and keeps every product photo in a set looking the same. In Lightroom, edit one photo, then copy and paste its settings to the rest.
Use Smart Objects
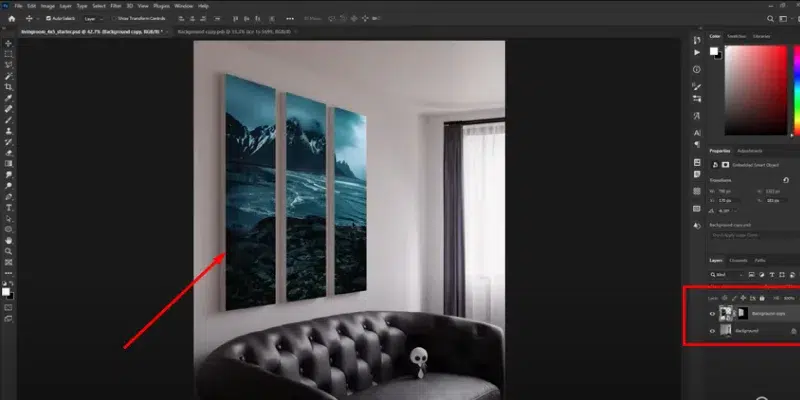
Using Smart Objects in photo editing software, such as Adobe Photoshop, allows you to work non-destructively on your product photos. By converting image layers into Smart Objects, you can apply filters, adjustments and transformations without permanently altering the original image data. This gives you the flexibility to make changes or revert back to the original photo at any time, making the editing process more flexible and reversible. Smart Objects are especially beneficial when you need to resize or scale product images without losing quality.
Background Blur

Background blur, also called bokeh, keeps the product sharp while the background goes soft. It suits lifestyle and social images, not marketplace main images, which need a clean white background. You can create it in camera with a wide aperture or add it later in editing software. Used lightly, it adds depth and draws the eye to the item.
Adjust Levels and Curves
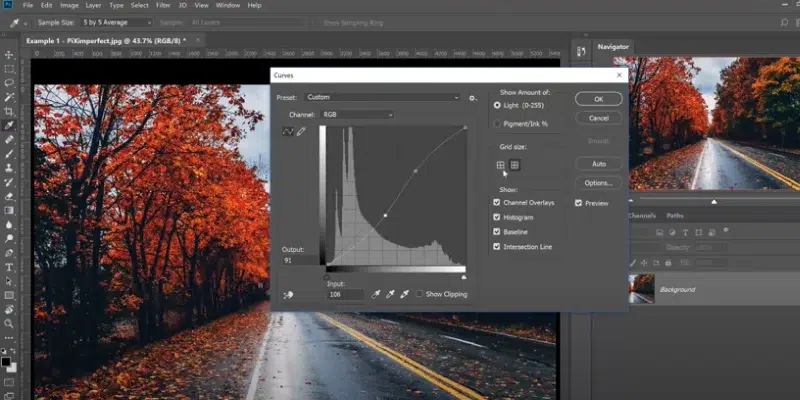
Levels and Curves let you set the black point, white point and midtones by hand. They fine-tune contrast and bring back detail in highlights and shadows that auto settings miss.
Remove Dust and Scratches
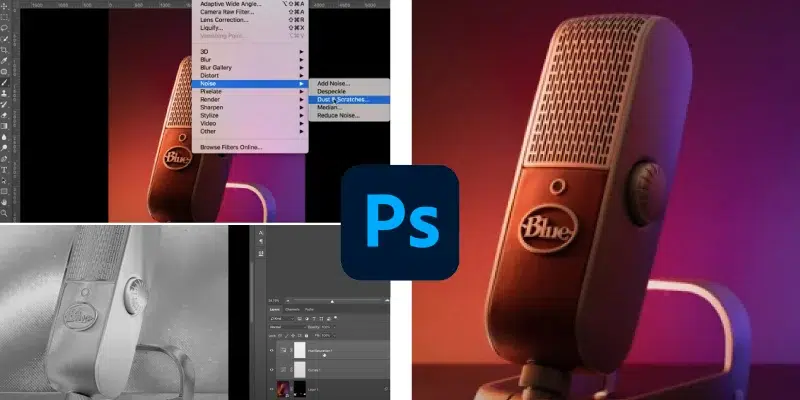
Dust and scratches pull the eye away from the product. Use the Spot Healing Brush for small specks and the Clone Stamp for larger areas, then check the whole image at 100% zoom before you export.
Which software do you need for product photo editing?
The right software depends on how much editing you need, your budget and how many images you handle. These are the common choices:
- Adobe Photoshop: The industry-standard editor, with advanced tools for cutouts, retouching and compositing product images.
- Adobe Lightroom: Organizes, edits and batch-processes large sets of product photos without changing the originals.
- Capture One: This is a professional-grade editing software known for its exceptional color accuracy and high-quality image processing.
- GIMP: A free and open-source alternative to Photoshop, providing a wide range of editing features for product photo enhancement.
- CorelDRAW: Primarily used for vector graphics, it also offers photo editing features for creating precise and detailed product images.
- Affinity Photo: A feature-rich software that offers comprehensive photo editing tools, suitable for professional-level product photo editing.
- Canva: Canva is a user-friendly online tool with pre-designed templates. It is suitable for basic photo editing and creating visually appealing product images.
- PaintShop Pro: A versatile software with various editing tools, making it suitable for both beginners and advanced users.
- Pixlr: A browser-based photo editor for quick edits without installing software.
What are the most useful product photo editing tips?
Most editing time is lost at the shoot. Clean the product, light it evenly, shoot in RAW and keep the setup fixed, and the edit takes a fraction of the time.
- Proper Lighting: Ensure well-balanced lighting to avoid harsh shadows or overexposed areas. Natural light or softboxes can create a pleasing, even illumination.
- Clean and Prepare: Clean products before shooting to remove dust and smudges, ensuring a polished appearance.
- Shoot in RAW: Use RAW format for maximum flexibility during editing, preserving more image data and allowing for better adjustments.
- Enhance Contrast and Clarity: Adjust contrast and clarity to make the product stand out and add depth to the image.
- Test Different Styles: Experiment with various editing styles to find the one that best suits your products and target audience.
Should you edit product photos yourself or outsource?
Edit them yourself if you have a small catalog of simple, solid products and a fixed shoot setup. Outsource when volume, a deadline or a hard material (jewelry, glass, hair, ghost mannequin) would take more of your time than the edit is worth.
Edit them yourself when
- You have a small catalog and add a few products a month.
- Your products have simple shapes and solid edges.
- You shoot with the same lights and setup every time, so one preset fixes most images.
- You have the time and already know Photoshop or Lightroom.
Outsource when
- You have a seasonal launch or a large batch with a deadline.
- The products are hard to cut out: jewelry, glass, chrome, hair, fur or ghost mannequin apparel.
- Listings are being suppressed or rejected for background or framing issues.
- Several photographers shot the set and the images need to match.
Many sellers split the work. They keep culling, naming and uploads in-house and send cutouts and retouching out. We offer background removal, clipping path and Amazon main image editing, each from $0.50 per image.
Product photo editing guides
Go deeper on any step with these guides:
- Product image requirements for Amazon, Shopify, Etsy and Walmart
- Clipping path vs background removal vs image masking
- Black Friday product photo checklist
- Product photography backdrops
- Product photo shooting and editing gear
- Background remover software for Windows, Mac and Linux
- Background remover: automatic vs manual
- How to create a clipping mask in Photoshop
- Photo editing workflow checklist
- Ghost mannequin photography tips and ideas
- Flat lay clothing photography
- Jewelry photography tips
- Product photo retouching: types and pricing
- Product photos that need a white background
- Amazon main image suppressed? Causes and fixes
Send your product photos, get an exact quote
Tell us the marketplace and the look you want, and we will edit every image in the batch to match. From $0.50 per image.
- Exact quote by email before you pay (PayPal, Visa or Mastercard)
- 24-hour standard delivery, rush from 6 hours
- 2 free revisions
- 100% money-back guarantee
Product Photo Editing FAQ
How do I edit product photos for Amazon?
Start with the main image, because it has the strictest rules: a pure white background, the product large in the frame and enough pixels for zoom. Match the color to the real item. Then edit the other images in the same style so the listing looks like one set.
Can I use a light gray or colored background on Shopify or Etsy?
Yes. Neither platform requires white. Pick one background, keep it the same across the whole catalog, and use white only where a marketplace requires it, such as Amazon and Walmart main images.
What is the difference between background removal and a clipping path?
A clipping path is a hand-drawn vector outline around a hard-edged product. Background removal is the result, and it can be done with a path, a mask or an automatic tool. Our comparison guide shows which one fits each product.
Why was my product photo rejected for a non-white background?
Usually the background reads slightly off-white (for example 250, 250, 250) or a gray shadow edge runs into it. Check several points with the eyedropper. Amazon and Walmart main images must read 255, 255, 255. If Amazon has already suppressed the listing, our guide to fixing a suppressed Amazon main image walks through each error message and its fix. Our Amazon photo editing service fixes this for listings.
Should I edit product photos myself or outsource?
Edit small, simple catalogs yourself. Outsource large batches, deadlines and difficult materials such as jewelry, reflective products or ghost mannequin apparel so every image stays consistent.
Sources
Sources checked October 27, 2026:
- Amazon Seller Forums: main image requirements (Amazon staff)
- Shopify Help: product media types
- Etsy: listing image size and ratio update
- Walmart Marketplace (US): image guidelines
- Walmart Canada: item image guidelines
- Adobe: Spot Healing Brush
- Adobe: copy and paste edit settings
- Google Search Central: image SEO
Drafted with AI assistance and checked by our team against the sources listed above on October 27, 2026.