Clipping masks are a fundamental and indispensable technique in design, offering precise control over element visibility and non-destructive editing. They enable seamless integration of images, textures and text within specific shapes. Clipping masks are essential for achieving complex layering, depth and creative effects. They make designs appear polished and professional. By facilitating efficient mockups, innovative typography and flexible experimentation, clipping masks enhance the artistic process and contribute to the overall aesthetic quality of designs.
You may also read– image masking services
What is a Clipping Mask
A clipping mask is a unique technique used in graphic design and image editing. It involves combining two or more layers in a way that controls the visibility of the top layer based on the shape. The bottom layer acts as a “mask” that defines the visible area of the top layer. Clipping masks are widely employed to craft visually engaging designs, seamlessly integrate images and text, and enhance the overall aesthetic appeal of various artistic projects.
You may also read– clipping path services
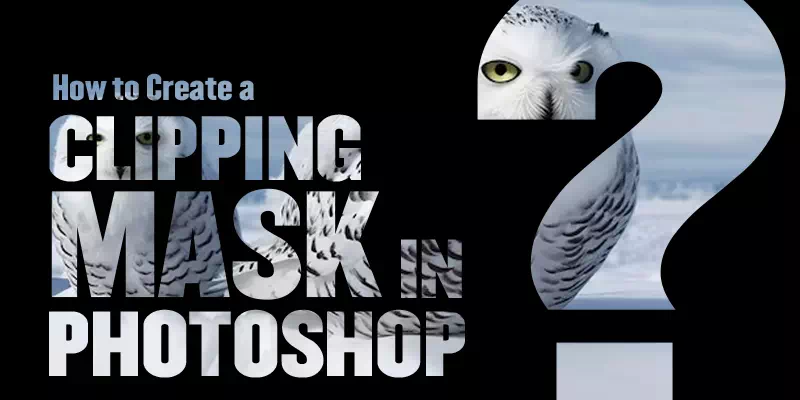
How to Create a Clipping Mask in Photoshop
Discover the essential technique of creating a clipping mask in Photoshop. Through this step-by-step guide you can manipulate elements to achieve stunning visual effects in your designs.
Step 1: Open Your Images

For creating a clipping mask in Photoshop first of all you have to open the images you intend to work with. These instructions will help you to open an image:
Install Adobe Photoshop on your computer.
Go to the “File” menu at the top left corner of the screen.
Select “Open” from the dropdown menu.
Navigate to the location where your images are stored.
Click on the first image you want to use and then click the “Open” button. The image will now be displayed in the Photoshop workspace as a new document.
Step 2: Arrange Layers

After opening your images in Photoshop, the next step is to arrange the layers in the Layers panel. Proper layer arrangement is essential for creating a successful clipping mask.
Access the Layers Panel: You can get the layers panel by going to the “Window” menu at the top and selecting “Layers.”
Position the Base Layer: Ensure that the image you want as the base layer is placed at the bottom of the Layers panel.
Place the Clipped Layer:

Drag and position the layer you want to clip (such as an image, text, or shape) above the base layer in the Layers panel.
Verify Layer Order:

Double-check that the base layer is below the clipped layer. The top layer should always be the one you intend to clip to the base layer.
Step 3: Create the Clipping Mask

With your layers properly arranged, you’re ready to create the clipping mask. This step is where the magic happens. Let’s explore how to create the clipping mask:
Select the Clipped Layer: In the Layers panel, click on the top layer to select it.
Apply the Clipping Mask: Right-click on the selected layer. From the context menu that appears, choose “Create Clipping Mask.”
Observe the Result:

As you apply the clipping mask, you’ll immediately notice that the clipped layer takes on the shape of the base layer. The visibility of the clipped layer is now confined within the boundaries of the base layer.
Make Adjustments: You can further refine the positioning, size and orientation of the clipped layer within the confines of the base layer. Use the Move Tool (V) to drag and adjust the clipped layer as needed
Step 4: Observe the Mask

After creating the clipping mask, it’s important to observe the mask and the effect it has produced. Some ways to observe the mask are given below:
Zoom In if Necessary: If the details are small, consider zooming in on your canvas to get a closer look at the mask’s interaction with the base layer.
Check Transparency: Pay attention to any areas of the clipped layer that may appear transparent or hidden. These areas will coincide with the empty spaces of the base layer.
Verify Composition: Take note of how the clipped layer now appears within the boundaries of the base layer.
Step 5: Adjust Position and Scale

Position and scale adjustment are also important in this technique. Let’s explore how to make these adjustments:
Select the Clipped Layer: In the Layers panel, click on the clipped layer to select it. This ensures that any changes you make will apply to the correct layer.
Use the Move Tool: Select the Move Tool from the Tools panel. This tool allows you to drag and reposition the clipped layer as needed.
Reposition Within the Base Layer: Click and drag the clipped layer to a new position within the boundaries of the base layer. As you drag, you’ll see the layer move while staying confined to the shape of the base layer.
Scale if Necessary: To adjust the scale of the clipped layer, use the Free Transform command (shortcut: Ctrl+T or Cmd+T). Hold down the Shift key while dragging a corner handle to maintain the aspect ratio.
Press Enter: Once you’re satisfied with the new position and scale, press the Enter key to apply the changes
Step 6: Refine the Mask

After establishing the clipping mask, refining it is pivotal to achieving a polished outcome in your Photoshop design:
Base Layer Adjustment: Click on the base layer within the Layers panel. Modify its shape, content or properties as desired.
Opacity Experimentation: Play with the opacity of the clipped layer. Adjusting transparency affects blending with the base layer, enabling diverse visual effects.
Layer Effects Application: Apply effects like shadows, glows or gradients to the base layer. These effects impact how the clipped layer appears within the mask.
Clipped Layer Enhancement: Modify the clipped layer itself using filters, adjustments or transformations to elevate its overall appearance.
Layer Grouping: Consider grouping layers containing clipping masks. This organization streamlines management for intricate compositions
Step 7: Explore Effects

With the clipping mask refined, you can now delve into exploring various effects to add depth and visual interest to your design. Here’s how you can experiment with effects to enhance the overall composition:
Apply Filters: Experiment with Photoshop’s array of filters to alter the appearance of the clipped layer. Filters can create artistic textures, distortions, and other unique visual effects.
Layer Blending Modes:

Adjust the blending mode of the clipped layer to change how it interacts with the base layer. Modes like “Multiply,” “Overlay,” or “Soft Light” can yield intriguing results.
Gradient Overlays: Apply gradient overlays to the base layer or the clipped layer to introduce smooth color transitions, shading, or highlights.
Textures and Patterns: Overlay textures or patterns onto the clipped layer to introduce tactile elements that enhance the visual aesthetics.
Adjustment Layers:

Add adjustment layers, such as “Hue/Saturation” or “Curves,” to fine-tune the color balance, contrast, or brightness of the clipped layer.
Layer Styles: Explore layer styles like drop shadows, bevels and strokes to add dimension and a polished finish to your composition.
Step 8: Save and Export

After creating a stunning design using clipping masks in Photoshop, it’s essential to save and export your work to share it with others or use it in various projects. Here are the final steps:
Save Your Photoshop Document:

First, save your project in the Photoshop format (PSD) to retain all layers, masks and effects for future editing.
Export for Web: For online use or sharing, navigate to “File” > “Export” > “Export As.” Choose the desired file format (JPEG or PNG), set quality settings and specify the destination folder. Click “Export” to save the image.
Print-Ready Export:

If your design is intended for print, select “File” > “Save As.” Choose a high-resolution format like TIFF or PDF. Use CMYK as color profiles for print and save the file in the appropriate resolution.
Review and Verify: Before finalizing the export, double-check your design for any errors, ensure proper resolution settings.
Share and Distribute: Now that your design is saved and you can easily share it on social media or use it in various creative projects
Sectors In Which Clipping Masks Can Be Used
Clipping masks empower designers to seamlessly blend, isolate and manipulate elements. In this exploration, we delve into the diverse sectors where the power of clipping masks can be harnessed to elevate visual storytelling and artistic expression.
- Graphic Design: Clipping masks are extensively used in graphic design for creating unique text effects, photo collages, image overlays and intricate compositions.
- Photography: Photographers use clipping masks to enhance and customize images.
- Advertising and Marketing: Clipping masks are employed to design eye-catching advertisements, product mockups and promotional materials that stand out.
- Web Design: Web designers use clipping masks to create custom graphics, design unique icons.
- Fashion Design: Clipping masks help fashion designers create digital fabric patterns, experiment with textile textures and showcase designs on different garments.
- Interior Design: Clipping masks are used to visualize artwork, posters and photographs within interior spaces for design presentations.
- Digital Art: Digital artists utilize clipping masks to create intricate illustrations, as well as to apply complex color and texture effects.
- Packaging Design: Clipping masks assist in placing product labels, logos and designs onto packaging templates to preview the final product.
Common Mistakes with Solutions
Mistakes are a natural part of the creative process, but recognizing and addressing them can elevate your design skills. We explore common design missteps and offer practical solutions to help you enhance your projects and avoid common pitfalls.
Issue: Clipping mask not working
Solution: Ensure the layers are correctly arranged. The layer you want to clip should be positioned directly above the layer you want to clip it to. Right-click the top layer, select “Create Clipping Mask.”
Issue: Unwanted transparency or gaps
Solution: Adjust the positions of the top and base layers. Use the Move Tool (V) to align them properly. If gaps persist, use the Eraser Tool (E) with a soft brush to clean up the edges.
Issue: Disrupted text or image appearance
Solution: Check the blending modes and opacities of both layers. Experiment with different blending modes to achieve the desired interaction between the layers.
Issue: Clipping mask affecting unintended areas
Solution: Double-check the boundaries of the base layer. Use layer masks on the base layer to refine the masked area if needed.
Issue: Lost layer adjustments or filters after clipping
Solution: Convert the adjustment/filter layer into a Smart Object before applying the clipping mask. This preserves the adjustments/filters for future edits.
Issue: Unable to move or transform clipped content individually
Solution: Right-click on the clipped layer and select “Release Clipping Mask.” This detaches the clipped content from the base layer, allowing independent transformations
Keyboard Shortcuts for Clipping Masks
Efficiency in graphic design is often a matter of keystrokes. Mastering keyboard shortcuts for clipping masks can significantly enhance your workflow.
- Create Clipping Mask: Right-click the top layer, choose “Create Clipping Mask,” or use Ctrl+Alt+G (Cmd+Option+G on Mac).
- Release Clipping Mask: Right-click the clipped layer, select “Release Clipping Mask,” or use Ctrl+Alt+Shift+G (Cmd+Option+Shift+G on Mac).
Conclusion
Throughout this guide, we’ve explored the versatility and functionality of clipping masks. They are indispensable tools for isolating and controlling the visibility of elements in your designs. Embrace the endless opportunities they offer to craft visually stunning and captivating designs. With dedication and practice, you’ll find that clipping masks are not just a tool but a gateway to unlocking your design potential.
Related


