

While running an apparel business, you know the struggle to present the products realistically. Here you need to present products just as they are. That is why it is best to show them as being worn. You definitely don’t want your clothes to be folded to flattened since they fail to show the details properly in that case. So what to do when you don’t want to hire a model for photography as well? Well, here comes the ‘ghost mannequin’ or the ‘invisible mannequin’ as your rescue. It shows your product flawlessly and gives the right detailed look. Apparently, it helps you grow the business even more with these ghost mannequin photography tips and ideas.
The ghost mannequin effect is a post-production service. But before sitting before your computer, you need to focus on photography ideas. And let’s be honest, it is not super easy for beginners as it requires some advanced photography and editing skill. But don’t worry, in this blog, we will take you through the Ghost Mannequin Photography Tips and Ideas.
For having the best eCommerce product images, take our Photography Post Production Services now.
First of all, let’s talk about what are the things you need for photography. You require a mannequin or a model for sure, your products (clothing), and your camera. After that, the post-production part will come.
We are going step by step.
Focus on the photography pose
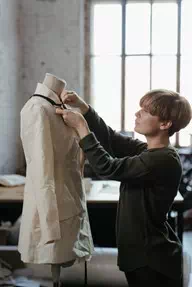
If you want to have a ghost mannequin effect after the photography, you need to focus on the photography part. If you are using a mannequin, consider changing it depending on the clothing type. For example, for women’s attire, use a female body mannequin.
And the same process for male clothing as well. Also, make sure you use the right size for the mannequin. Don’t make it wear an oversized t-shirt. Using a white-colored mannequin will make your editing much easier.
You will need both half-size and full-size mannequins. For instance, for a shirt, t-shirt, tops, blouse, blazer, or jacket you can take half-size mannequins. But for a long dress or a suit set, you will need a full-size mannequin.
On the other hand, if you are using a model, make sure it wears the right size of the clothes. The model should not have any extravagant style which will make the editing harder. Long hair should be tied up as well. Experimenting with poses is not suitable here. So ask them to give a static pose to avoid any distraction.
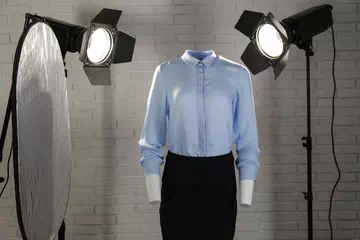
Prepare your photography gear
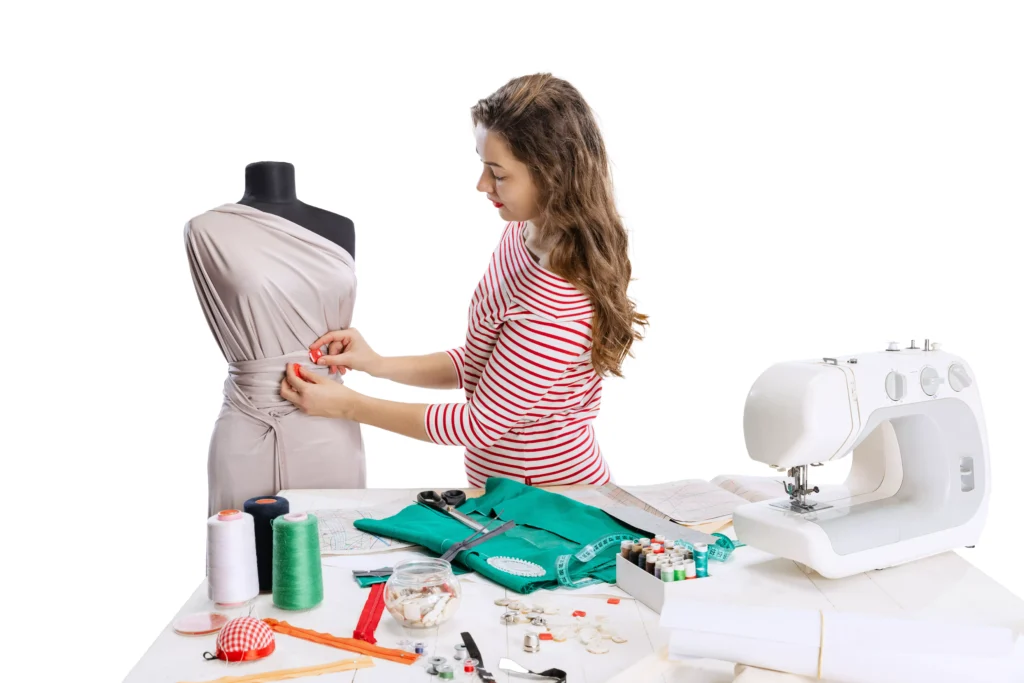
In this step, you need to prepare your equipment and tools for starting the photography. So your goal is to take professional quality photos of your products in your studio.
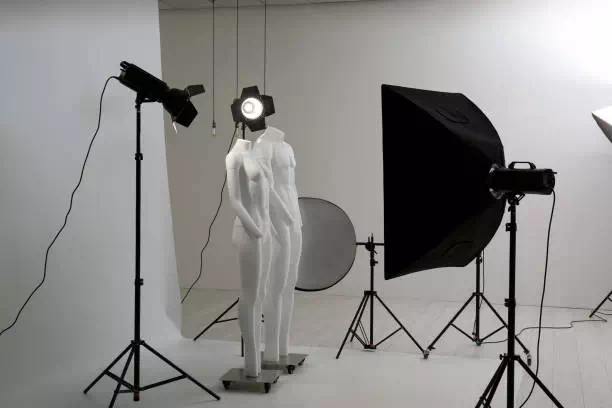
A white background is a must-have thing as other colors are not suitable for the ghost mannequin effect. The necessity of a tripod is nothing to elaborate on as you must be aware of that.
Adjust your lights in a way they don’t create any shadow otherwise it will be difficult for you to remove them in Photoshop. The light should be soft and even thoroughly. You can use an umbrella to distribute the light properly.
To get a perfect view of the clothing, you need to focus on the angle. While taking photos of a t-shirt or a top, take the image from the chest height. And for bottom wear like pants, take the images across the hip area.
If you get distortion, you can use a telephoto lens to avoid that.
The last piece of advice is to icon the clothes. Folded clothes are way too hard to deal with in post-production.
Camera settings
To take the photos flawlessly, adjust your camera accordingly. You require the subject to be detailed and well-lit.
It is recommended to keep the ISO 100-200, shutter speed 1/125, aperture setting in between f/8 to f/11or more, and the flash power 3.0 for the best result. For ghost mannequin photography, you do not need a high ISO as it makes the photos grainy and less detailed. So keep it as low as possible to make the photos clear and sharp.
Keep in mind that a small aperture number keeps the entire subject in focus and a high aperture keeps a specific part in focus. Also, keep the white balance in auto mode to avoid color correcting in post-processing. Make sure there is no blue or orange hue in the photo.
Shoot Images
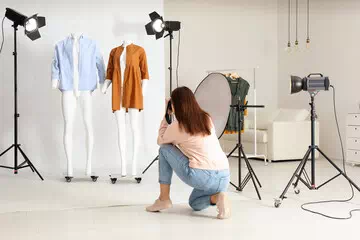
Before getting into your final shooting, try capturing some demo images first. Consider checking if everything is okay. See the results and change anything if you feel bothering. You can even connect your camera to your laptop to check the photos more intensively.
Let’s talk about the basics. You cannot show every side of your clothes through the mannequin. Some areas remain invisible and covered. So the first photo is the one you take from the mannequin body. And the second photo is those parts that get covered in the first step.
You will need to take several images depending on the clothing type. As customers want to see every part of the garment, you cannot only show them the front view. The sleeves, the collars, the buttons, and the additional items- everything needs to be properly visible.
Upper Body Garments: For upper-body garments like a t-shirt, blazer, shirts, you need to get a mannequin with the head part. As these types of clothes have a collar, a headless mannequin is not suitable for them. Focus on the sleeves and arm joint as those parts tend to have more folds and wrinkles. You can keep some folds and wrinkles to make it look a bit natural and spontaneous.
Lower Body Garments: For pants, trousers, pajamas, you can use a mannequin of half-length. It will make the post-production easy as well. You can use some clips behind the pant to make them look tight from the front. But do not remove all the natural folds, for instance, around the knees.
Full-body garments: Clothes like a wedding dress, pant-suit, blazer set, gowns; you will require a full-body mannequin. Make sure the dress is straight and free from any wrinkle. Use pins and clips on the opposite side to make the dress look nice and straight.
For background removal services we are the best according to clients.
Photography Post Production
Once you are done with shooting, it is time for post-production of the images. It is the step where you will get the ghost mannequin or the invisible mannequin effect.
Here you will need photo editing software that is capable of doing it. Achieving the desired effect is not a complex process. Firstly create a new background layer and fill it with white. Then you will require a selection tool to select the product from the mannequin or the model.
Refine the masking and eliminate the background along with the mannequin. In this step, you will thank your white background and white-colored mannequin as they will make your work a lot much easier.
However, now you have got your product free from the mannequin. But you are not done yet. So far, you have got the front part of the image which is not everything you need. The collar and the sleeves are still missing. So here, you will need the separate images that you took previously. You have to repeat the first steps to merge the images correctly.
Once you have done them all, check out if there is any flaw in the photos. Fix them accordingly in this step.
Useful tips
- Mannequins are expensive and buying the right size is not always successful. So keep some pins, clips, and tapes handy. They will help you adjust the clothes on the mannequin’s body.
- Take equally detailed images from the front and the back. Otherwise, you will regret it in the post-production step.
- Take suggestions from your graphic designer or the image editor because it will be finally them who will work with the images. So keep them with you or listen to their requirements.
- Keep multiple tripods of different sizes handy. They will rescue you more than you ever expect.
- Consider having a large room as your studio as you are going to need a lot of equipment. Fewer disturbances mean you can focus on your work better which results in better quality photos. Also, try keeping the walls white or covered with white curtains to avoid lengthy editing of the images.
- Take clear photos of the size, logo, and brand name. Also, don’t forget some inside portions.
- Check the photos over and over. Try to look from a customer’s eye and you will get perfect perspectives on how the cloth will look.
- Try using natural lights as much as possible. The best way for that is to set everything against a large size window.
- To save your time and hassle, take services from a capable company.
So, this is how you can get the perfect ghost mannequin photo for your apparel business. Once you start using them for e-Commerce, you will feel how much it is helping you to grow more. However, if you don’t want to immerse yourself in this lengthy process, our service waits for you. Don’t forget to check out our Product Photo Editing Service


