Learn how to draw Mickey Mouse, the iconic and cheerful cartoon character created by Walt Disney and Ub Iwerks in 1928. Mickey Mouse, created by Walt Disney and Ub Werks in 1928, is an iconic and cheerful cartoon character recognized worldwide. With his distinctive big ears, red shorts, and infectious smile, Mickey is more than just a character; it’s a symbol of joy and imagination. Mickey Mouse holds immense significance as the very first animated character with a distinct personality. Beyond being a cartoon, Mickey marks the beginning of The Walt Disney Company’s legacy, a company that has brought enchanting stories and characters to life for generations. This beloved character has not only left a lasting impact on animation history but has also become an enduring symbol of happiness and creativity. Drawing Mickey Mouse can be a fun and creative activity. Whether in vibrant colors or simple line drawings, Mickey Mouse continues to capture the hearts of people around the globe.
The popularity of Mickey Mouse is unparalleled. Mickey has become a cultural phenomenon. His adventures in cartoons, comic strips, and theme parks have made him a beloved and enduring figure, connecting with people of all ages. Loved by both children and adults, Mickey Mouse is not just a character; he’s a cherished friend who has played a vital role in shaping the world of entertainment and continues to bring smiles to millions around the globe.
And now, let’s explore how to draw Mickey Mouse.
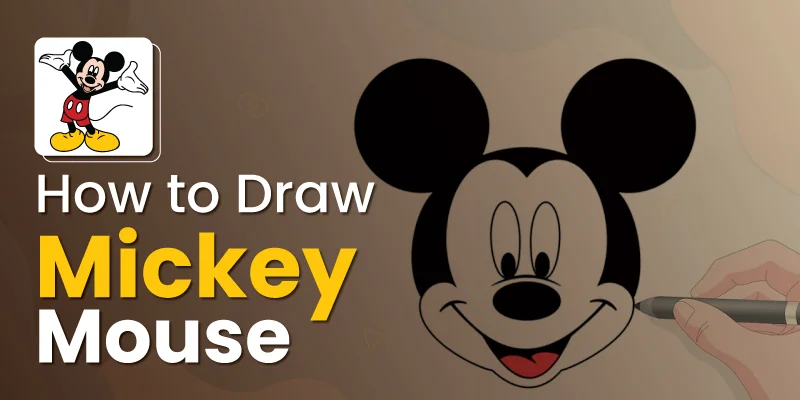
How to draw Mickey Mouse
How to draw Mickey Mouse is a creative journey that allows you to capture the essence of this beloved character. Learn how to draw Mickey Mouse with these easy steps and create your own artistic style!
Materials Needed

Certainly! Here’s a concise list of the art supplies needed for drawing Mickey Mouse. And now, let’s explore how to draw Mickey Mouse easily using these materials. Get ready to unleash your creativity and discover the joy of bringing Mickey Mouse to life on paper!
- Paper: A clean, medium-sized sheet suitable for drawing.
- Pencils: Various pencils for different line intensities and shading.
- Eraser: A good-quality eraser for corrections and refining your drawing.
- Coloring Materials (Optional): If you plan to add color to your drawing, consider using classic Mickey Mouse colors like red, yellow, black, and white.
You may also read- vector line drawing services in illustrator and photoshop
Step-by-Step Guide: (Drawing Mickey Mouse)
Here’s Your Roadmap to Drawing Mickey Mouse easily step by step :
Step 1: Draw Mickey’s Head

Start by creating a big, round circle in the middle of your paper. This circle will be the main part of Mickey’s head.
Step 2: Add Face and Ear Guidelines

In the second step, you will give Mickey Mouse his distinctive face and ears. Imagine the circle you draw for Mickey’s head. To make sure that both sides of his face are the same and to give him a symmetrical look draw a straight line down the center of the circle. Next, add a horizontal line a little below the middle of the circle. This line will guide you in placing Mickey’s eyes, so they are just right.
Now, on each side of the circle, draw two more circles. These circles are going to be Mickey’s big, adorable ears. They give him that unmistakable Mickey Mouse look. So, to sum it up, one line down the middle, one line across, and two circles on each side for those famous ears.
Step 3: Draw Mickey’s Eyes

Now, let’s bring Mickey’s expressive eyes to life in the third step. Along the horizontal line, you drew earlier, create two oval shapes. These will be Mickey’s eyes. To give him that classic look, make sure the tops of the ovals are slightly bigger. This subtle detail captures the charm and expressiveness of Mickey’s iconic eyes. You’re adding personality to your Mickey Mouse drawing, making it even more delightful!
Step 4: Add Facial Features

In the fourth step, it’s time to give Mickey some facial features to complete his cheerful expression. Just below the eyes, draw a small, rounded shape for his nose. Right underneath the nose, draw a smiling mouth. This will give Mickey that trademark happy and friendly look. With these simple additions, Mickey is starting to come to life on your paper! Keep going, and you’ll soon have your own fantastic Mickey Mouse drawing.
Step 5: Define Mickey’s Ears

Now, let’s define Mickey’s iconic ears in the fifth step. Connect the circles you drew for his ears to the head. This step gives Mickey Mouse his unmistakable round ears. Make sure the connection is smooth, following the curvature of his head. Mickey’s distinctive silhouette is taking shape, and you’re capturing the essence of this beloved character.
Step 6: Refine Head and Body

In the sixth step, it’s time to refine Mickey’s head and create his simple body. Shape Mickey’s head, ensuring it looks just the way you want it. Take your time to capture that classic Mickey charm.
Next, extend lines downward from the head to form Mickey’s body. Keep the lines simple and cartoon-like, maintaining the whimsical style. This step brings Mickey Mouse to life on your paper, and you’re well on your way to completing your drawing!
Step 7: Add Clothing Details

Now, let’s give Mickey his signature clothing details in the seventh step. Draw a pair of shorts on Mickey’s body, and add some buttons for that extra touch. These details are part of what makes Mickey instantly recognizable.
Additionally, refine the lines for Mickey’s gloves on each hand. Mickey’s distinctive attire is an essential part of his character, and these details will add to the overall charm of your drawing. Your Mickey Mouse is really coming together now! Keep going to add those final touches.
Step 8: Finalize Details

In the eighth step, it’s time to finalize the details of your drawing of Mickey Mouse easily:
Go through your drawing and carefully erase any extra guidelines you initially sketched. This ensures that only Mickey’s final lines remain, giving your drawing a clean and polished look.
If you’d like, this is the moment to add any extra touches that make your Mickey Mouse uniquely yours. For example, you can include Mickey’s tail, giving your drawing that classic finishing detail.
By erasing guidelines and adding those personal touches, you’re putting the finishing strokes on your Mickey Mouse masterpiece. Your hard work is paying off, and you’re capturing the spirit of this beloved character.
Step 9: Optional – Adding Color
In the optional ninth step, you have the creative choice to add color to your Mickey Mouse drawing. If you want to bring your drawing to life with a burst of color, consider using classic Mickey Mouse colors. Use red for his shorts, yellow for his shoes, and black and white for his iconic gloves and facial features.
Adding color can make your Mickey Mouse drawing more vibrant and dynamic. However, feel free to keep it in black and white if you prefer the classic monochrome look. The choice is yours, and your Mickey Mouse is now ready to charm in full color or timeless black and white.
Tips for Drawing Mickey Mouse
Here are additional tips for drawing Mickey Mouse in short points:
- Focus on Expressions: Pay attention to the expressions in Mickey’s eyes and mouth to convey his cheerful personality.
- Master Basic Elements: Master the basic elements like the circle for the head and the distinct round ears that define Mickey’s silhouette.
- Play with Line Thickness: Experiment with line thickness to add depth and emphasis, giving your drawing a dynamic look.
- Practice Consistently: Consistent practice will improve your confidence and skill in capturing Mickey’s features accurately.
- Reference Classic Artwork: Refer to classic Mickey Mouse artwork for inspiration and to understand the timeless style.
- Utilize Online Tutorials: Explore online tutorials for additional guidance and tips from experienced artists.
- Share and Seek Feedback: Share your drawings with others, and seek constructive feedback to improve your technique.
- Have Fun with Color: If adding color, stick to classic Mickey colors for authenticity, or experiment with your palette for a unique twist.
Remember, each drawing is a step toward improvement. Enjoy the process, and let your creativity shine!
You may also read- Drawing Ideas
Conclusion
In a nutshell, drawing Mickey Mouse involves a few important steps. Start by sketching Mickey’s head, adding facial features and those iconic ears. Detail his eyes, nose, and smiling mouth. Dress him in shorts and gloves, then refine the details and, if you wish, add color. It’s a fun process that gets better with practice.
As you start drawing Mickey Mouse, think of it like going on an art adventure. The more you practice, the better you’ll get at capturing Mickey’s special character. It’s like taking small steps to make your drawing better each time. Share your Mickey Mouse drawings with others and enjoy being part of a group of people who love art. Let the fun of being creative be your guide. It’s important to keep drawing and trying new things to improve your skills and express yourself through your art.
Related Blog


