Let’s explore the world of vector images, powerful tools in digital design. We’ll begin by understanding what they are, why they matter, and how you can make a vector image. First off, what are they, and why are they important? When you want to make a vector image, it means creating a special graphic using math to shape it. This process, known as vectorizing an image, allows for the conversion of raster graphics into a mathematical representation. These vector graphics stay super sharp, no matter how big or small you want to make them. Picture them as magical shapes for logos, icons, and cool designs.
Now, think about your pictures changing size without getting blurry – that’s the magic of vectors when you make a vector image. They’re super handy for websites, print, and even giant billboards, and they always look awesome when you generate a vector illustration. Designers love vectors because tweaking and editing these images is a breeze. You won’t compromise on details when you generate a vector graphic. And guess what? They play nicely on all sorts of devices and platforms, making the whole process of making a vector image a lot easier and more fun for designers.
Why Use Vector Images?
Vector images are super flexible. You can resize them without losing quality. It’s like magic – they stay sharp no matter how big or small you make them. Perfect for all sorts of designs! Unlike regular pictures (like photos), vectors don’t get blurry when you zoom in. They keep their clarity. It’s like the difference between a clear cartoon and a fuzzy photo. Designers love vectors because they work everywhere – on websites, in prints, big or small. They’re like superheroes for logos, icons, and illustrations, making designs look awesome in any situation!
How to Make a Vector Image:
Certainly! Here are the steps on how to make a vector image:
Choosing the Right Software
When entering the realm of vector graphics, selecting the right software is crucial for your creative journey. Three notable options are Adobe Illustrator, CorelDRAW, and Inkscape, each with unique advantages.
- Adobe Illustrator: It is an industry-standard, known for its professional-grade tools, making it suitable for intricate designs across a variety of projects.
- CorelDRAW: It offers a user-friendly interface, making it accessible for both beginners and experienced designers. It excels in illustration and layout design, providing versatility and ease of use.
- Inkscape: As a cost-effective option, it is a free and open-source software catering to basic to intermediate vector projects. It’s particularly attractive for those starting their design journey.
Getting Started with Vector Images in Illustrator
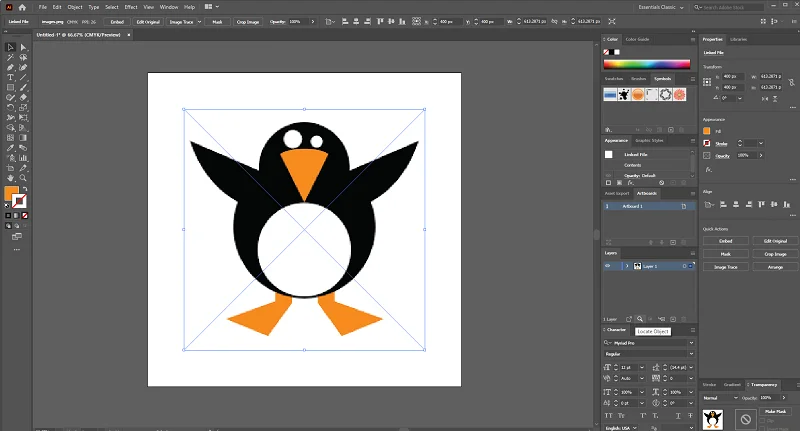
First, click on your vector graphics software, like Adobe Illustrator. It’s the door to your creative world, especially when you want to make a vector image.
Now, start a new project by making a fresh document. Pay attention to things like size and colors. This step ensures your canvas is just right for your design, especially when dealing with vectors for Illustrator. Think of it like preparing a perfect stage for your creative show – set it up, so your design can shine!
Getting Started
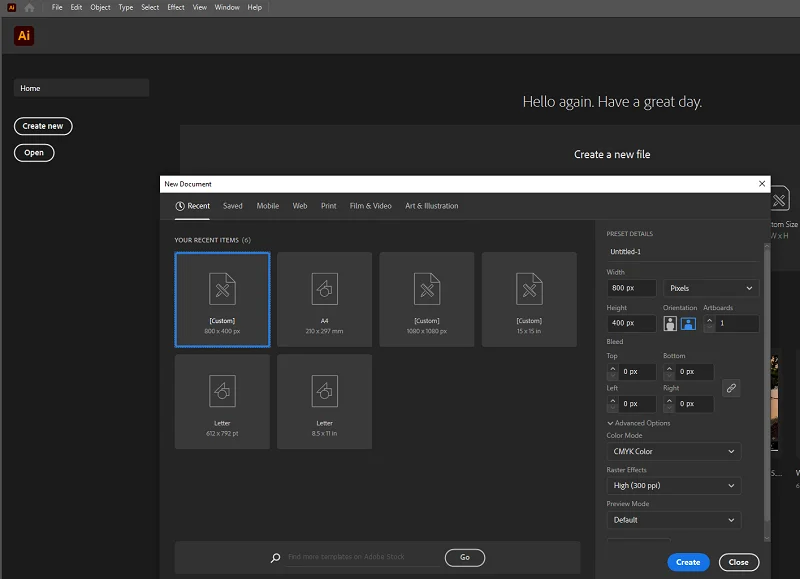
Click on the program you chose, like Adobe Illustrator. This is where the magic happens when you want to make a vector image.
Now, start a new project. Think of it as opening a fresh canvas for your masterpiece. Choose the right size and colors – it’s essential, especially when you’re dealing with vectors for Illustrator or planning to Illustrator vectorize later on. This sets the stage for your creative journey!
Basic Elements: Shapes and Paths
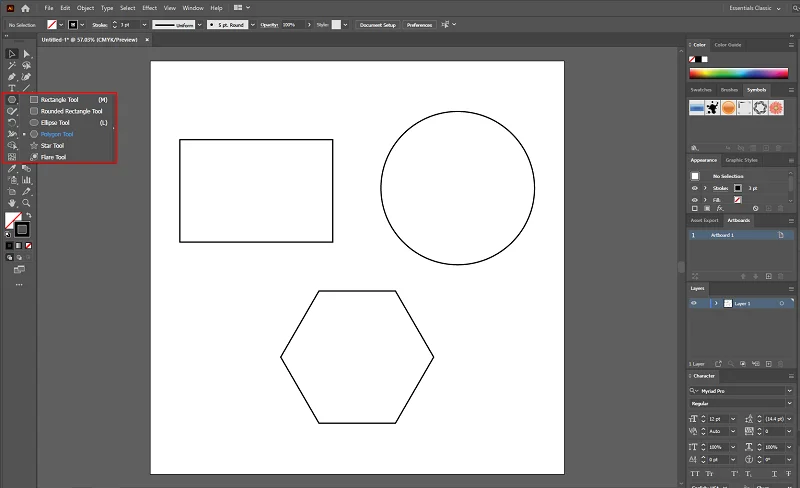
Let’s start with shapes – like circles, rectangles, and polygons. They’re the building blocks when you want to make a vector image. In Illustrator, you can easily bring these shapes to life for your creative masterpiece.
Now, paths are like the trails your pen follows. They can be lines or curves. Knowing how to use them is key when dealing with vectors for Illustrator. Whether you’re sketching or planning to illustrator vectorize later, paths are your artistic guide. It’s a bit like having a magic pen that can create wonders on your digital canvas!
Editing and Modification
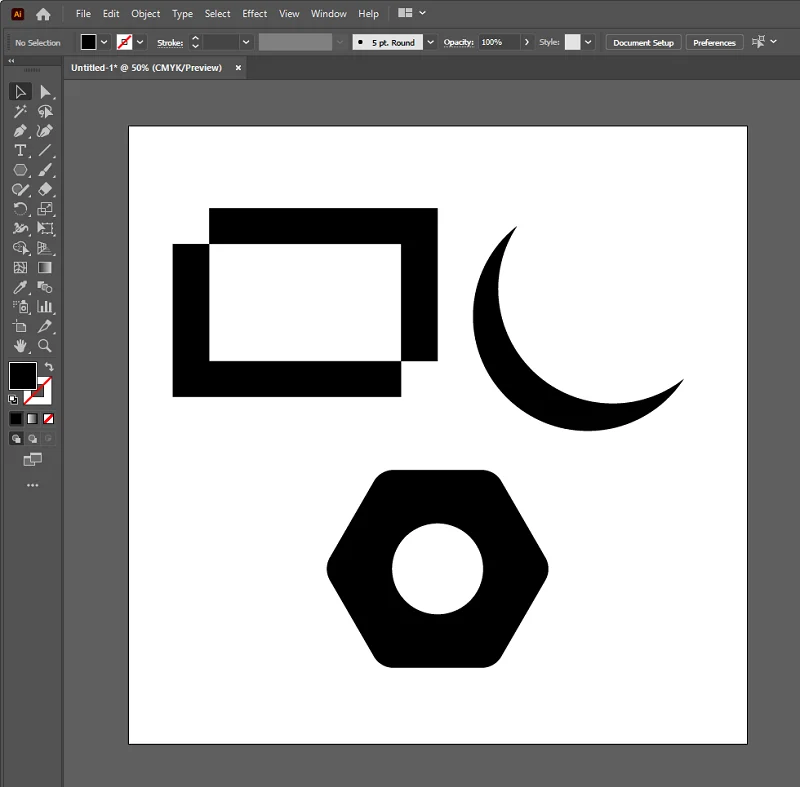
Now that you’ve got your shapes and paths in place for your vector image in Illustrator, let’s tweak things. Change the size, move them around, and play with their features. It’s like sculpting your creation to perfection. This step is essential when you want to make a vector image that fits just right.
Imagine layers as transparent sheets stacked on top of each other. They help keep things organized when dealing with vectors for Illustrator. Adjusting layers is like arranging elements in your design. It’s a bit like having a neat and tidy desk where everything has its place. This makes it easier when you’re ready to illustrator vectorize or make more changes later on!
Adding Text
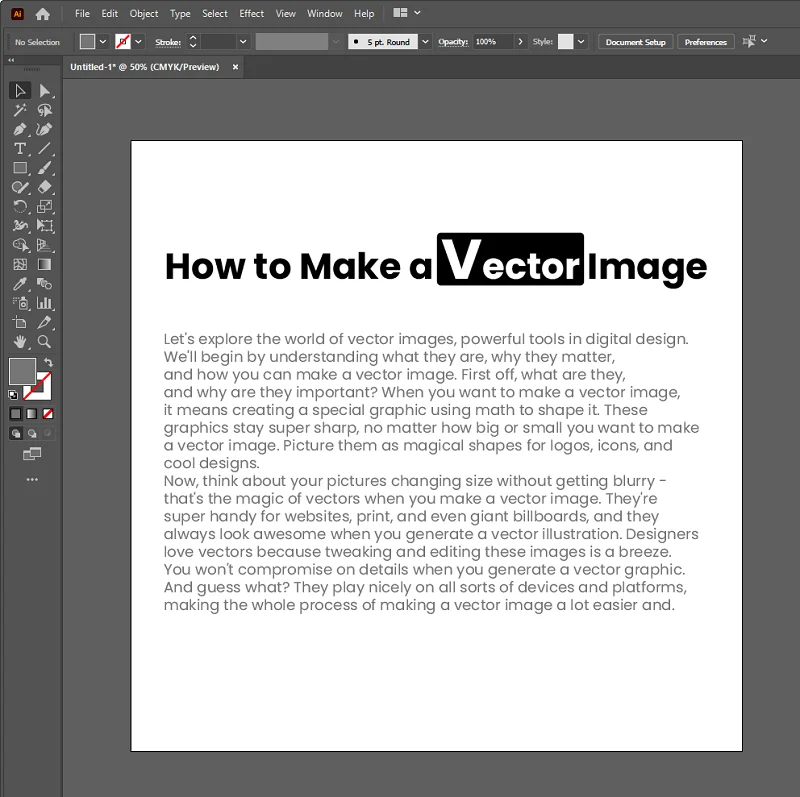
Time to add words to your creation! Incorporate text into your design when you want to make a vector image in Illustrator. It’s like telling a story with your visuals. Make your text uniquely yours. Customize the font (the style of your letters), the size, and how it looks. This step is crucial when working with vectors for Illustrator. Think of it as choosing the perfect words and dressing them up for your design. It adds that extra flair to your illustrator vector masterpiece!
Utilizing the Pen Tool
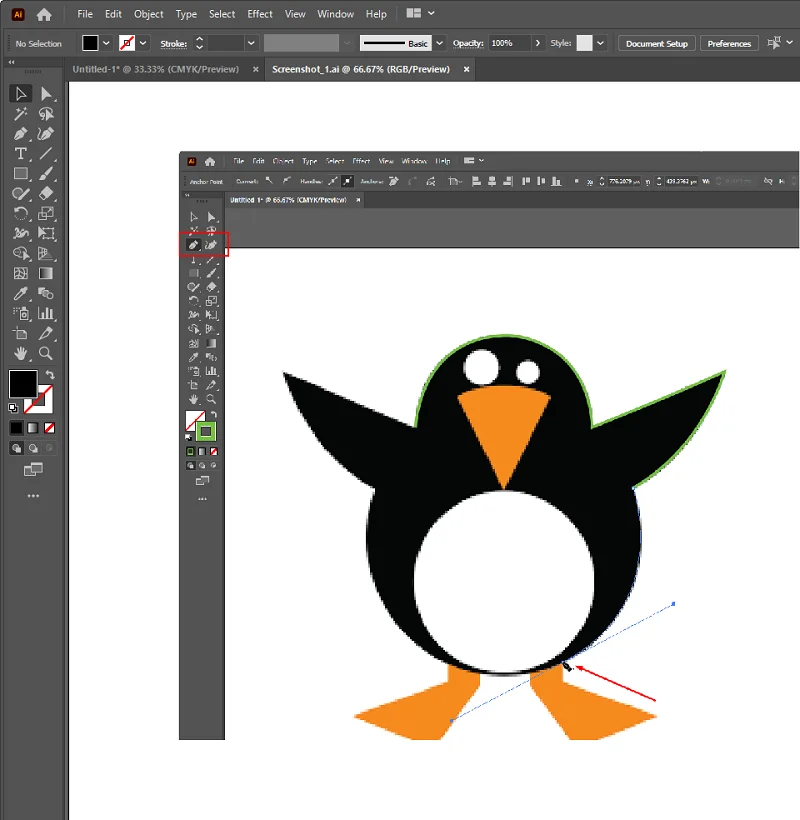
Meet your digital pencil, the Pen tool! It helps you draw custom shapes and lines for your design in Illustrator. It’s like your magic wand for creating special details in your vector image. When you want things to be just right, the Pen tool is your friend. It’s like having a super-accurate paintbrush that adds a touch of finesse to your design. Whether you’re drawing or refining, the Pen tool makes your vectors for the Illustrator journey smoother and more precise.
Bringing Your Design to Life: Colors and Gradients
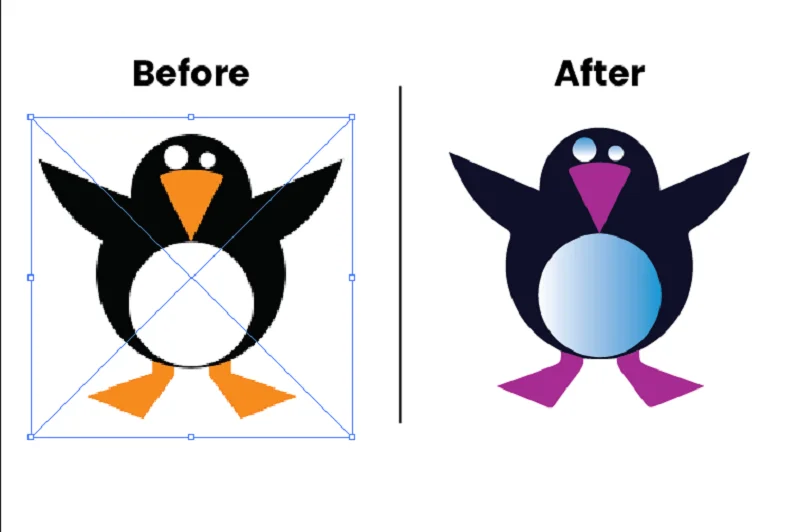
Now, let’s splash some color onto your creation! It’s time to add life to your vector image in Illustrator. Pick colors for your shapes and paths, making your design pop. Imagine it like adding a vibrant coat to your masterpiece. Want to take it up a notch? Experiment with gradients (smooth color transitions) and patterns. It’s like playing with different textures and shades for your vectors for Illustrator. This step adds depth and style to your design, making it truly unique. So, go ahead and make your illustrator vector creation a colorful masterpiece!
Saving Your Work
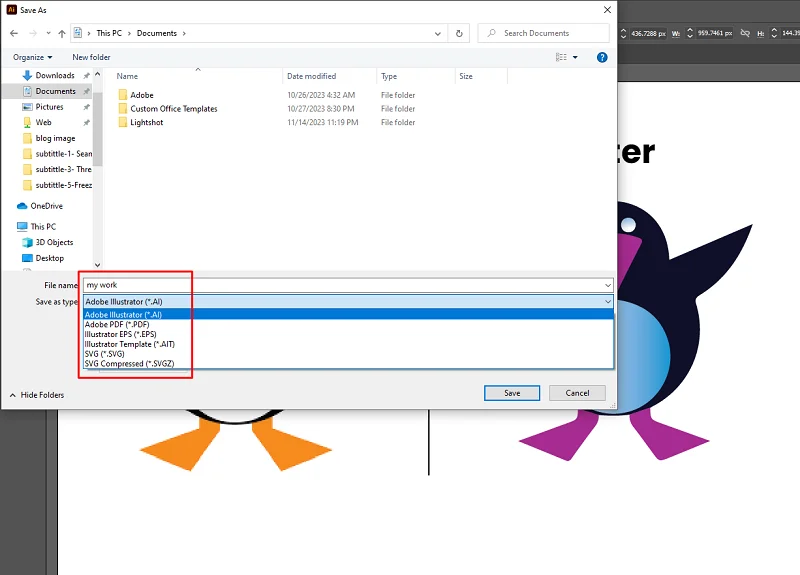
Think of saving as your design’s superhero move! It’s crucial to save regularly to avoid losing your work. Imagine your design is a storybook – saving is like bookmarking the pages, ensuring you don’t lose any chapters. When it’s time to save, pick the right format. Illustrator loves formats like. AI or SVG for vectors in Illustrator. It’s like choosing the perfect cover for your design book. These formats keep your vector image in Illustrator safe and ready to share or edit later.
Exporting Your Vector Image
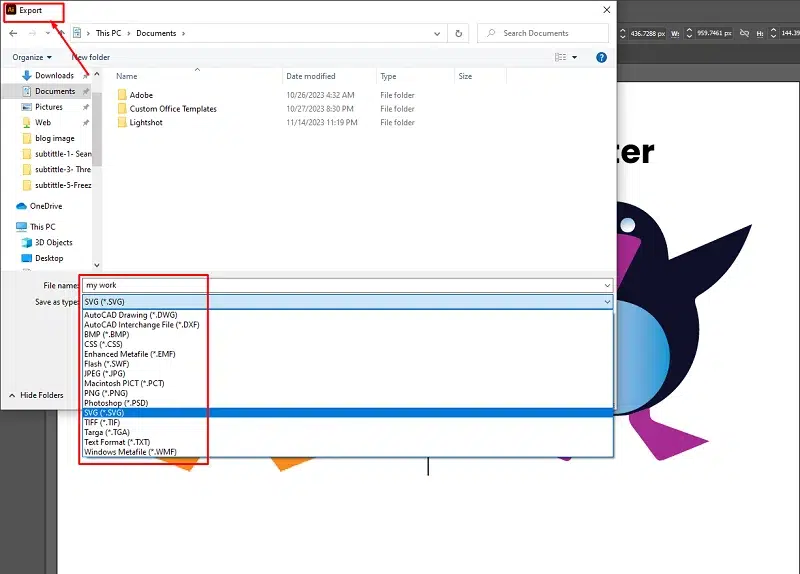
Time to show off your creation! In Illustrator, click on export. Choose the right way to save it, like SVG, EPS, or PDF. Each way is like a special language for your vector image in Illustrator. Pick the one that works best, making your vectors for Illustrator flexible and ready for anything. Don’t let your art lose its charm when you share it. Keep it looking great by saving it in a way that keeps its quality. It’s like making sure your illustrator vector creation looks fantastic no matter how big or small. So, hit that save button and let your art shine wherever you share it!
Tips for Efficiency: Shortcuts and Advanced Features
Discover design wizardry in Illustrator with time-saving shortcuts and advanced features, transforming your vector image in the Illustrator process. From personalized workspaces to clever template use, 10 Simple Tips for the Efficient Design of your creative game.
- Quick Actions with Shortcuts: Learn and use quick shortcuts in your design tool (like Illustrator) to speed up making your vector image.
- Explore Advanced Tools: Try out fancy tools in your software (like Illustrator vectors) to make your designs cooler and more special.
- Set Up Your Space: Arrange your design space so it suits you. It’s like creating your comfy spot for vectors for Illustrator.
- Smart Template Use: Save time by using smart templates for your designs, especially when you want to make a vector image.
- Keep Things Organized: Use different spaces for different parts of your design, just like using separate pages for your vector image in Illustrator.
- Sort Your Files: Make a system for your design files. It’s like having neat folders for all your Illustrator vector creations.
- Make Tasks Easier: Find tasks you do a lot and see if your tool can do them for you. It’s like magic for Illustrator Vectorize.
- Use Libraries and Presets: Grab ready-made things to use in your designs. It’s like having a set of cool tools for vectors for Illustrator.
- Check for Updates: See if there are new tricks in your tool. It’s like finding out about new toys for illustrator vectors.
- Keep Learning: Keep learning new things about your tool. It’s like discovering secrets for making your vector image even better!
Conclusion
So, you’ve painted your creative masterpiece with the magic of making a vector image in Illustrator. From sketching ideas to using special tools like illustrator vectors, each step has added a touch of uniqueness.
But hold on, there’s a whole world of creativity waiting for you. Don’t be afraid to explore and experiment further. Try different colors, shapes, and techniques in your vectors for Illustrator. It’s like having an endless canvas to play with.
Remember, the joy of creating doesn’t have an endpoint. Keep the excitement alive by diving into new possibilities. Your illustrator vector journey is a tale without a final chapter, so go on, be curious, and keep making your creative magic!
Related blog


