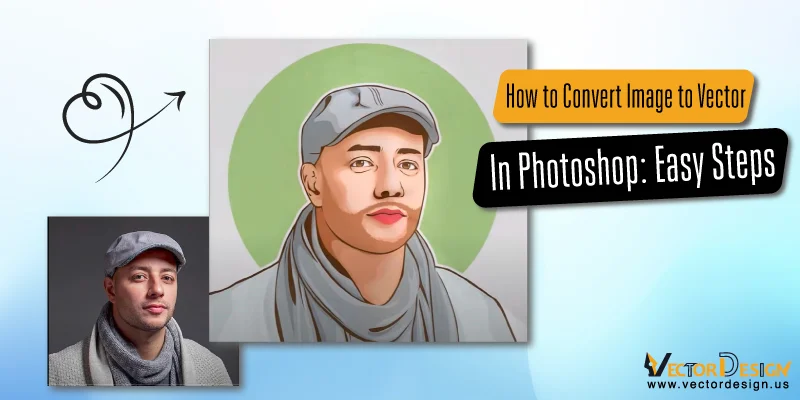
Most beginners think that Photoshop is not an ideal tool to convert images to vectors as it is simply a raster graphics software. To say it honestly, it’s a baseless fact. In fact, most professionals love to use Photoshop to make the conversion. Although we already let you know the way to convert image to vector in Illustrator.
Initially, there are different ways, and almost all the methods are easy and effortless. If you don’t know any of the ways, we can help. Just stick to the end of this article, and surely, you will learn the most effective way to do so.
How to Convert Image to Vector in Photoshop

We have tried different ways to convert images to vectors in Photoshop. And choose the method with the Selection tool as it is easy to understand and use. Just follow the steps below sequentially to convert simple images to vectors.
Step 1: Open Image in Photoshop

To change or edit anything on an image in Photoshop, you have to open the image in it first. You can simply drag and drop the image into this popular software. You can also open it, click on File, and then Open. So, just find the image you want to convert to a vector image and open it in Photoshop
Step 2: Removing the Background
This step is only required if the image has a very complex background. If the image comes with a simple background, you can keep it as it is. Otherwise, use the automatic background removal option to remove it.
Step 3: Selecting the Object’s Surrounding

At this point, you have to use the selection tool, and there are different ways to use this tool in Photoshop. But, you cannot just use any method to edit the image. Indeed, you have to choose it wisely. Check out the following image criteria and choose a suitable selection method.
• Choose the Quick Selection tool if you want to change the color.
• You can also try Magic Want Selection tool for the same purpose.
• Try Rectangular Marquee if the edges of the image are straight.
• Subject Selection tool is the best option for portrait images. Generally, the Selection tool of Photoshop is a very high-tech tool that basically utilizes an advanced algorithm to select people in a photo. However, you have to click the Select menu on top of the image. And then click on Subject. Then, you will find different Selection tools. Choose the appropriate one. Here, we are choosing the tool for the portrait image
Here, you have to use the Global Refinement slider. This tool will fine-tune the edges of the image. After using this tool, you have to make a new layer by outputting the Selection tool. If the object in the photo has a complete figure, you can use the advanced object Selection tool in Photoshop.
Step 4: Creating the Threshold Effect
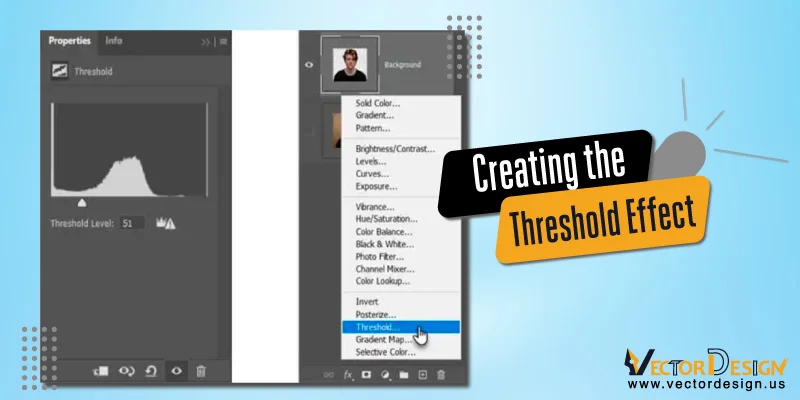
You must be familiar with the Threshold adjustment tool. It simply transforms the layer into a completely black and white photo. As a result of using this tool, you will have chances to get a clean look at the image.However, to use this tool, you have to click on the Layers Panel and then add a new layer.
For that, select the option ‘Create New File or Adjust Layer.’ You can make the necessary adjustment to get the exact look that you want. You have to change the threshold number for the adjustment
Step 5: Selecting the Tonal Area
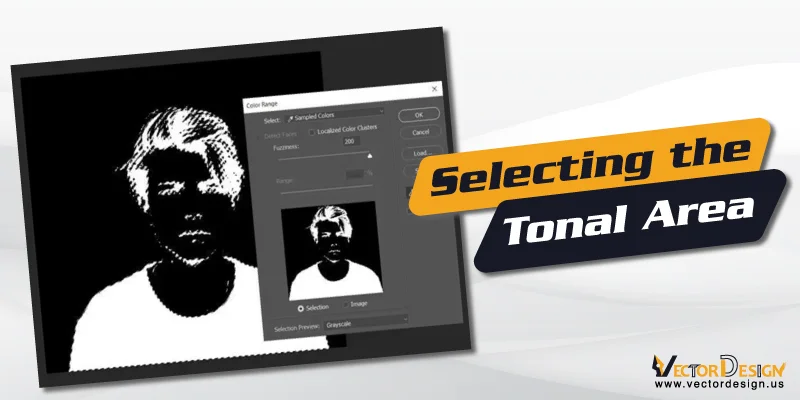
At this point, you have to select the Tonal area to get a complete black and white image. For that, you have to use the Color Range Command. You will initially find this option right under the Selection menu. This tool is quite like the Magic Wand tool that lets you select the pixels to share colors with the eyedropper tool.
However, to select all the black and white tonal area, you have to use the Color Range Command. For that, press on Select and then find Color Range. Click on it. You will get another menu where Eyedropper Tool will be available. Click on it, and soon, you will be able to select all the tonal areas. Now, click on the OK button to save it.
Step 6: Converting The Selection

Now is the time to convert the Selection you made a minute ago to a Path. However, a path is a line that comes with anchor points at the two ends. This path is also known as the vector line. You can use this path to make a shape or stretch.To convert the Selection, you have to select the Marquee option. You can also try other Selection tools in this case. Once you right-click on the image, a menu will pop up, and here you will find an option, Make Work Path. Click on it.
Step 7: Adjusting the Tolerance Value

Once you select the Make Work Path, you will have an option to select the Tolerance Value. It is essential to adjust, especially for smoothing the path. You will simply get a dialogue box where there will be a box for tolerance pixel value.
Remember that 1.0 is the most suitable Tolerance Value for any vector image with irregular paths. This value basically determines the distance between the path and the contours of the image. The distance will reduce if the value is lower. That’s why we suggest keeping it 1.0 in most cases. You can also change it to experiment with the changes
Step 8: Creating the Solid Color Layer
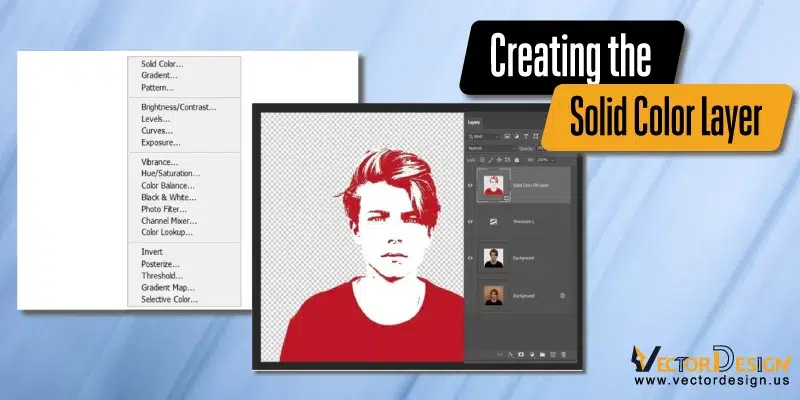
We are near the end, and now, you have to create an entirely new solid color image layer. For that, you have to click on the Layers Panel again and select Create New Fill or Adjustment Layer. The very first option you will get must be Solid Color. Click on it.
From the menu, you will choose your favorite color. And now, you will find the images only with white and the solid color you choose. Also, a new vector shape layer will be created here, and you will find it on top of the Threshold layer.
Step 9: Changing the Setting to Save the Image
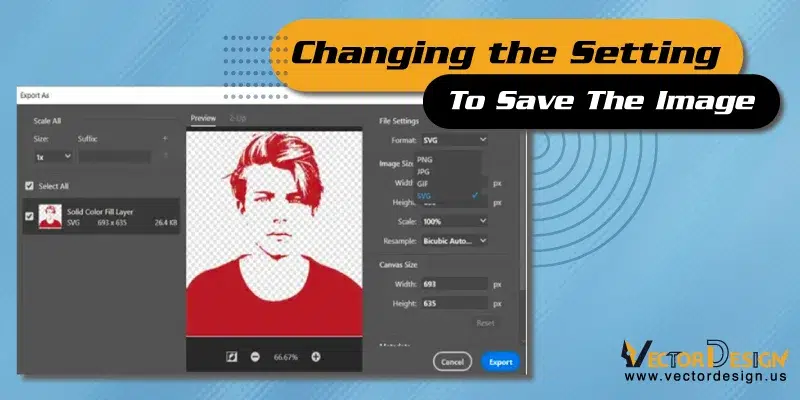
Your vector image is now ready. But, you have to save it before you use it. For that, right-click on the Layers option and click on the second option. It must be Export As. If you click on the File option, you will get the same option as well.
Once you click on the Export option, a new menu will pop up that lets you change the settings. On the File Setting, you will find an option, Format. It offers you several options, and you have to click on SVG. And then click on the Export option at the bottom of the menu.That’s all. Your vector image is not ready to use. You can simply open it on any other software like Inkscape or Adobe Illustrator.
Final Verdict

There are initially different ways to convert images to vectors using Photoshop. But this specific method is easy for beginners. That’s why we suggest it. Besides, this method offers the best result and is the quickest method.
Now, it’s your turn to try this. Don’t forget to inform us how things were going with your experiment. Thank you for your time.

