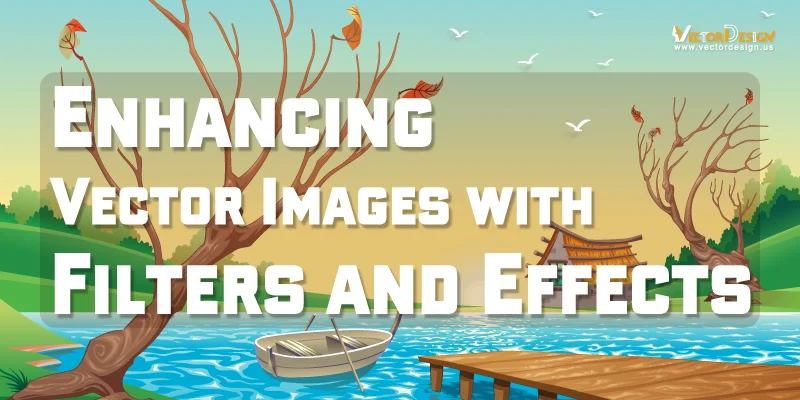
Vector images are special kinds of pictures created using math tricks. Unlike regular pictures, they stay super clear no matter how big or small you make them. They’re like smart pictures that never lose their quality. Vectorizing an image is the process of converting a raster image (made up of pixels) into a vector format. Enhancing Vector Images with Filters and Effects is important because it adds coolness. Enhancing means adding special effects and tricks to make the pictures more interesting. It’s like giving them extra magic to stand out and look awesome. Filters and effects are like special tools for pictures. They can make parts fuzzy, add shadows, smooth colors, and make things shine. Using these tools helps make the pictures not just good but exciting and eye-catching.
Importance of Enhancements Vector Images with Filters and Effects
Enhancing vector images with filters and effects is crucial for multiple reasons. Firstly, adding filters and effects to vector images is like giving them a style upgrade. It makes them look more attractive, interesting, and eye-catching. Visual appeal matters because it grabs people’s attention and makes them want to look at and enjoy the images.
Additionally, vector images often need to fit into various places like websites, social media, or print materials. Using filters and effects helps optimize the images for different platforms. It ensures they look great and stand out, no matter where they’re used.
Lastly, filters and effects aren’t just for looks; they also make vector images more usable in different designs. Whether it’s a logo, a website, or a brochure, enhanced vector images can adapt and fit seamlessly into various design contexts. This versatility makes them more valuable in creative projects.
Types of Filters and Effects:
Let’s dive into the different types of filters and effects that make our vector look super cool:
Color Filters
Color filters are like magical paintbrushes for your pictures, making them visually stunning. They’re special tools that let you have fun with colors, creating a colorful masterpiece. Here are two cool things you can do with color filters:
Hue and Saturation Adjustments:

- What it does: Changes the basic colors in our pictures, making them brighter or more muted.
- Example: Turning a regular blue sky into a vibrant sunset.
Color Gradients:
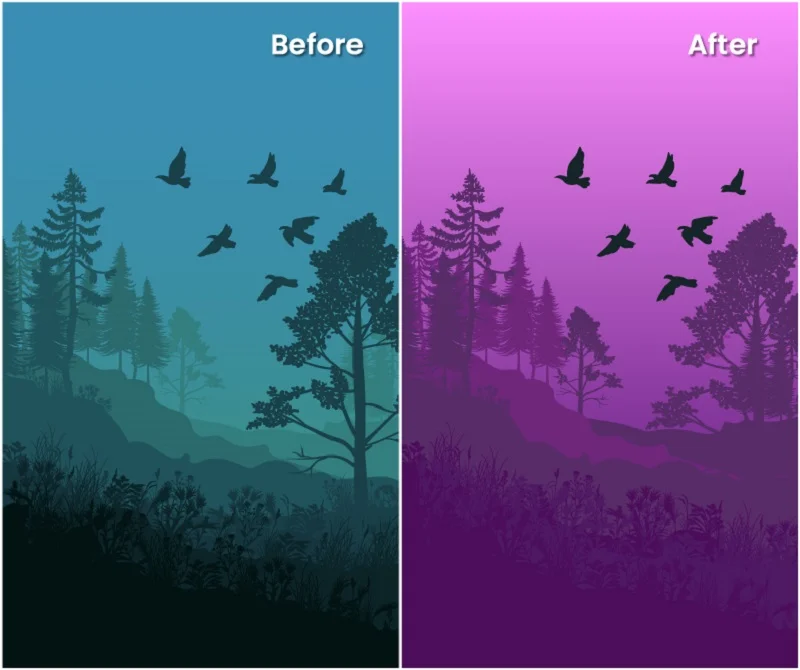
- What it does: Blends different colors smoothly, creating a gradual shift.
- Example: Make a background go from pink at the top to purple at the bottom.
Texture and Pattern Effects
magic to your pictures, giving them interesting feelings and cool designs. Here are two awesome things you can do with texture and pattern effects:
Adding Textures:

- What it does: It puts a feeling of touch on our pictures, like making them look rough or smooth.
- Example: Adding a texture to a wall to make it look like bricks.
Applying Patterns:
- What it does: Decorates our pictures with repeated designs.
- Example: Making a shape look like it’s covered in cool patterns, like stripes or dots.
Blurring and Sharpening Filters
wands for focusing or softening parts of your pictures. Here are two cool things you can do with blurring and sharpening filters:
Gaussian Blur:

- What it does: Softens parts of our pictures, like making backgrounds less clear.
- Example: Blurring the trees in the background of a photo to make the person in front stand out.
Sharpening Effects:
- What it does: Makes certain areas of our pictures more detailed and crisp.
- Example: Sharpening the edges of a logo to make it look clean and precise.
Distortion Filters
Distortion filters are like playful tools that let you twist and turn your pictures for a creative touch. Here are two fun things you can do with distortion filters:
Warp and Twirl Effects:

- What it does: Changes the shape of our pictures, either bending or twisting them.
- Example: Making a face look funny by twisting it a bit.
Liquify Filters:

- What it does: It lets us move and reshape parts of our pictures like they’re made of liquid.
- Example: Making hair flow in the wind or shaping clouds in the sky.
This process of enhancing vector images with filters and effects adds that special touch to make visuals stand out. They are transforming ordinary pictures into extraordinary ones, full of vibrant colors, captivating textures, and interesting shapes.
Step-by-Step Guide to Enhancing Vector Images:
Enhancing vector images is a creative process that can make your designs pop. Here’s a simple guide to help you step by step:
Step 1: Import Your Vector Image
First, open your vector image using a design tool like Adobe Illustrator or CorelDRAW. This is where you’ll start your journey to make it look even more amazing.
Step 2: Choose Appropriate Filters and Effects
Then, navigate to the filters and effects options in your design tool. Pick the ones that match the style or vibe you’re going for. It’s like selecting the right colors for your painting.
Step 3: Adjust Filter Parameters
Once you’ve chosen a filter or effect, there will be settings you can play with. Adjust these settings to fine-tune how the filter or effect affects your vector image. Think of it as adjusting the volume of your favorite song.
Step 4: Preview Your Changes
Before making your changes permanent, use a preview feature if available. This lets you see how your enhancements will look without committing. It’s like trying on different outfits before choosing the perfect one.
Step 5: Fine-Tune the Enhancements
Take your time to fine-tune the effects. This might involve adjusting colors, textures, or the strength of filters. Think of it as adding the finishing touches to a masterpiece.
Step 6: Save the Enhanced Vector Image
Once everything looks just right, save your enhanced vector image. Consider saving a copy to keep the original safe. It’s like putting the finishing touches on your creation and signing your artwork.
Practical Applications
Certainly! Filters and effects can be applied to enhance vector images in various design contexts. Here are practical applications for each of the mentioned areas:
Web Design:
In web design, think of filters as special tools to make your website look cool. You can use filters to give your website’s background interesting textures and colors, making it visually unique. Also, when people move their mouse over buttons or pictures on your site, filters can make them change a bit, like adding shadows or glows. This makes the website more fun and interactive for visitors, like adding movie-like magic to your design.
Print Media:
In print media, filters can spruce up your materials like brochures or posters. Imagine them as tools to jazz up your text and images. For text, you can use filters to add cool effects like shadows or glows, making it stand out. When it comes to pictures, filters help adjust colors or give them a vintage feel, making your printed stuff look even better. It’s like adding a touch of magic to your words and pictures before they hit the paper!
Branding and Logo Design:
In branding and brand logo design, think of filters as tools to make your company’s visual stuff look better. They’re like magic touches that add style to your logos by giving them cool textures and dynamic colors. It’s like putting a fancy outfit on your brand, making it stand out and be remembered by people. So, filters here are like stylish accessories for your company’s look!
Illustrations and Artwork:
In Digital illustrations and artwork, filters are like special tools that make your drawings and digital art look cooler. They add unique textures and create depth, making your art more interesting and lifelike. It’s like using magic to enhance the beauty of your creations and make them stand out. Filters in illustrations are like the artist’s secret sauce for making awesome and eye-catching art!
Best Practices and Tips
Certainly! Here are some best practices and tips for enhancing vector images with filters and effects:
Maintaining Originality:
Keep your designs unique and authentic. Avoid excessive use of common templates or trends. Inject your style into the design to make it stand out from the crowd.
Considering the Target Audience:
Understand who your audience is and what appeals to them. Tailor your design elements to match the preferences and interests of your target demographic.
Experimenting with Different Combinations:
Don’t be afraid to try out various color schemes, fonts, and layout combinations. Experimenting can lead to unexpected and creative results, helping you find the most effective design elements.
Keeping File Size in Check:
Optimize images and graphics to ensure reasonable file sizes, especially for web design. Compress images without compromising quality to improve loading times, user experience, and overall performance.
Conclusion
In summary, enhancing vector Images with Filters and Effects brings a bunch of benefits to different kinds of design work. It makes websites, prints, logos, and art look better. It’s like adding a bit of magic to your creations.
We should always try to be creative when using these filters. Adding your style to designs is like putting your personal touch on them, making them special and different. As technology gets better, designers can expect new tools and ideas to play with. Keeping an eye on these changes helps us keep making cool and interesting designs that catch people’s attention. So, let’s keep being creative and see where the future takes us.
FAQ’s:
What are filters and effects in vector image enhancement?
Filters and effects are tools that improve the look of vector images by adding textures, colors, and other enhancements.
How do filters benefit web design?
In web design, filters enhance backgrounds and create interactive hover effects on elements like buttons.
Why are filters important in print media?
Filters optimize text for readability and improve the overall appearance of images in printed materials.
How do filters contribute to branding and logo design?
Filters add unique textures and color gradients, giving logos a sophisticated and memorable look.
Are there best practices for using filters?
Best practices include maintaining originality, experimenting with combinations, considering the target audience, and keeping file sizes in check.


