
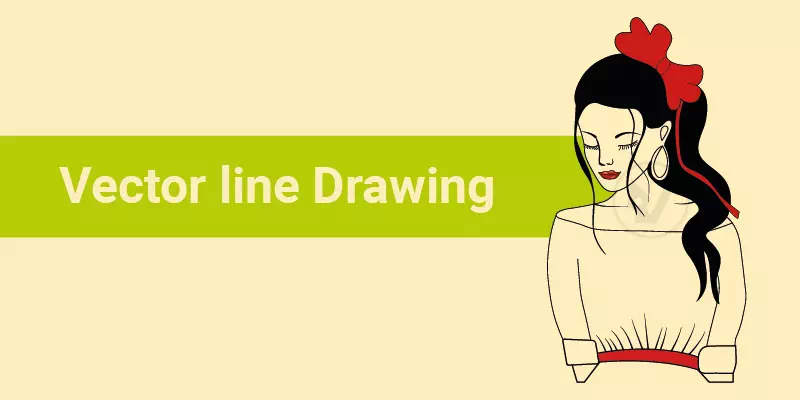
Sketch to Vector Line Art is a popular technique used by vector artists, graphic designers, and illustrators to convert a hand-drawn sketch into digital artwork. It involves tracing the sketch in drawing software to create clean and scalable vector lines, which can then be edited and colored as desired. This technique is particularly useful for creating logos, illustrations, and other digital graphics that require crisp, clean lines and shapes.
In this guide, we will walk you through the process of creating Sketch to Vector Line Art step by step. Whether you’re a seasoned artist or a beginner, this guide will provide you with the knowledge and skills you need to create stunning vector line art from your sketches. So, let’s get started!
How to Draw Sketch to Vector Line Art
However, drawing vector line art is not as hard as it sounds. An amateur even can create line art in Illustrator, but to be a pro-quality vector line artist, you must practice with the vector line drawing tutorial made by experienced vector artists. Follow this step-by-step tutorial that is created by our expert vector illustrators. Let’s explore-
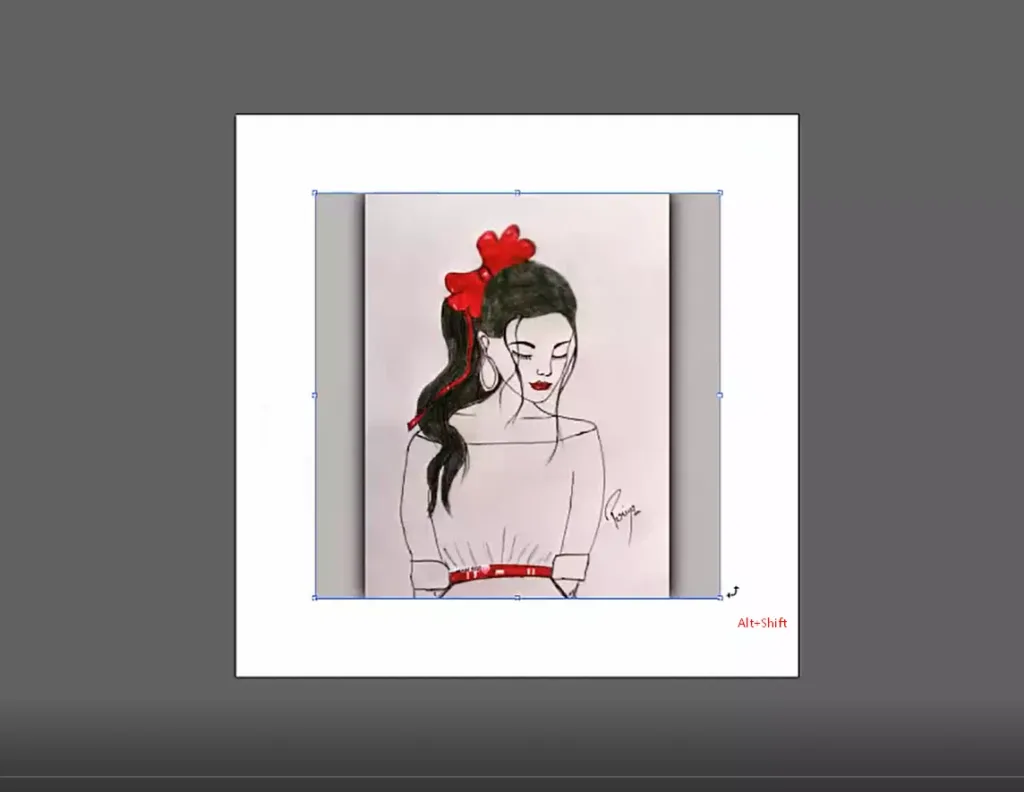
Step 1: Import Sketch Image
First import a sketch file into Adobe Illustrator’s artboard. Press ‘Alt+Shift’ to enlarge the image as you need.
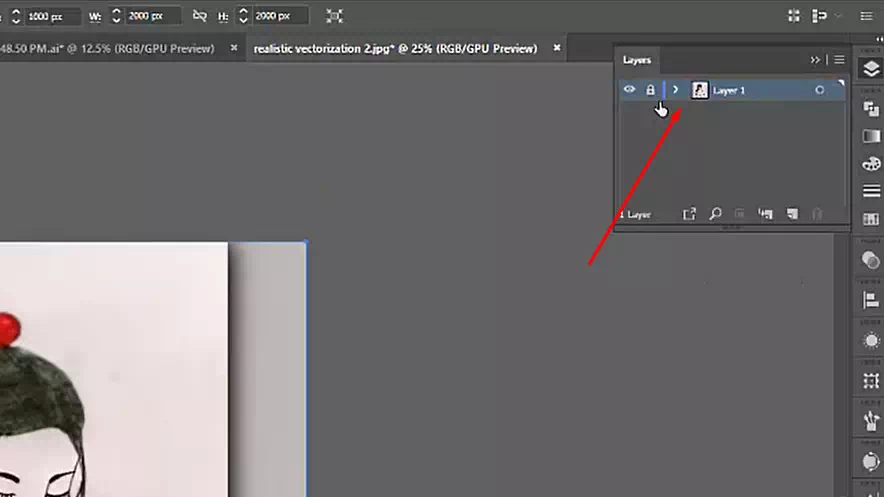
Step 2: Select Layer
Go to ‘Window’ and select ‘Layer’. You can do it by pressing ‘F7’ also.
Step 3: Work with Layer Option
Now, it’s time to work with the ‘Layer’ option. Lock the layer and add a new layer. Work with the layer color. Lock the fill color and choose a stroke color.
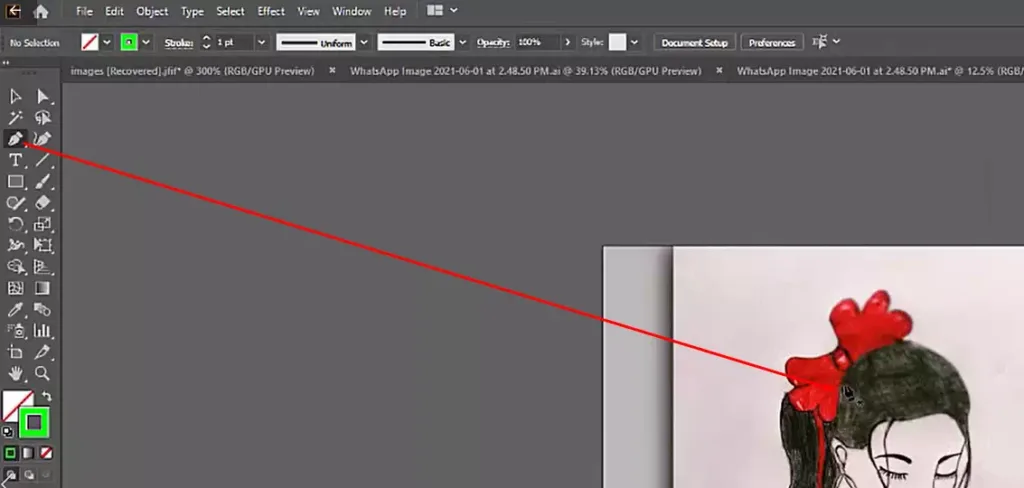
Step 4: Create Lines with Pen Tool
In this step, the main task is needed to be done, and the task is- line drawing. Choose ‘Pen Tool’ by pressing ‘P’. Start the path drawing with the tool. You must aware of stroke because you need to increasing or decreasing the stroke’s uniform and paint based on the image.
You may face problems finding the line appropriately. The solution is- to go to ‘Window’, select ‘Stroke’, and increase or decrease the point to find the line properly.
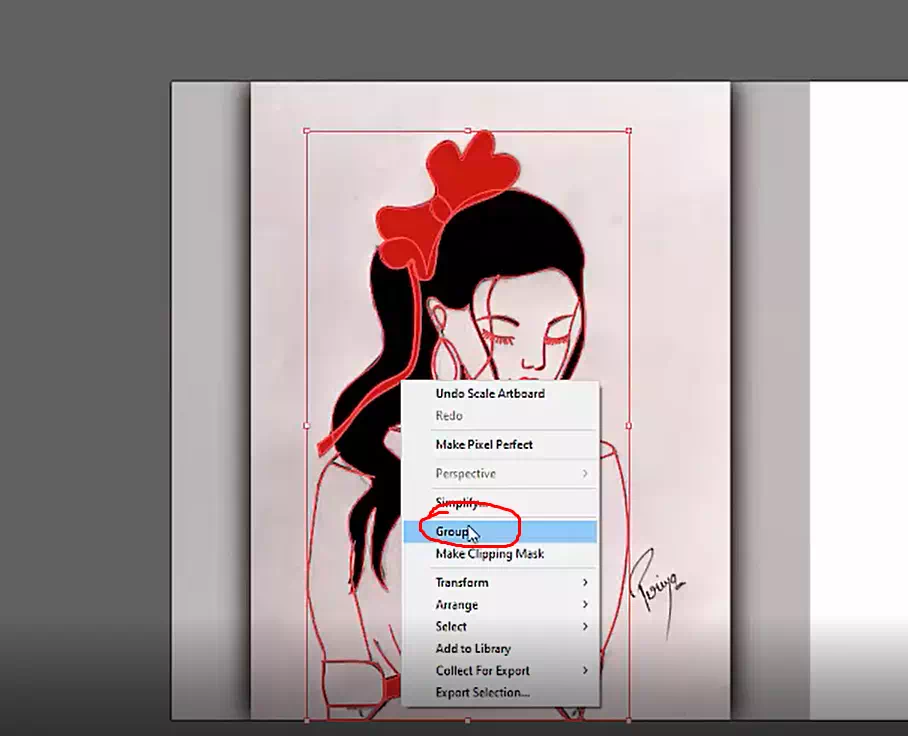
Step 5: Group Every Parts
After completing the path drawing, select all and group every part of the drawing.
Step 6: Colorize the Drawing
Now, the option is- colorized the drawing according to the sketch file or the direction of the service taker.
Step 7: Export the Vector Image
Before exporting the vector file, you should do image QC (quality check). To do that press the layer’s eye icon and observe the sketch and vector file carefully.
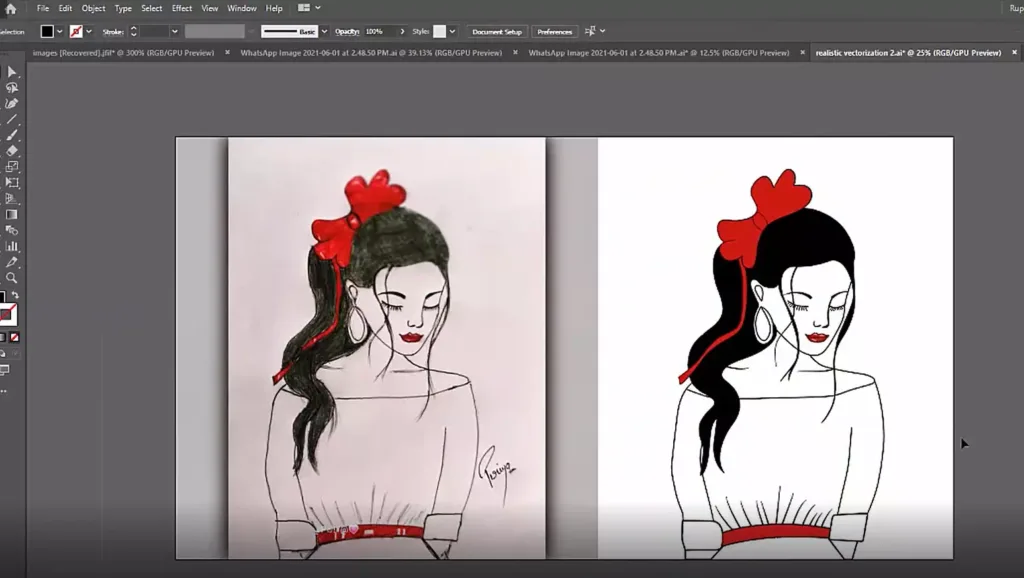
Step 8: Make a Before-After
Separate the before-after image and save it. Press ‘Ctrl + S’ or go to ‘File’ and choose ‘Save as’ option. Finally, locate the file where you want to save it.
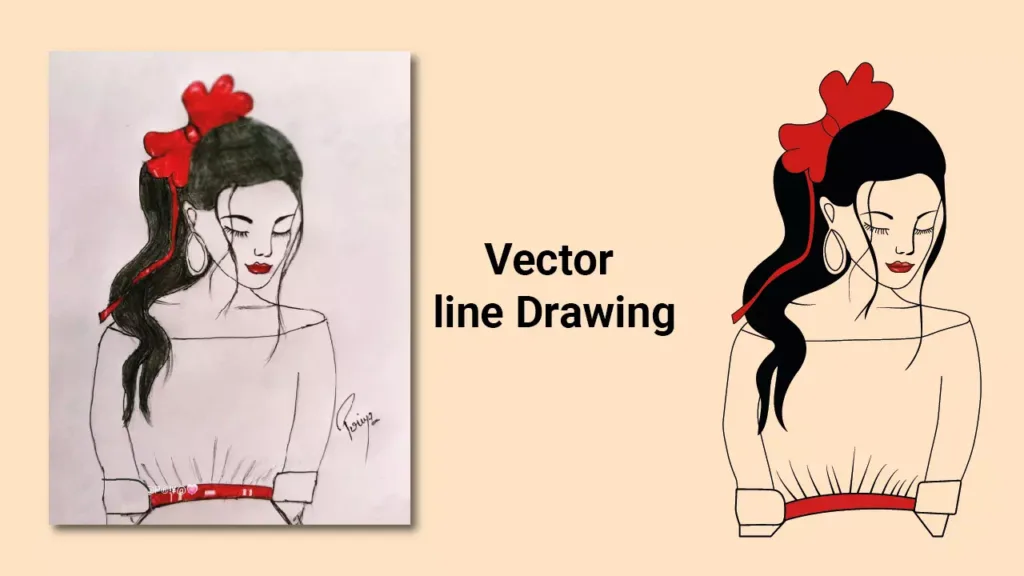
Step 9: Get a Stunning Vector Output
This is the final step. You need to export the output to represent your vector line art. Go to ‘File’ first, then take the mouse cursor to ‘Export’ and click on ‘Export as’. Now choose the file format you need. You can do the full processing by pressing ‘Ctrl+Shift+Alt+S’.
Here we have described the full process of drawing sketch to vector line art. You may follow the process for DIY. We think it will make your task easy. And finally, use the distort-free Vector file as your need.
Wait, are you learning this line drawing tutorial for your commercial projects? If so, we are worried that practicing several times, you cannot produce the industry-standard line arts. It may ruin your time and efforts. You may be frustrated.
Instead of time consuming, you can send us your sketch files and allow us to provide you the most quality vector line drawn images overnight. We are a professional vector conversion service provider continuing our design services to assist the business by our stunning vector designs. To know more about our services, contact us.
Some Common FAQs
What is the difference between a sketch and vector line art?
Sketches are rough, hand-drawn illustrations created with pencil or pen on paper. They often have imperfections and are not clean and polished like vector line art. Vector line art, on the other hand, is digital artwork created in drawing software, using precise and scalable vector lines.
What software do I need for Sketch to Vector Line Art conversion?
There are several drawing software options available, such as Adobe Illustrator, CorelDRAW, and Inkscape, among others. You can choose the one that best suits your needs and budget.
Do I need a graphics tablet for this task?
While a graphics tablet is not mandatory, it can make the process more efficient and provide better control over the strokes. However, you can still create it using a mouse or trackpad.
How do I create the initial sketch?
To create a sketch, you can use a pencil or pen and paper to draw your image. Once you have the sketch, you can either scan it or take a photo of it with your phone or camera to import it into your drawing software.
Can I add color to Vector Line Art?
Yes, you can add color to your vector line art by creating a new layer in the drawing software and adding color to it. You can also create shading and other effects to enhance your artwork.
Can I edit my final Vector Art after it’s complete?
Yes, since the artwork is created in a digital format, you can always go back and edit or make changes to it at any time.


