

Photo to vector conversion is one of the most popular services in the graphics design industry. People use the vector file for personal or commercial purposes to get distortion-free images. There is an automated vector conversion option, but it’s good to use a manual vectorizing method instead of automation. Because automatic tools cannot produce the best vector output that works.
If you are a lover of automatic vectorizers, we will recommend you to use firstly the hand-drawn method of vectoring images. How to vectorize an image manually? Read the below text tutorial and get the solution of manual vectoring.
Here, we have described how we provide vectorizing services to our global clients from our production house. Undoubtedly, you are getting a very comprehensible tutorial from a professional vector artist. Try to grab the manual vectoring tutorial, you must win therefore more quality projects in the future.
Vector my image
Either you need to take the service or you are a designer, it’s very common asking is, how to vector my image? However, today we have decided to answer your asking in this tutorial. We have used Adobe Illustrator CC software here. We hope you will get a concrete acknowledgment of the process. Let’s explore-
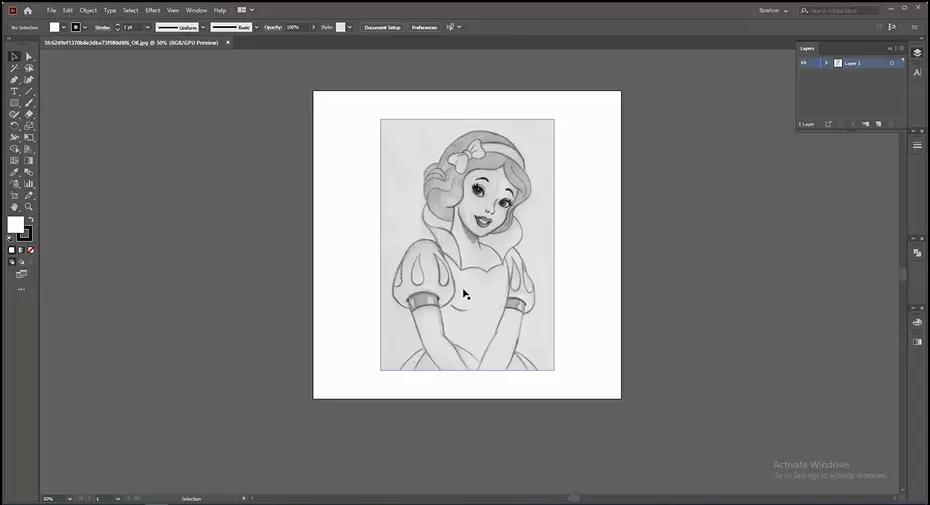
Step 1:
We need to pick an image firstly in adobe illustrator software.
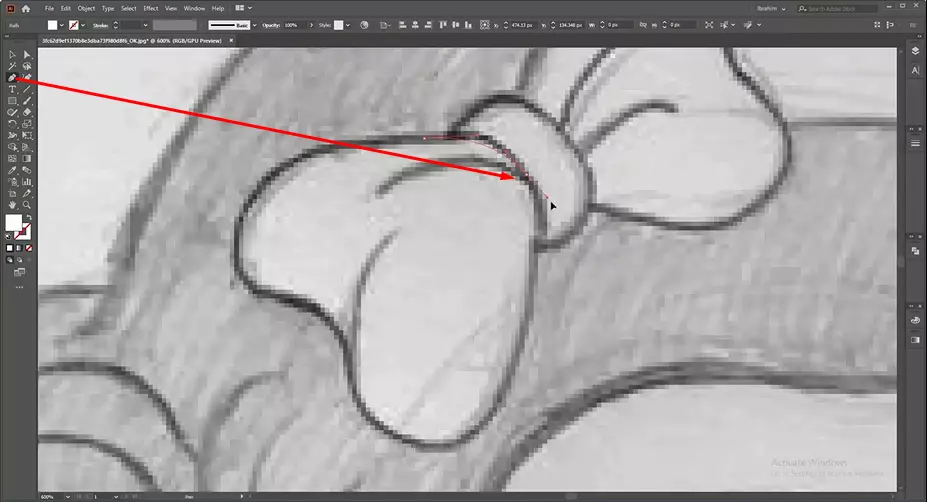
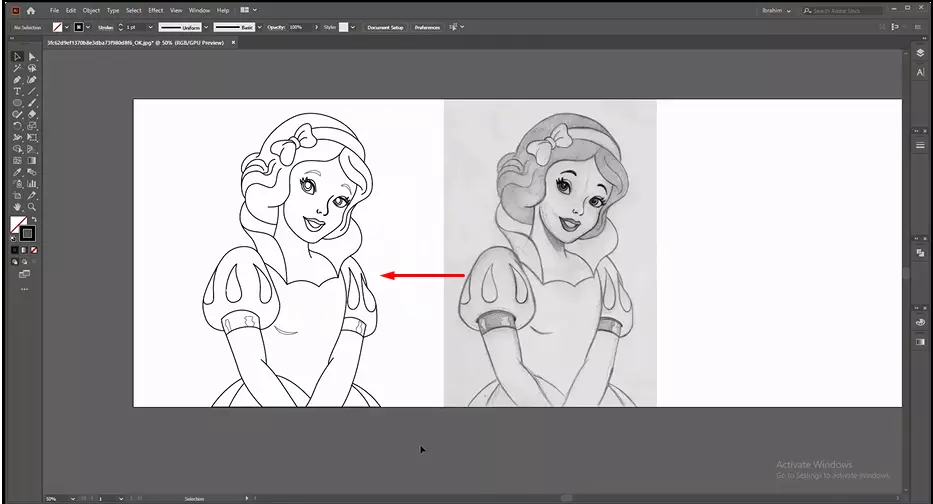
Step 2:
Secondly, start vectorizing with the ‘Pen Tool’. Select the tool manually or press ‘P’ for the shortcut. Create a new layer and lock the main layer. Don’t forget to modify the stroke.
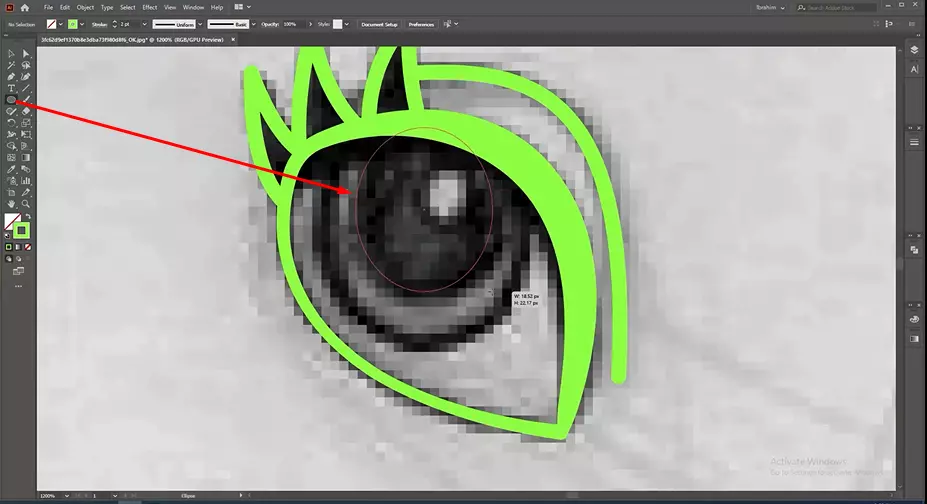
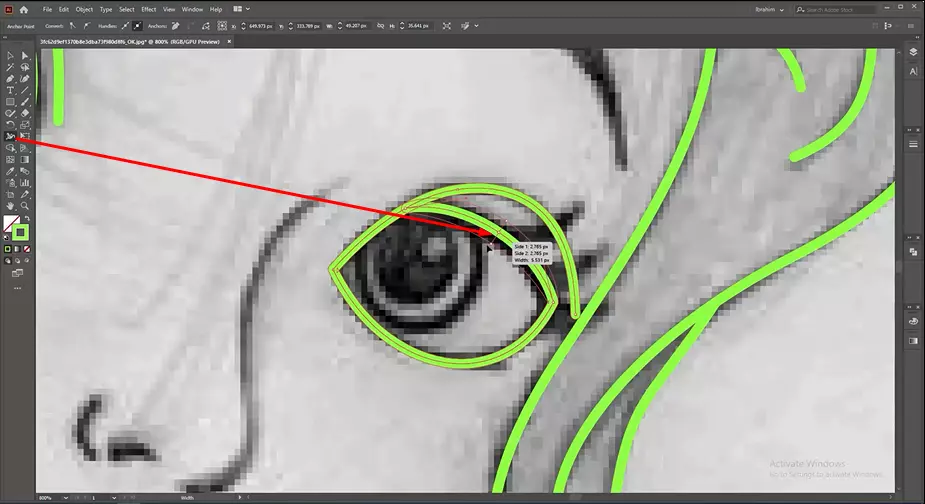
Step 3:
We need to use other supportive tools like ‘Ellipse Tool’ for drawing round type shape, it can be selected manually or by pressing ‘L’. We also use ‘Width Tool’ for enlarging the specific portion of any object and ‘Delete Anchor Point Tool’ for removing unwanted path.
Step 4:
After completing the path drawing, make a group of all portions and separate the vectorized image from the before file. We can use the vector file or also go for the next step.
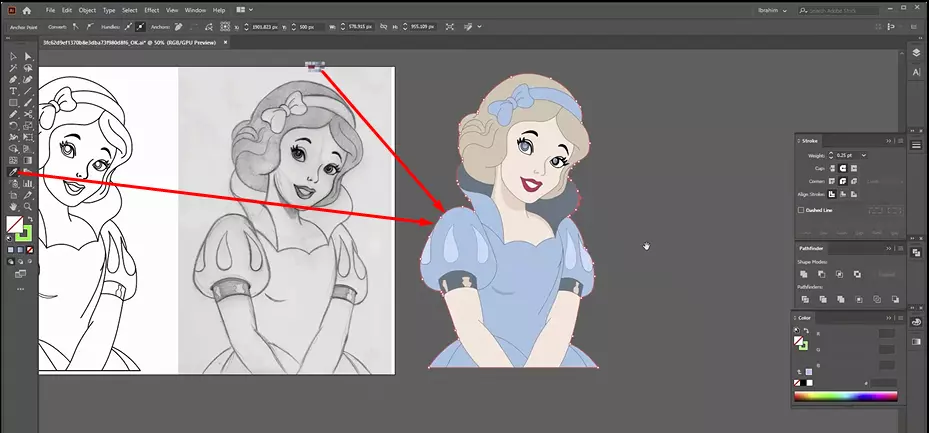
Step 5:
We can add color like this black-white image by nurturing our creative minds. We use ‘Eyedropper’ for coloring the image. Try best to choose matching and related colors. Otherwise, the work will lose the impression.
Step 6:
Now we reach the end of vectorizing the image. Save the Ai file and export it as a need.
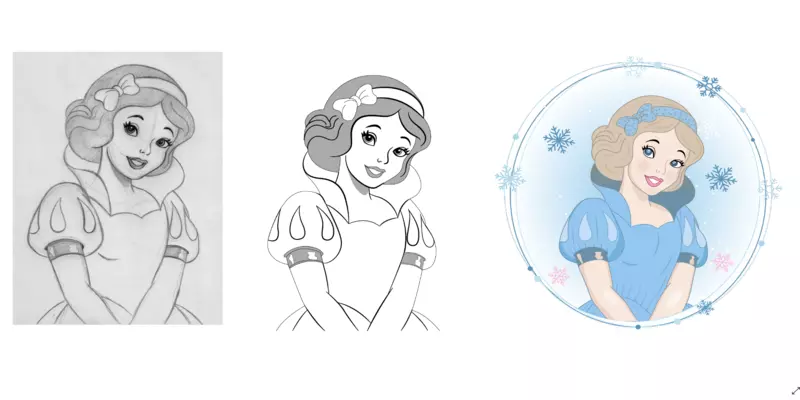
At the end, we hope you understand the A to Z vectorizing process. Now, you can easily justify the illustration service. Continue practice photo to vector conversion and achieve perfection that is essential for offering graphic design services.
We have been providing quality vector conversion services to our global customers like Photographers, eCommerce and products owners, advertisers and marketers, busy graphic designers, and design studios. You will get all types of image to vectorization services from us at a very competitive price. Get a quote if you are planning to take vectorization services for your projects.
You may also watch the video tutorial here.


