The Pen Tool in Adobe Illustrator is a magic pencil for artists and designers, perfect for Vectorizing an image. It helps you draw all sorts of shapes and paths with great precision. You use it by placing points on your canvas, which are like anchors guiding your drawing. The cool part is that you can make straight lines or smooth curves by pulling special handles attached to these points. This makes it super versatile for creating anything from simple shapes to complex designs.
Now, why is the Pen Tool so important? Well, it’s like the superhero of drawing tools because it gives you total control. It lets you be exact in your drawings, ensuring everything looks just right. You can make things big or small without losing quality, which is awesome for logos or pictures that need to look good no matter the size. Plus, if you ever want to change something, the Pen Tool lets you go back and edit easily. Now, let’s talk about How to use the pen tool in Illustrator.
How to Use the Pen Tool in Illustrator:
The Pen Tool in Illustrator is incredibly powerful. It lets you draw precise and flexible custom vector objects. We use it for creating everything from custom icons and infographics to logos and digital illustrations. It gives you a lot of control to craft exactly what you envision. Certainly! Here’s a step-by-step guide on how to use the Pen Tool in Illustrator:
Getting Started
Step 1: Open Adobe Illustrator
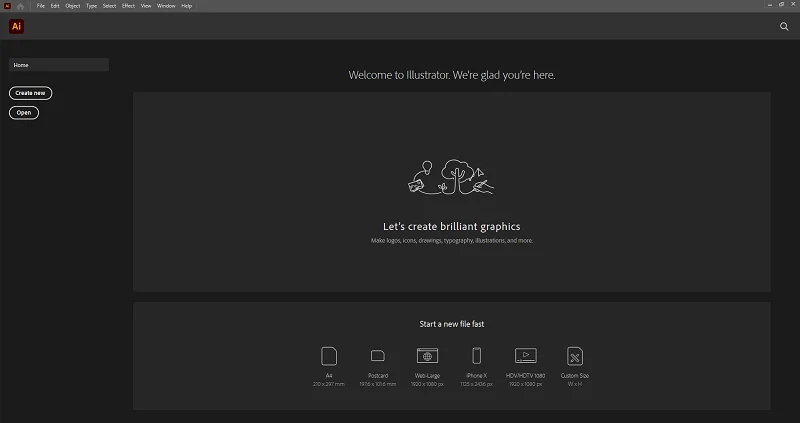
First launch the Adobe Illustrator software on your computer.
Step 2: Create a New Document
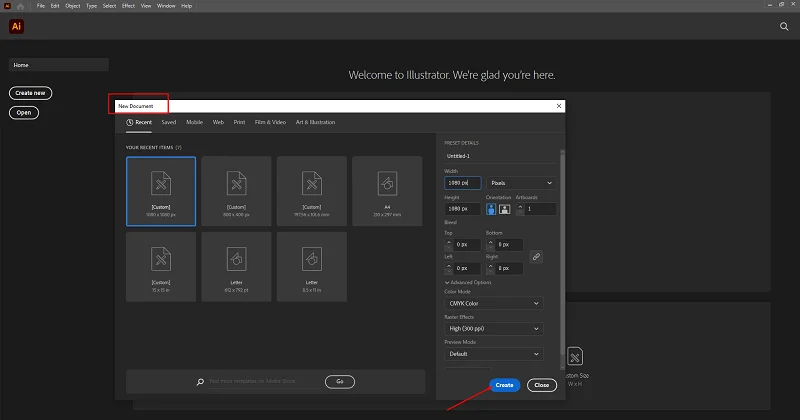
Start by clicking on “File” at the top of the screen. After that, choose “New” to make a new document. Pick the settings you want, like how big the document should be and which way it should face, and then click “OK.”
Step 3: Access the Pen Tool
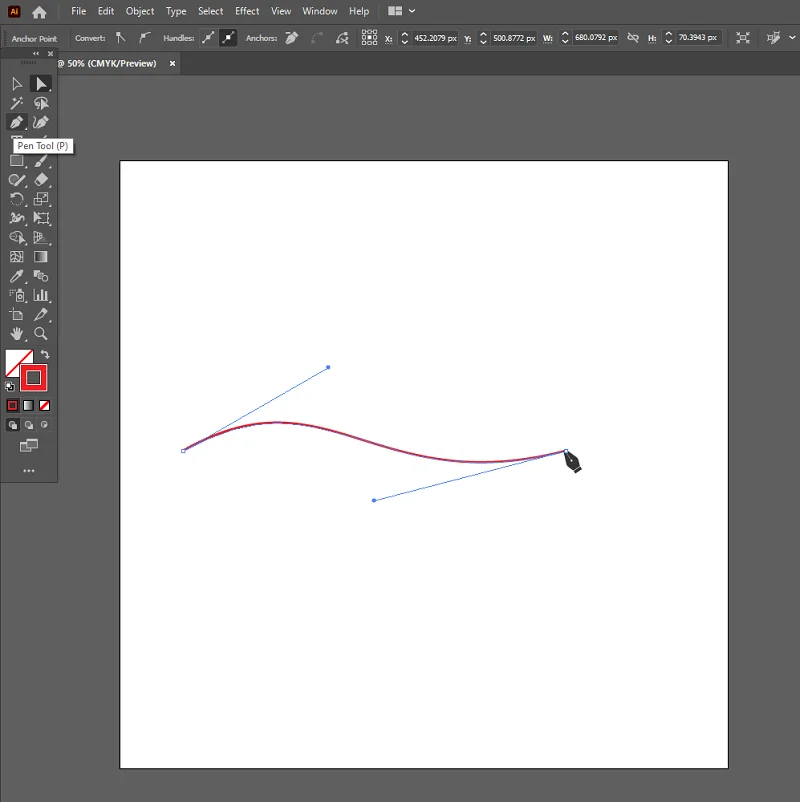
Next, check out the toolbar on the left side of your screen. It’s a place with different tools. Look specifically for the Pen Tool – it has an icon that looks like a pen nib. If you want a quick way, you can press the “P” key on your keyboard, and it will choose the Pen Tool for you. Easy, right?
Basic Functions of the Pen Tool
Creating Straight Lines:

Think of this like connecting dots with straight lines. Click on a point, then another, and the Pen Tool draws a straight line between them.
Creating Bezier Curves:
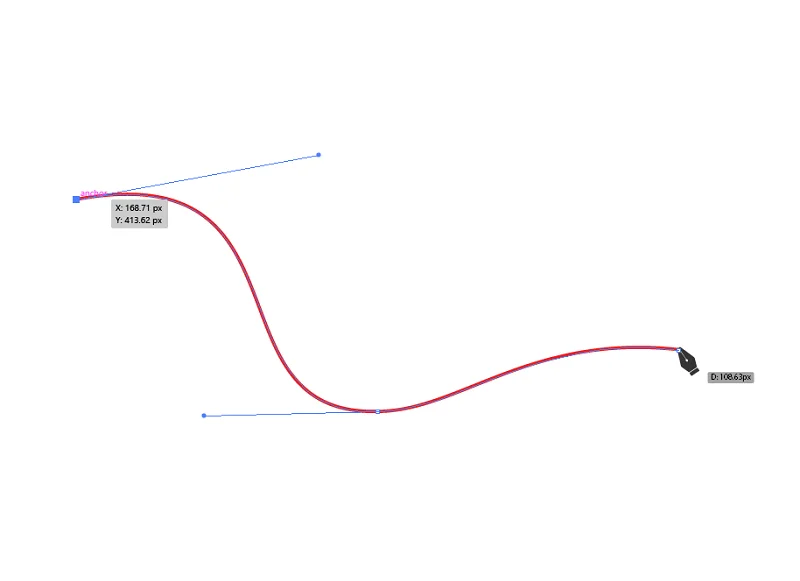
Now, imagine drawing a curved line instead of a straight one. Click and drag after you’ve made a point, and the Pen Tool creates a smooth, curved line.
Adding Anchor Points:
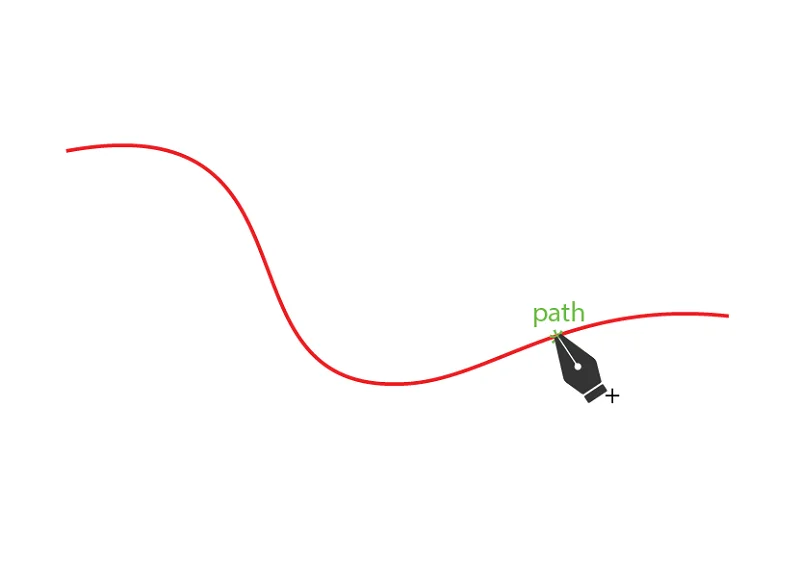
Anchor points are like pins that hold the lines in place. If you need to make more adjustments or add more lines, just click on the path, and a new anchor point appears.
Removing Anchor Points:
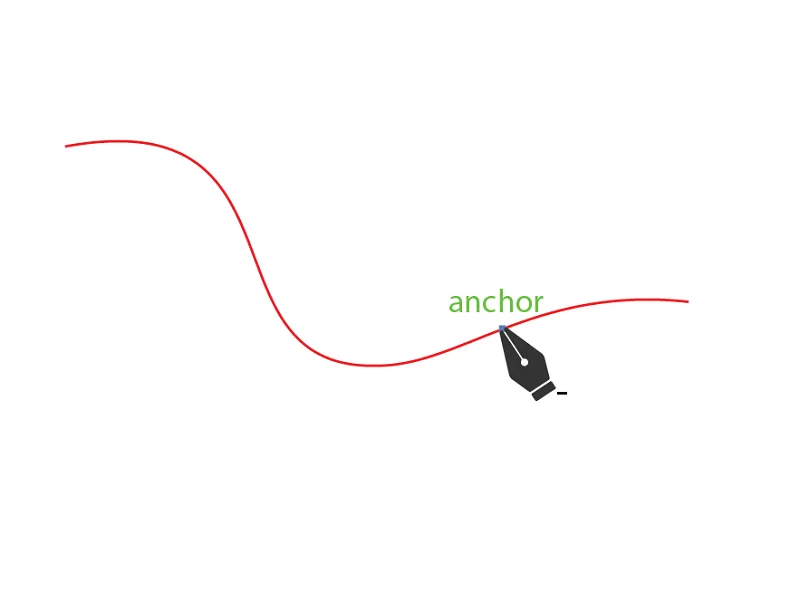
On the flip side, if you have extra anchor points you don’t need, you can delete them. Select the point and hit the delete key. It keeps things tidy!
Advanced Functions of The Pen Tool
Once you’ve mastered the basics of the Pen Tool in Adobe Illustrator, it’s time to explore some advanced functions that enhance your precision and creativity.
Converting Anchor Points:
One powerful feature of the Pen Tool is the ability to convert anchor points. To do this, select the anchor point you want to modify and right-click. Choose the “Convert” option to switch between corner points and smooth points. This versatility allows you to refine your shapes and paths with greater control.
Cutting Paths:
Illustrator’s Pen Tool also enables you to cut paths with precision. Use the “Cut” tool or press the keyboard shortcut (Ctrl + Alt + J on Windows or Command + Option + J on Mac) to split a path at a specific anchor point. This function is handy when you need to create separate sections within a shape or modify complex illustrations.
Direct Selection:
The Direct Selection tool complements the Pen Tool for fine-tuning your creations. Access it from the toolbar or press “A” on your keyboard. With this tool, you can individually select and manipulate anchor points or segments. This level of control is especially useful when refining the details of your artwork. This allows for intricate adjustments without affecting the entire path.
Keyboard Shortcuts for Pen Tool and Related Functions
Let’s learn about the essential keyboard shortcuts that make it easy to use the pen tool:
Pen Tool: To swiftly access the Pen Tool, simply press “P.”
Direct Selection Tool: Quickly switch to the Direct Selection Tool by pressing “A.”
Add Anchor Point (with Pen Tool selected): Increase precision by adding anchor points with the Pen Tool using the “+” key.
Delete Anchor Point (with Pen Tool selected): Remove unnecessary anchor points easily by pressing the “–” key.
Convert Anchor Point (with Pen Tool selected): Enhance flexibility in your designs by converting anchor points between corners and smooth using “Shift” + “C.”
Switch Between Pen and Direct Selection Tools: Seamlessly toggle between the Pen and Direct Selection Tools by holding down “Ctrl” (Windows) or “Cmd” (Mac).
Cut Path at Selected Anchor Point (with Pen Tool selected): Divide paths effortlessly by selecting an anchor point and pressing “Ctrl” + “Alt” + “J” (Windows) or “Cmd” + “Option” + “J” (Mac).
Undo: Rectify mistakes promptly with the “Undo” command by pressing “Ctrl” + “Z” (Windows) or “Cmd” + “Z” (Mac).
Cursors and Visual Cues with the Pen Tool:
When using the Pen Tool in Adobe Illustrator, paying attention to different cursors and visual cues is essential for precise design. Understanding these cursors and visual cues helps you use the Pen Tool effectively. Here’s a simple guide:
Pen Tool Cursor:
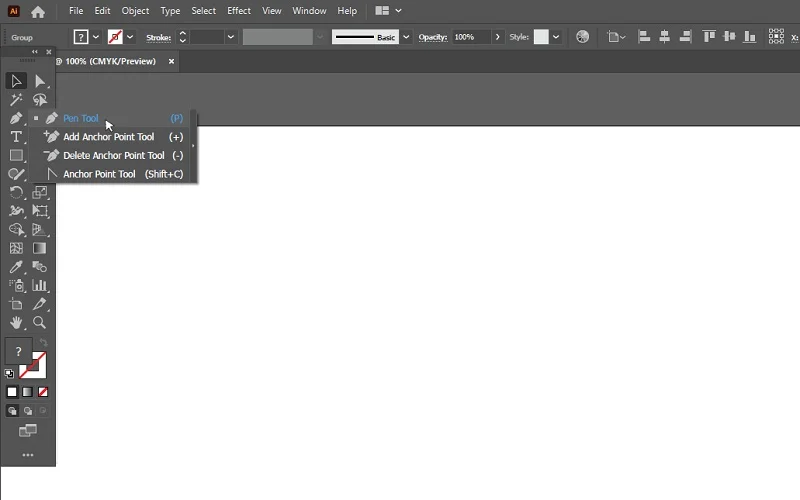
Look for a small pen nib icon. This is your Pen Tool cursor, indicating the tool’s position.
Adding Anchor Points:
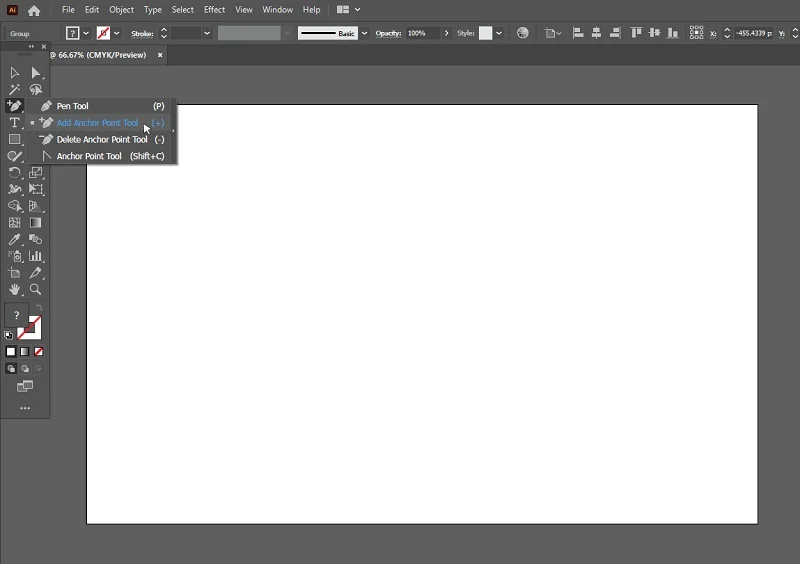
Cursor shows a small plus sign (+) when adding an anchor point.
Click to place a new anchor point on your path.
Deleting Anchor Points:
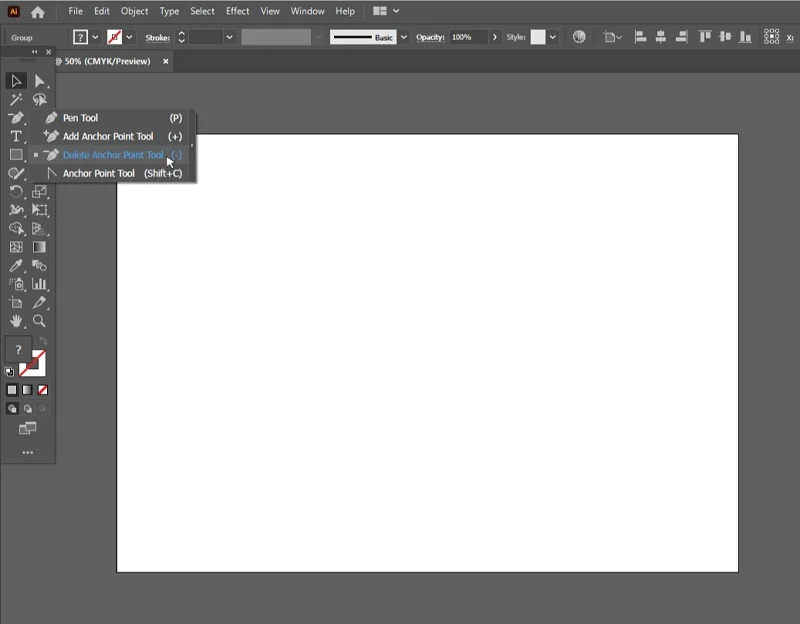
The cursor displays a small minus sign (-) when positioned over an anchor point.
Click on an existing anchor point to remove it.
Converting Anchor Points:
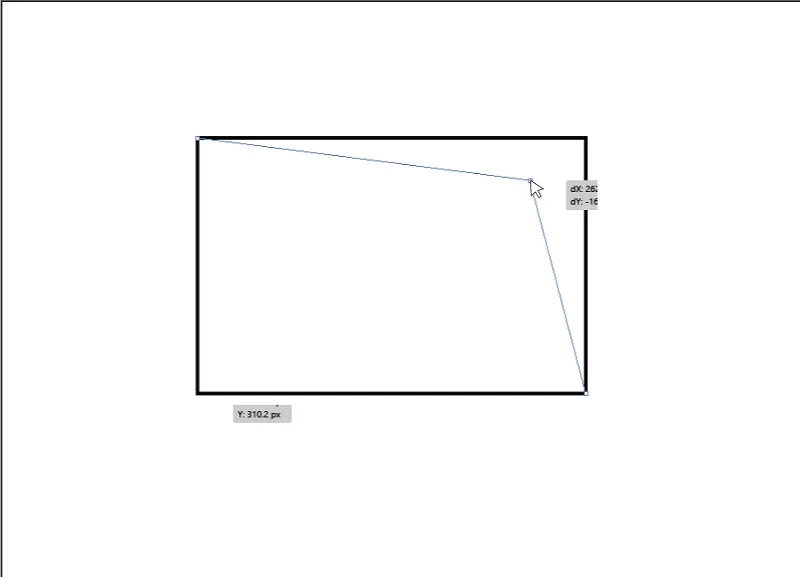
When hovering over an anchor point, the cursor becomes an angled double-headed arrow.
This signals that you can convert the anchor point between smooth and corner.
Creating Curves:
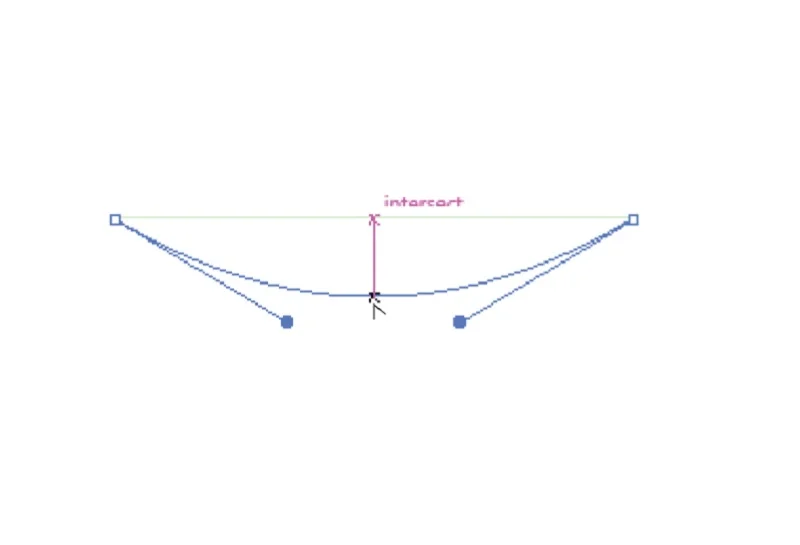
While dragging to create a curve, the cursor shows direction lines and anchor points.
Adjust the length and angle of the direction lines to shape your curve.
Preferences and Settings:
Certainly! Here’s a brief description for Preferences and Settings related to adjusting anchor point and handle display, as well as setting tolerances for selection and snapping:
Adjusting Anchor Point and Handle Display Preferences:
You can change how little dots (anchor points) and lines (handles) look in the program. Make them bigger, change colors, or pick a style you like. This helps you see and do your design work more easily.
Setting tolerances for selection and snapping
When you’re designing stuff on a computer, you can change two important things. First, there’s how easily you can pick things. It’s like deciding if you want to grab exactly what you’re pointing at or if it’s okay to accidentally grab things nearby.
Then, there’s how things stick together when you move them. You can decide if they should neatly line up with other stuff or just do their own thing. These settings help you make your design look just right by deciding how things fit together.
Troubleshooting Common Issues:
Undoing Unwanted Actions:
Press Ctrl + Z if you’re on Windows or Command + Z on a Mac. This will undo the last action you performed. To undo multiple actions, repeat the shortcut (Ctrl + Z or Command + Z) for each step you want to revert.
Correcting Mistakes with Anchor Points and Handles:
Select the Direct Selection Tool by pressing the “A” key on your keyboard. Click on the anchor point or handle that requires adjustment. The selected point or handle will be highlighted. After selecting, reposition the anchor point or handle as needed. Drag it to a new position for corrections.
Dealing with Looped Paths and Extra Anchor Points:
Zoom in for a closer view of your path. This helps you identify details more precisely. Use the Direct Selection Tool (shortcut: A) to select and delete unnecessary anchor points. Click on the extra point, then press the Delete key. To maintain a smooth path flow, adjust the remaining anchor points and handles as needed. Click and drag them to create the desired path shape.
Tips for Precision
Certainly! Here are tips for achieving precision with the Pen Tool in Adobe Illustrator:
Zoom in When Needed:
Why: Enlarge your view to focus on specific details.How: Use the zoom tool or press “Ctrl” + “+”/“-” (Windows) or “Cmd” + “+”/“-“ (Mac) to zoom in and out.
Snap to Guides and Grid:
Why: Ensure accurate positioning and alignment.
How: Activate “Snap to Grid” or “Snap to Guides” in the View menu.
Numeric Input for Precision:
Why: Enter specific values for precise dimensions.
How: Input values when creating shapes or adjusting anchor points.
Use Direct Selection for Fine-Tuning:
Why: Achieve granular control over anchor points and handles.
How: Press “A” to select the Direct Selection Tool and make detailed adjustments.
Employ Smart Guides:
Why: Receive on-the-fly measurements and alignment cues.
How: Enable Smart Guides in the View menu.
Practice Smooth Movements:
Why: Develop a steady hand for smoother path creation.
How: Regularly practice drawing curves and lines to improve control.
Implementing these tips will significantly enhance your precision when working with the Pen Tool in Adobe Illustrator, allowing you to create more accurate and refined designs.
Conclusion
In short, we’ve explored how to use the Pen Tool in Illustrator, learning how to create shapes and use features like adjusting curves. We’ve also talked about fixing common issues with the Direct Selection Tool and using handy keyboard shortcuts. For your journey ahead, practice is key! Don’t worry if it feels tricky at first—getting better takes time. Try different shapes, play with shortcuts, and make your designs better. Adobe Illustrator is a big creative space, and the Pen Tool is your special tool for making cool art. So, keep practicing, stay curious, and have fun creating awesome pictures.
FAQ’s:
How do I start using the Pen Tool in Illustrator?
To start using the Pen Tool, select it from the toolbar (it looks like a pen). Click on the canvas to create anchor points for straight lines or click and drag to make curves.
Can I edit a line or shape after using the Pen Tool?
Yes, you can! Click on an anchor point to move it, or adjust curves by dragging the handles. Use the Direct Selection Tool (white arrow) to select and modify individual anchor points.
How do I close a shape with the Pen Tool?
To close a shape, click on the starting anchor point after creating the desired shape. A small circle appears next to the cursor to indicate closure.
Is it possible to delete a part of a path I created with the Pen Tool?
Absolutely! Use the Direct Selection Tool to select the anchor point you want to remove, and press the Backspace or Delete key.
Can I draw both straight lines and curves with the Pen Tool in one shape?
Yes, you can combine straight lines and curves in one shape. Click for straight lines and click and drag for curves. Experiment with different combinations to achieve your desired design.
Related Blog

