
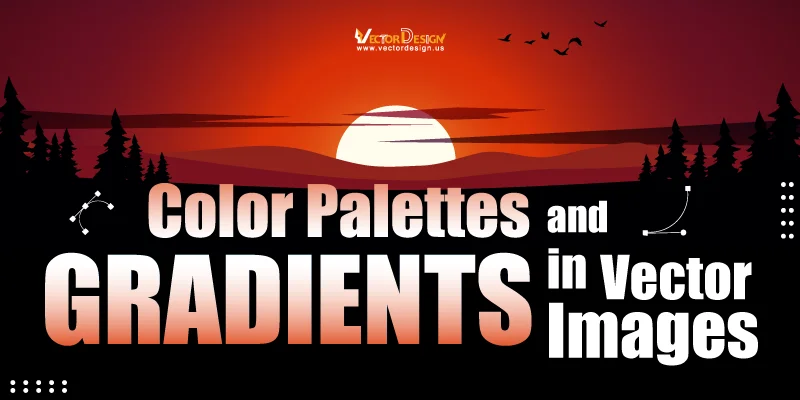
In the enchanting process of vectorizing an image, we not only transform pixel-packed wonders into sleek vectors but also infuse them with a burst of vibrant color. Today, we will explore two cool things – color palettes and gradients in vector images – and understand why they are super important in making things look awesome. Color palettes are like sets of crayons we use to color pictures. In vector images, groups of colors are chosen to make the designs look nice. Think of it like picking your favorite colors before painting a picture. Gradients are when colors smoothly blend into each other, like a sunset where the sky changes from blue to orange. In vector graphics, gradients make things look more interesting and give a feeling of depth.
Now, let’s talk about gradients. Picture a sunset where the sky goes from bright orange to deep blue – that smooth transition is a gradient. In design, gradients are like these smooth color blends. They make things look fancy and add a bit of magic to the picture. Whether it’s a background that goes from light to dark or a cool logo with a smooth color shift, gradients make designs pop.
Color Palettes in Vector Images:
Now, let’s dive into the colorful world of color palettes to see what is it and how they make our designs even cooler!
Explanation of Color Palettes:
A color palette is like a special set of colors chosen for a picture. It’s not just any colors; it’s the perfect mix that goes well together. Imagine picking your favorite crayons before drawing – that’s creating a color palette for a picture. Colors can make us feel different things, like happy or calm. Color palettes help us tell a story with feelings. For example, warm colors (like red and yellow) can make a picture feel lively, while cool colors (like blue and green) might make it seem calm. It’s a bit like choosing the right music for a movie – the colors in a palette help create a certain mood or feeling in your picture. So, picking the right colors is like adding the perfect soundtrack to your visual creation.
Types of Color Palettes:

Choosing colors is like selecting ingredients for a tasty dish, and just like recipes, there are different ways to mix them up! Let’s explore the various types of color palettes—
- Monochromatic: Monochromatic color palettes stick to one color but use different shades and tones of that color. It’s like using light blue, medium blue, and dark blue in a picture.
Example: If your favorite color is green, a monochromatic palette might include light green, regular green, and dark green.
- Analogous: Analogous color palettes use colors that are next to each other on the color wheel. It’s like choosing colors that are buddies. For instance, blue and green or red and orange.
Example: If you’re designing a sunset, an analogous palette might include shades of orange, pink, and red.
- Complementary: Complementary color palettes use colors that are opposite each other on the color wheel. It’s like picking colors that stand out because they’re so different.
Example: If you want to make something pop, you might pair blue and orange together in a complementary palette.
- Triadic: Triadic color palettes involve three colors evenly spaced around the color wheel. It’s like making a triangle with your chosen colors.
Example: For a more calming and nature-inspired palette, choose green, purple, and orange. These colors, evenly spaced around the wheel, evoke a sense of balance and tranquility, perfect for nature-themed illustrations.
- Tetradic: Tetradic color palettes use four colors together, in the form of two complementary color pairs. It’s like creating a rectangle with your chosen colors on the color wheel.
Example: If you combine blue and orange with green and red in a tetradic palette, you get a set of colors that complement each other in pairs.
Creating and Choosing Custom Color Palettes:
Creating and choosing custom color palettes is a bit like being an artist with a palette of paints. Use the tools to play around, trust your feelings about what looks good, and enjoy making your design colorful and exciting.
Tools and methods for creating custom color palettes: To get started, you can use color pickers in design software or online tools to choose the exact colors you like. Experimenting with gradient tools helps you blend colors smoothly, similar to creating a beautiful sunset with different shades. You can also find inspiration in photos or artwork you love by extracting colors from them.
Considerations for selecting effective color schemes: Now, when it comes to choosing the right colors, think about the mood you want your design to have. Colors can make people feel different emotions, so pick the ones that match the feeling you want. Also, consider who will see your design and where it will be used. Bright and lively colors might be great for kids, while more subtle tones might be better for a serious setting. Make sure there’s enough contrast between colors. To keep things simple and clean, limit the number of colors you use in your palette.
Gradients in Vector Graphics:
Let’s take a colorful plunge into the world of color palettes and gradients, exploring how these magical elements turn our designs into something extra special:
Definition and purpose:
A gradient is like a gentle color change in a picture. Instead of one solid color, it smoothly goes from one color to another.
Gradients make pictures look more interesting by adding a sense of depth. It’s like when the sky changes from light to dark during a sunset –it adds a cool effect. In drawings, gradients help make things look more real and lively.
Types of gradients:
Each type of gradient adds its flair to designs, offering flexibility in creating different visual effects. It’s like choosing the shape of the blending in your picture – straight, circular, angular, or even diamond-shaped. Let’s explore:
Linear gradients:

Linear gradients are like a color transition in a straight line. Instead of colors blending in a circle or other shapes, they smoothly shift from one side to another, creating a straight, even change.
Example: Like a sunset where the sky changes from one color to another in a straight line.
Radial gradients:

Radial gradients are like colors spreading out from a center point in a circular or radial pattern. Instead of a straight-line transition, the colors blend outward, creating a circular effect.
Example: Similar to a spotlight where colors blend outward from a central point.
Angular gradients:

Angular gradients are like colors blending in a circular or pie-shaped pattern. Instead of a straight line or a full circle, the colors transition in slices, creating an angular effect.
Example: Think of a target with rings of different colors emanating from the center.
Diamond gradients:

Diamond gradients are like colors transitioning in a diamond-shaped pattern. Instead of a circle or a straight line, the colors smoothly change, forming a unique diamond effect.
Example: Imagine colors smoothly changing from the center outwards, forming a diamond pattern.
How to Create and Apply Gradients in Vector Graphics?
Creating and applying gradients in vector graphics can add depth and visual interest to your designs. Here’s a step-by-step guide:
Creating Gradients:
- Open Your Vector Software: Launch your vector graphics software, such as Adobe Illustrator or Inkscape.
- Draw or Select an Object: Create a new vector shape or select an existing one that you want to apply the gradient to.
- Open the Gradient Panel: Locate and open the gradient panel in your software. In Illustrator, you can find it under the “Window” menu.
- Choose Gradient Type: Select the type of gradient you want. Common types include linear (straight line), radial (circular), and mesh gradients for more complex effects.
- Select Colors: Choose the colors for your gradient. For a smooth transition, you can select two or more colors. Click on the color stops in the gradient panel to set the colors.
- Adjust Color Stops: Drag the color stops to change the position of the colors along the gradient. This controls how quickly one color transitions to the next.
- Set Opacity and Blending Modes: Adjust the opacity of color stops to control transparency. Experiment with blending modes to achieve different visual effects.
Suggested Article-How to Make a Gradient in Photoshop
Applying Gradients:
- Apply to Objects: Select the object you want to apply the gradient.
- Drag Gradient onto Object: Drag the gradient from the gradient panel onto your selected object. The gradient will be applied based on the direction and type you set.
- Adjust Gradient Handles: If using a linear gradient, you can adjust the handles on the object to change the direction and length of the gradient. For radial gradients, you can adjust the center and size handles.
- Fine-Tune Gradient Appearance: Use the gradient tool or the gradient panel to fine-tune the appearance of your gradient. You can add or remove color stops, adjust their positions, and experiment with different settings until you achieve the desired effect.
- Save and Reuse Gradients: Some vector software allows you to save gradients for future use. If you create a gradient you like, save it to your library for easy access to other projects.
Tools and Techniques for Color Management:
In design, maintaining consistent and appealing colors is key. Let’s explore two essential aspects of color management: Color Swatches and Libraries, and Global Colors.
Color Swatches and Libraries:

Color swatches are like a palette of pre-selected colors that you can easily pick and use in your designs. Libraries are collections of swatches that you can save and reuse across different projects.
Example: If you have specific brand colors, you can save them as swatches in a library. This way, you maintain a consistent color theme throughout your brand materials.
Global Colors:

Global colors are like master colors that, when changed, automatically update all instances in your design. It ensures consistency and makes it easy to tweak colors globally.
Example: If you decide to change the shade of blue used in a logo, using global colors ensures that all instances of that blue are updated instantly across your design.
Impact of Color and Gradients on User Experience:
Color and gradients play a big role in how users feel and interact with designs. Let’s explore how:
Psychological Aspects of Colors: Colors evoke emotions and influence user perception. Warm colors like red and orange can create excitement or urgency, while cool colors like blue and green often convey calmness and trust. Understanding the psychological impact helps designers make intentional choices that resonate with users.
Example: A travel website might use blue and green tones to convey a sense of tranquility and reliability, making users feel more at ease when planning their trips.
Influence of Gradients on Visual Flow: Gradients guide the viewer’s eye through a design. Whether subtle or bold, gradients create a sense of depth and direct attention. They can lead users through a webpage or draw focus to specific elements, enhancing the overall user experience.
Example: A social media app might use a gradient to subtly highlight notifications, guiding users to the most relevant and engaging content.
Case Studies on Successful Implementation:

Examining real-world examples demonstrates the effective use of color and gradients in improving user experience. Case studies showcase how thoughtful color choices and gradient applications contribute to brand identity, user engagement, and overall satisfaction.
Example: Instagram:
Objective: Foster user interaction and content discovery.
Implementation: Instagram incorporates a simple and clean design with a distinctive gradient in its logo, transitioning from purple to pink. The use of gradients subtly communicates innovation and creativity. The color choices aim to evoke positive emotions and make the platform visually appealing.
Result: The recognizable gradient logo and carefully chosen color scheme contribute to a positive user experience, encouraging users to explore and share content.
Tips for Effective Use of Color Palettes and Gradients in Vector Images:
Designing with colors and gradients can be a lot of fun, but there are some tricks to make your vector images look even better:
Consistency: Maintain a consistent color scheme throughout your design to create visual harmony. Consistency helps establish a cohesive and professional look.
Example: If your logo uses specific colors, carry those colors consistently across various elements in your vector image.
Balance: Achieve a balanced distribution of colors. Avoid overwhelming the design with too many vibrant hues or creating monotony with a lack of variation.
Example: If you have a bright and bold color as a focal point, balance it with more neutral tones to avoid visual overload.
Consider the Purpose: Tailor your color choices to the purpose and message of your vector image. Different colors evoke different emotions, so align them with the intended tone.
Example: For a nature-themed illustration, use calming greens and blues to convey a serene atmosphere.
Test in Different Sizes: Colors may appear differently at various sizes. Test your vector image in different sizes to ensure that the colors maintain their impact and readability.
Example: A logo with intricate gradients might lose detail when scaled down, so adjustments may be needed for smaller versions.
Use Color Theory: Understand basic color theory principles, such as complementary and analogous colors, to create visually pleasing combinations. Color theory guides you in selecting colors that work well together.
Example: Applying an analogous color scheme to a vector illustration of a sunset, using variations of warm tones, creates a cohesive and pleasing visual effect.
Conclusion
So, to wrap it up –making pictures with vectors, choosing colors, and using gradients is like telling a story. Colors set the feelings, like happy or calm, and gradients add a cool effect, guiding how we look at the picture. Remember, colors should work together, and gradients make things look real and interesting. Keep your colors in check, test them in different sizes, and use the color wheel tricks you’ve learned.
But here’s the fun part, don’t be afraid to be creative! Designing with vectors is like being an artist. So, explore, try new things, and let your designs be a colorful adventure. Happy designing!


