
Photography is the most common hobby or passion these days. And not only that, it is a ‘real job’ now. So, if photography is your passion, you can think of turning it into your profession. And for that, you can start today, even if you do not have a DSLR camera. Start smartphone photography and to get the initial ideas, read out this smartphone photography tips-related content.
At least you have a smartphone, right? If yes, start with that. Smartphone cameras are getting upgraded day by day with a lot of cool features. Now you can hope to get professional quality photos with your phone camera. So what are you waiting for?
Smartphone Photography Tips
To help you understand smartphone photography better, we have listed 50 tips for beginners in this article. Go through all of them to explore.
Understand Your Camera Setting:
Before jumping into the world of photography with your Smartphone, the most important thing to do is to understand your camera. You have to check every feature of it. No matter which brand you use or how expensive it is, if you do not know your phone, nothing will work well.
So we request you to read the settings and take a lot of sample photos to understand the camera better. Besides, try to know your phone as well. Know the shortcuts and the easiest way to reach the camera so that you do not miss any moment worth capturing.
Know Some Basics:
This tip is for all beginner photographers. When you are thinking of clicking photos a bit seriously, it is better to know about some basics. There are many factors and features that work in a camera. If you can master them, you can hope to get professional quality photos using your phone camera. Such as adjusting the ISO, maintaining the Shutter speed, white balance, sharpness, etc.
Steadiness is Important:
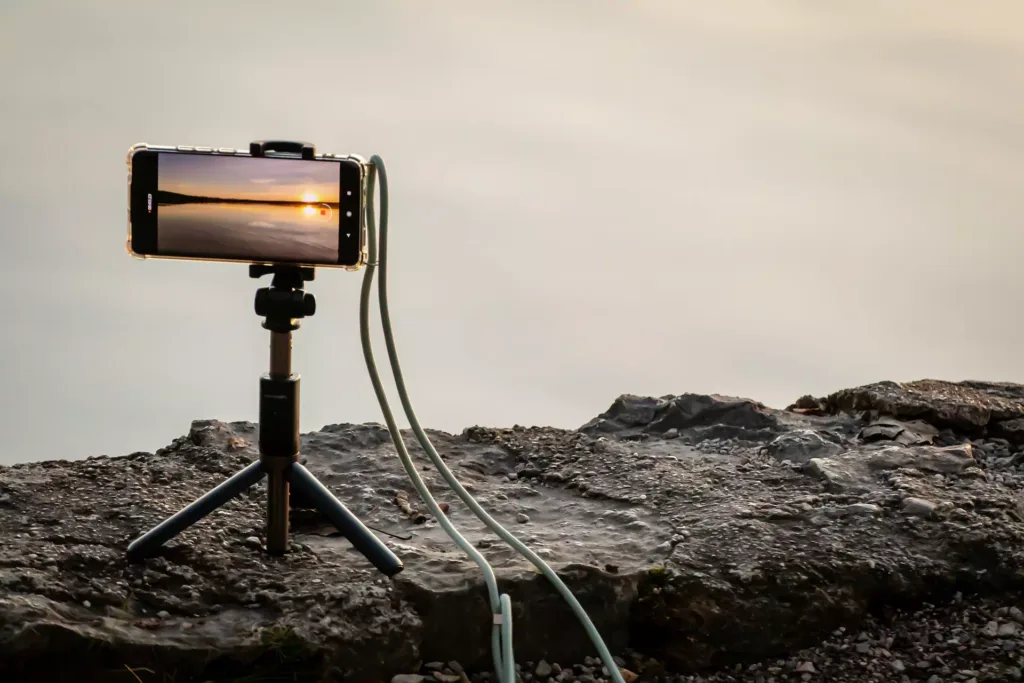
To avoid unnecessary blurry photos, the camera needs to be super steady. Often in lower lights, the photos end up getting blurry. Because in lower lights, the camera uses a slower shutter speed and the blurriness becomes more noticeable.
But it does not happen in bright lights as the camera maintains a fast shutter speed in such conditions. So, if you often take photos in lower lights and face problems of blurriness, you have to work on it.
You can invest in a tripod that will solve the problem effectively. But if you do not want to buy a tripod, there are many other ways to solve it. You can use both of your hands to avoid shaking or keep the phone against any solid surface.
Use Portrait Mode:

Using portrait mode has some amazing benefits. With the mode, you can hope to get a clear and sharp picture of the subject in the foreground. As in the portrait mode, the background gets blurred automatically the foreground gets sharper and clearer. It gives the perfect blurry background just like the DSLR does. For isolating the subject from a noisy background, portrait mode is the best solution.
Keep the Lens Clean:
It is a must-do thing. You cannot expect your photos to be flattering when there is dust, dirt, and finger-marks. As our phones stay in our hands, pockets, and all those wired places, it gets dirty too often. Often those debris, dirt, and dust go into the lens.
That is why it is necessary to keep the lens clean. But do not be too harsh. Use a soft microfiber cloth or a lens cloth to wipe it gently. Using isopropyl alcohol in the right ratio is super effective for cleaning the camera lens.
Keep the Camera Scratch-free:
Along with keeping the lens clean, you should be careful about any external scratches to the phone camera. To prevent any unwanted scratch, you can use a good quality back cover which will keep the camera protected from any friction. Never use anything harsh to wipe the camera. And also do not touch it often.
Present a Certain Perspective:

We are not trying to tell you that a Smartphone camera is 100% compatible with a DSLR camera. But the point is- maybe you cannot change the capacity of the camera much but you can focus on the subject of your photography. Keep a thoughtful perspective and compose it mindfully. Your photos will be eye-catching and attractive only by the way of their composition. Try capturing different subjects with different perspectives.
Shot More to Learn More:
It is a no-fail and must-do rule for beginners. You have to take a lot of photos to practice. But do not do it randomly. Keep changing the subjects, lights, angles, and perspectives. Experiment on which time of the day is providing the right amount of natural light for you.
Practice will help you figure out what is working the best for your camera. It will increase your skills too. So there is no alternate way except to practice more and more.
Learn to Use Phone’s Flash:
Every Smartphone has got an in-built flash for the camera. But it is the trickiest thing in photography. Sometimes it leaves a blue tint and creates red eyes. Besides, it can create unnecessary reflections. If you really want to use a flash, experiment with it. Take some photos with the flash and some without it. Then you can understand the difference and the way it is working.
Experiment with Distance:
Maintaining the perfect distance is important in photography. Depending on the subject, you have to choose how closely you will take the shot. For example, if you get an overwhelming background and want to keep it in the photo, capture it from a bit distant position. But if the background is not attractive and you want only to show the subject, take a close shot.
Besides, you can also experiment with the distance. Take photos from different distances to discover what is working well for the subject.
The Rule of Third:
The Rule of Thirds is one of the few important things you need to learn if you want professional quality composition in photography. It is basically a composition structure where an image gets divided into 9 segments by 3 vertical and 3 horizontal lines.
The benefit of maintaining the rule is to keep the subject the focus of attraction. Thankfully, smartphones give you the option to do it. So don’t ignore it. For a better composition, maintaining the rule of third is a safe play.
Use Gridlines:
Gridlines is actually an outcome of the Rule of Thirds. If you turn on the gridlines, based on the rule, your photos will get split into 9 sections. You only need to go to the settings to find out the option and turn it on.
It gives the photos a more balanced and even look. If you place your subject into the sections, the photo will come out much better and more balanced.
Use a Selfie Stick:
A selfie stick is handy and easy to carry. It is cheap as well compared with other tools. It has got huge popularity for selfies as the background comes better with it. Not only a selfie, but you can also use it for taking other sorts of photos. You can get better steadiness with it if you can master it with practice.
Self Timer:
The self-timer is a great option for taking self-portraits with a Smartphone camera. Using it is simple and does not require any special skill. Not only for portraits, but you can use them for other subjects as well. Even it works well for outdoor photography. All the phones have it in the camera settings. There are 3 seconds to 10 seconds time duration in the timer.
Get some Lenses:
If you want professional-quality photographs from your smartphone, you can invest in some good-quality lenses. Before buying the lens, you must think about certain things. Ask yourself what kind of photos you want to shoot? Is there any particular type that you want to go for? Depending on that answer, you have to choose lenses. There are macro lenses, wide-angle lenses, telephoto lenses and so on which can help you to take your photography to the next level.
Use the Natural Lights:

It is always good to use the natural lights as much as you can get. Natural light makes the photo much more attractive and definitely more natural. But natural light does not mean harsh sunlight which can ruin all your efforts. There are some specific times when the light is perfect for photography. Keep reading to explore.
Use the Golden Hour:

The golden hour is the time just after sunrise and before sunset. These times the sun gives a soft and warm glow as it stays low on the horizon. Depending on your location, you can get such lights for 15 minutes to half an hour. It gives less contrast and makes the photo evenly exposed. Besides, you get softer and longer shadows which add more excellence to the photos. Many websites can help you to track the time duration of the golden hour on your location.
Use the time to capture a landscape or even portraits. This ‘magic hour’ goes perfectly well with such subjects.
And the blue hour:

Blue hour refers to the time before sunrise and after sunset when the sun is below the horizon. These times give a much cooler tone and soft hue in the photos. As it does not last very much longer, you have to keep yourself ready for the time. Take help from those websites that can help you track the time.
Blue hour is best for capturing natural elements like mountains, sky, sea beach, forest, and other landscapes. Don’t capture moving subjects as you might end up getting blurry photos because of the slow shutter speed.
Use Artificial lights:
When you do not get enough natural lights, go for artificial lights instead. It is helpful for indoor photography as well. There are plenty of lighting accessory options available for the Smartphone. You can go for portable LED lights, ring lights, flashlights, and many more to include. So consider investing in any of the lighting tools to get high-quality images from your Smartphone.
Motion blur technique:

Motion blur is a technique of photography where the background gets blurred and the subject gets a dynamic look. It is possible to do the technique with your smartphone.
To create this effect, you have to slow down the shutter speed. This way your camera will be able to detect the moving object. Also, keep the ISO number low. If you have a tripod, use that in this technique. This is how you can capture the perfect motion blur image with your smartphone.
Long Exposure techniques:

Another cool photography technique is the long exposure. It is basically about keeping the shutter open for a long time.
Like the motion blur technique, this one also can be shot with a smartphone. For that, you just need a tripod because a little shake of your hand will ruin the effort. Now you need to switch to the ‘manual’ or ‘pro’ mode. Keep the ISO low and shutter speed slow (20-30 seconds) with a small aperture (f/22).
With this technique, you can take the photos of starry nights, star trails, cloudy water, and many more other amazing things.
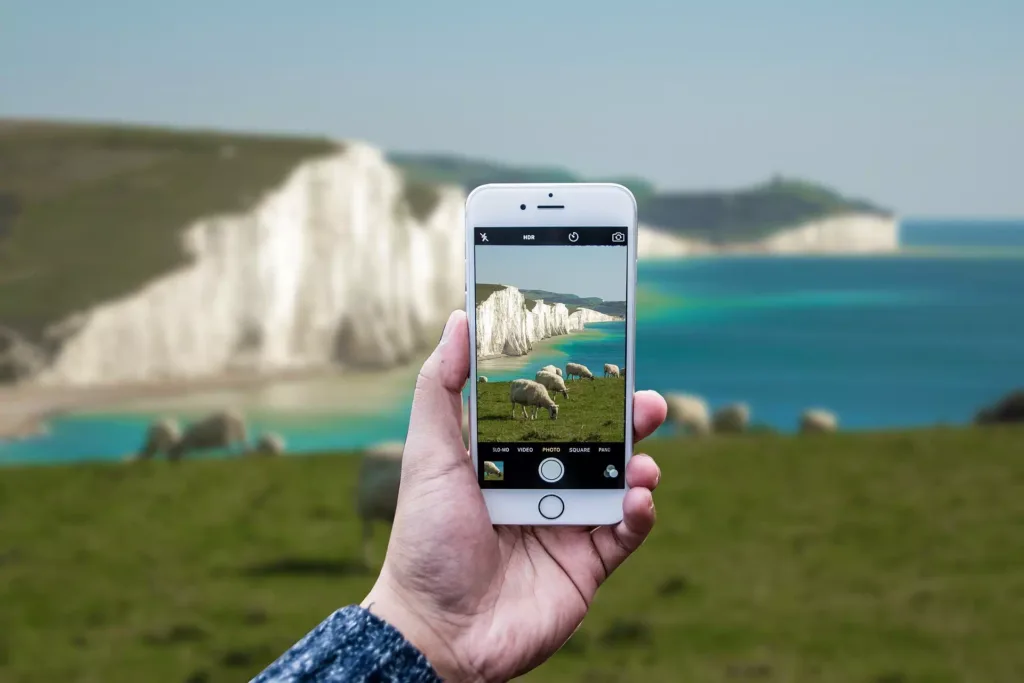
Use HDR:

HDR or High Dynamic Range is a common feature for all smartphone cameras. It makes your photos brighter and more flattering. But do not use it always. When your photos are coming out darker for too much backlight, you can use HDR to minimize it. You can use it more in landscape photography as it can adjust the color contrast perfectly. Besides, it goes well with portrait photography when there is too much sunlight.
Use the Negative Spaces:
Negative space means the empty spaces around the subject. Keeping this space in the photos makes them an excellent composition. Negative spaces help the subject to pop more and do not create any distraction to the eyes. The sky is a great element as negative space. Besides, you can use other elements like an empty field, wall, water, and many more other things to create the negative space in your photos.
Get help from a Camera App:
If you are not much satisfied with your phone’s default camera, you can get a better one from the app store. Choose an app that has all the features you need for photography. Check its settings and features. There should be gridlines, timer, flash, customizable exposure, ISO, and shutter speed. Never stick to one app until you get the perfect one for your photography.
Avoid the Digital zoom:
While the advanced optical zoom can do a little better for your photography, digital zoom can ruin it. So it is wiser to avoid the digital zoom function. It makes the photo unclear and grainy. Instead, capture the subjects as close as possible. If your phone has an optical zoom option, you can go for that in inevitable situations. But the digital zoom should better be avoided.
Try out different angles:

Most of the photos are taken from chest height and they all look more or less indifferent. But you can effectively change the way your photos look by experimenting with different angles. Try different positions like kneeling, crouching, sitting, or lying on the ground while taking the picture. Photos taken from a low height make the subjects look bigger and straighter.
Look at the sample photo, if it was taken from chest height, it would not look this way. That is the difference you get with different angles.
Concentrate on the Lines:

Did we say to you that composition is the soul of photography? Well, you have to know that a confused composition delivers no message to the people. So you have to show them what you are presenting. That is why concentrating on leading lines is necessary.
It is a good way of composing photos. Use staircase, roads, or bridges as a leading line of the photo- composition. As if they are leading the eye in a certain direction. It makes the photo much clearer in its perspective and message.
Try Burst Mode:
When you are taking photos of any moving object, use the ‘burst mode’ feature. Clicking single shots can give you blurry photos. But with burst mode, there is no such risk. Rather you will get some photos that are flawless and perfect.
In simple words, it is a technique of getting multiple photos with only one click. Also, using the feature does not require any special skill.
Manually set the Focus:
Nowadays smartphones have an auto-focus feature which may seem good. But for a better result, you should set the focus manually. It is super easy and simple. Just click on the screen where you want to focus. Your camera will do the rest. This way you can get a perfectly focused picture of your subject.
Shoot in DNG Format:
DNG stands for digital negative format. It is developed by Adobe and is considered the most controllable image format. There are many benefits to shooting in DNG instead of the RAW format. First of all, it has a smaller file size which means you can store more images on your device. Also, most of the editing software support DNG file. And unlike RAW files, when you will edit them, they will be saved as DNG saving a lot of space.
Shoot from the Eye Level:

Yeah, shoot from eye level when you are taking portraits of someone or something with low heights. Otherwise, the angle will get messed up and so is the photo. That is why it is important to maintain eye level.
Another thing is- that when you do not maintain the level, there comes a lot of unnecessary things in the photos from the surroundings. So, do not make the mistake.
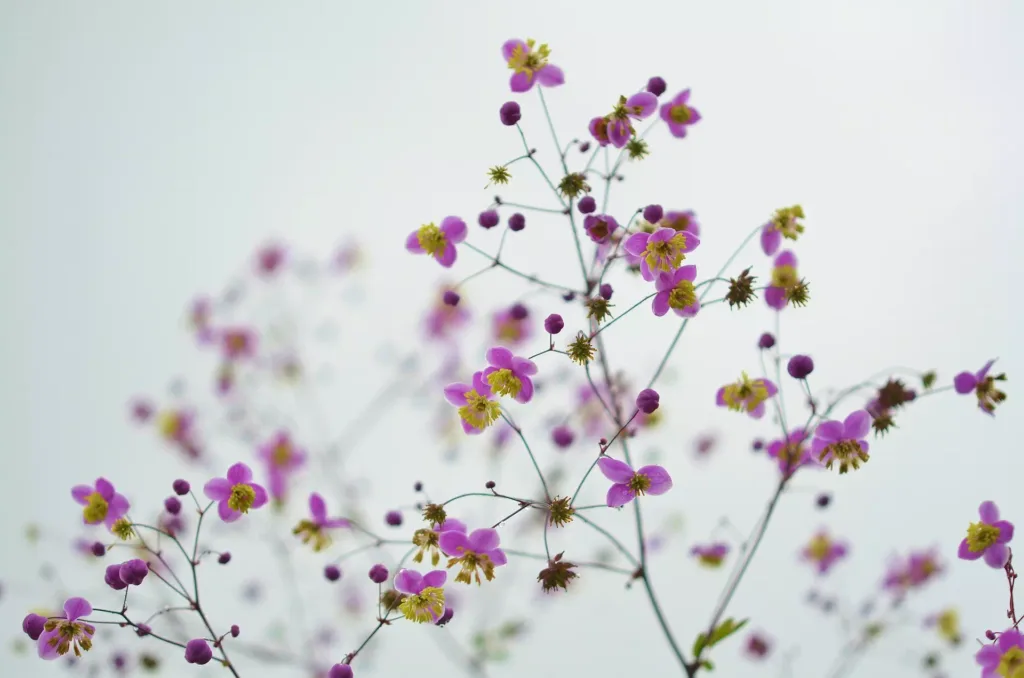
Add Creativity While Composing:

An easy way to add a different touch to your photography is to be creative while composing it. It is not anything complex. You only need to have the right eye to create more aesthetic and brilliant photos. Color contrasting, and height management of the subject should be handled carefully. Do not use anything with your main subject that can distract the eye.
Look at the sample picture given here. The photographer has used a pink rose with the teacup. Both of them are complementing each other with their colors.
Keep the Horizon straight:

Maintaining a straight horizon line is a crucial thing in landscape photography as well as other outdoor photography. The uneven and crooked line can make the photo less attractive and disturbing on the eyes. To keep the line straight, you can rely on your eye capacity or take help from grid function to level the horizon line with the gridlines.
Take closer Shots:

In Smartphone Photography, try to capture the subjects from a bit close. It will make your photos better without much effort. Also, there is no need of changing your camera settings if you try this. So instead of going for digital zoom, go close to the subject and take closer shots if possible. Obviously, it is not applicable for a lot many subjects but does not make it a habit of capturing them from distance.
Play with Lights and Shadows:

To grasp the photography more intensively, you can play with different lights. For example, try candles, fairy lights, bulb etc to see how they are working for the images. It will help you understand the lighting techniques which are one of the most important skills for photography.
Along with playing with lights, try out experimenting on shadows. Sometimes shadows make your photography subjects more attractive and mysterious. It sets an entirely new perspective. See how any light is contributing to forming shadows. You will learn a lot of things through experimenting with these elements.
Take the photo in different format:
Sometimes depending on the subject, you can take the same photo in both portrait and landscape format. Different formats bring out different perspectives from the subject. You can keep the better one afterwards. But never leave the location without shooting in different formats, if you don’t want to regret it later.
Look for Interesting Subjects:

As a beginner, you can focus more on the photography subject rather than stressing much about technical matters. Look for meaningful and colorful subjects. Use the natural light and natural settings. If you trust us, a raw, unfiltered photo has a different appeal in it. So never lose the chance of capturing the beautiful, peculiar, wired, funny and intriguing things with your phone.
Roam Outside to Explore:

When you are a beginner in Smartphone photography, the best way to practice is to roam outside. It is for finding out different subjects and watching them with the eyes of a photographer. Sometimes a simple thing can look amazing in a photograph if it is composed in that way. So, roam more and explore your surroundings.
Play with reflections:

Reflections do look great in the photos. They show the photographers creativity and skill in the job. So you can master capturing reflections of different objects. Do not stick to the water and water body only. Try out mirrors, glass windows and other objects to capture reflections.
Adjust your phone’s brightness:
The phone’s brightness is a pretty important thing in photography. If it is not at the right level, the photos can get ruined. And the only way to explore how much brightness is working the best is to experiment with it. Take lots of photos with different brightness level to see what is going well with the photos.
Shoot from Above:

When you take any photo from above, the photo comes out with a completely different look. So for a smaller object, you can take the photo from above. Okay, but how much above? There is no specific rule that you must follow. You have to find out yourself experimenting with different height level and different subjects. Sometimes, you may need to take the photo from slightly above but sometimes a bit more. Keep exploring the best one for you.
No shame in Editing:
Yes, there is no shame in editing. And it definitely does not an unfiltered photo is not beautiful. But why not increase it more? Editing makes the photo more vibrant and attractive. There are more than thousands of free photo editing apps that you can download on your phone.
Use such an app to remove any unwanted objects or for some basic retouching as adjusting the brightness, sharpness, contrast, and white balance etc. These will make your photos flawless and stunning.
Get a Waterproof Phone Case:
Yes, there is no shame in editing. And it definitely does not an unfiltered photo is not beautiful. But why not increase it more? Editing makes the photo more vibrant and attractive. There are more than thousands of free photo editing apps that you can download on your phone.
Use such an app to remove any unwanted objects or for some basic retouching as adjusting the brightness, sharpness, contrast, and white balance etc. These will make your photos flawless and stunning.
Use Sunglasses:
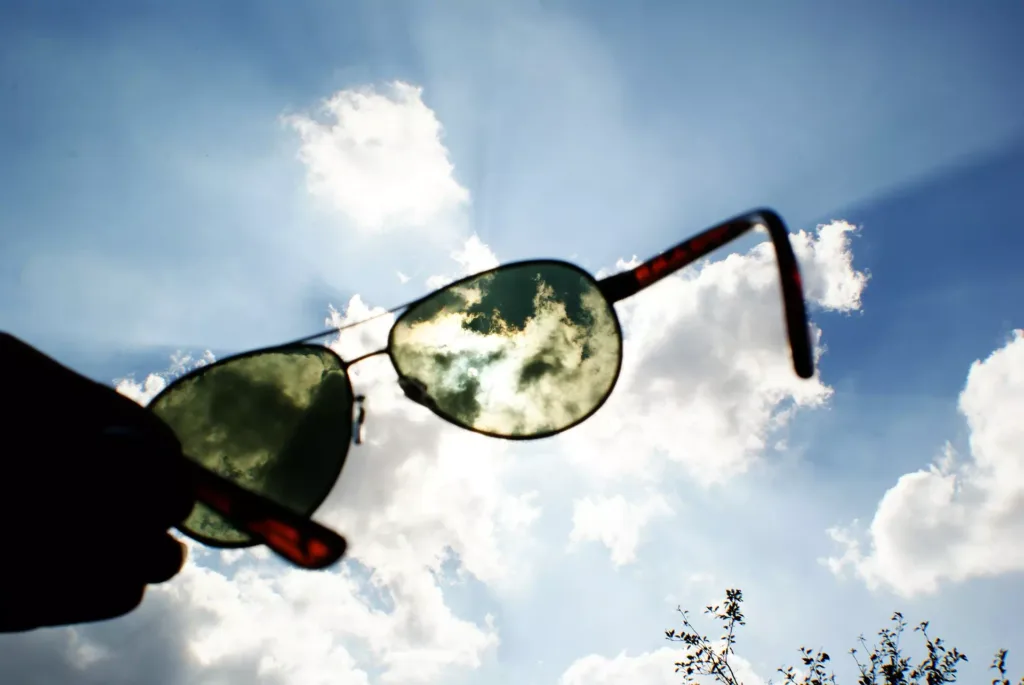
You can even use your sunglasses to shoot amazing photos. Sunglasses are a ready-made soft light provider. Actually, they do not provide light rather they create that look. They work as a filter to soften the harsh sunlight.
So shoot through the sunglass to get warm-toned photos. But be careful with reflection. Otherwise, it will ruin the photo.
Some Candid:

Take as many as candid photos you can because these photos are honest and natural. And as a beginner, starting with candids is a good approach. They help you understand several things about photography and boost your confidence level. With all these benefits, you will get amazing candid photos of your friends and family!
Keep the Phone ready:
You never know when you will find the perfect subject for photography. So it is always good to stay ready. What we mean is keeping the phone ready. Check its battery percentage so that you do not miss anything to capture because of the dying battery. Also, keep a good amount of storage free in the phone to store all those images.
Use the Night Mode:

If you have the ‘Night Mode’ feature in your Smartphone camera, you are one step ahead in photographing at night time. It is a useful feature when you are going to shoot in low lights or at night time. It is adjusted with the right ISO and shutter speed to make the photos looking great without compromising their quality. With it, you can try capturing moving objects as well.
Avoid using in-App Camera:
Many apps allow you to take photos through your camera. For instance, you get it on Facebook, Instagram, Snapchat and many other apps. They may seem convenient and not of good quality. So better you avoid those cameras and take photos with the phone camera. You can definitely upload that later.
Share your Photos:
Never hesitate to share your photos among friends and family. Share them on multiple social networking sites like Facebook or Instagram to receive constructive criticism from people. It will help you in doing better. Also you will be able to understand your flaws as well as the perfections. So share your photos and ask for people’s opinion. Let not any comment de-motivate you.
A Good Phone is Important :
Last but definitely not the least- you must need a minimum compatible phone for taking ‘good’ photos. As a beginner, you can use just the one you have now. But if you want to take your photography to the next level, a good phone is necessary. There are some important things to check in a phone while buying such as megapixel, sensor, aperture, image stabilization etc. Also, good battery life and storage is important.
So, here are our 50 tips for smartphone photography for beginners. Now is the time for you to take your phone and jump into the race.


