

A watermark is a faint design or text pun on an image or design so that other people cannot steal the image without valid consent. Watermark is applied on images during manufacture. It is a hardly visible text or design that the designer can often identify. Though the idea of watermark application has got changed, now people use easily recognizable watermark that helps them brand their business.
Watermark is a crucial element to protect any design or image. It hinders stealing your image from corrupted users. Watermark has also some drawbacks. It will also be an obstacle for you to use your existing images later when you lost the original image file. Usage of an image that has a watermark will be copyright infringement. So, sometimes it becomes necessary to know the way to remove watermarks.
Here we are going to share with you an easy tutorial about how to remove watermark in Photoshop. However, you are going to experience multiple ways of vanishing watermarks from images.
How to Remove Watermark in Photoshop
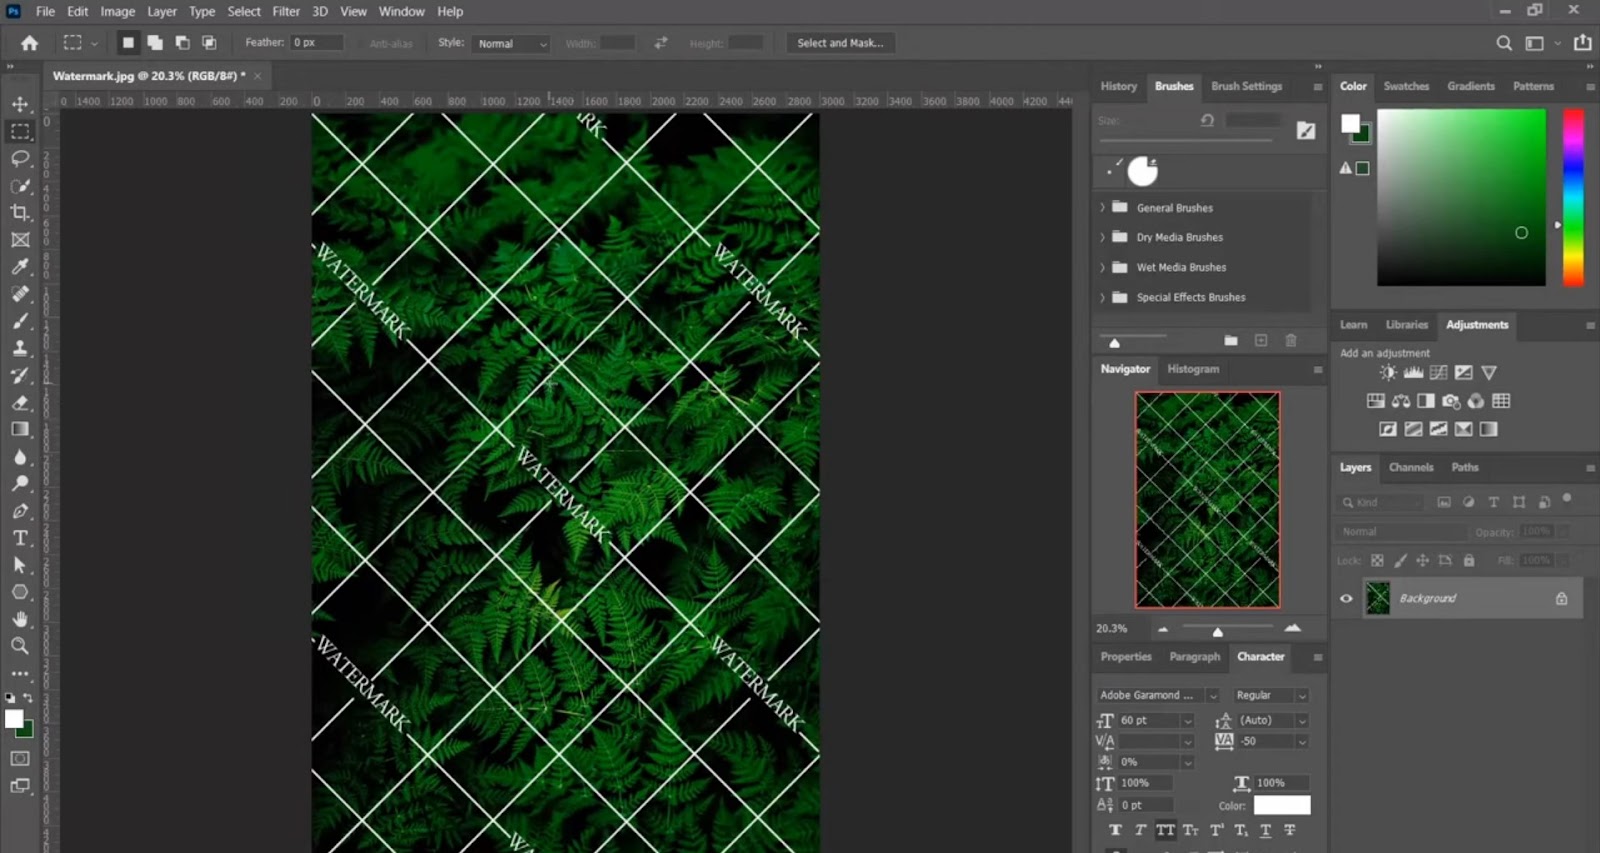
Step 1: Open the image you want to remove the watermark from in Photoshop. Analyze the image if it is deep in color or faded. Consider if the watermark is contrasting the background image or color.
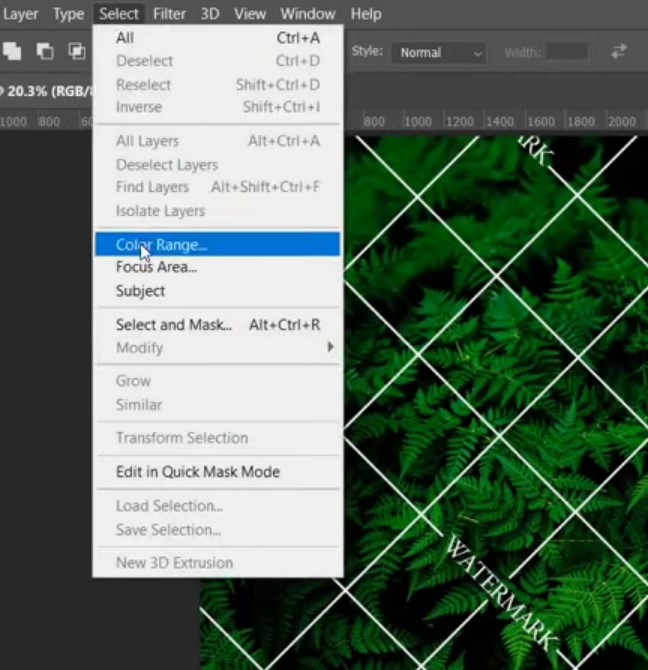
Step 2: Go to Select and click on the Color Range option
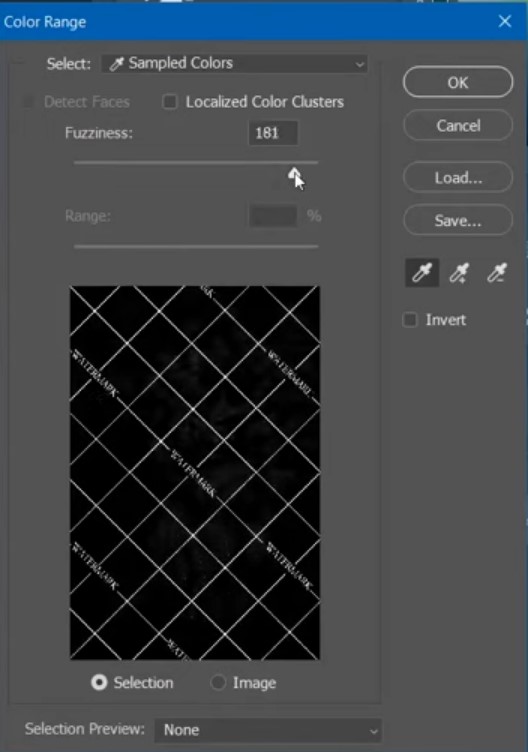
Step 3: Select the watermark by increasing or decreasing the Fuzziness. Look at the image below, we select the watermarks in the image.
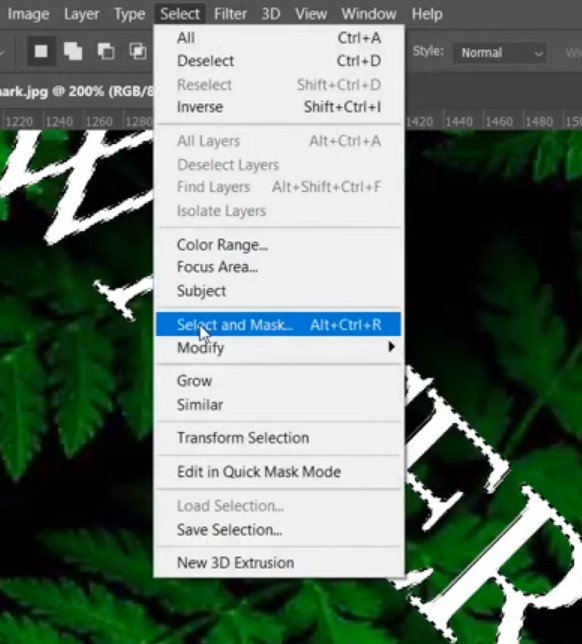
Step 4: Click on OK and get the watermarks that contrast the background. But the image watermarks are selected very sharply. If we now remove the watermarks without further image retouching, we will have distorted marks of watermarks. So, let’s work more on this image.
Step 5: So, now again go to the Select option, click on the Select and Mask. You can find your watermark is in selection containing one or two-pixel backgrounds. It will not remove the marks sharply, rather smoothly.
Step 6: Go to Edit and click on the Content-Aware Fill option and see, the watermark is replaced with the background color.
Step 7: If your image is still selected, press Ctrl+D to deselect.
Step 8: Finally, save the image without the watermark.
Tutorial Credit goes to: https://www.youtube.com/watch?v=-17yZ5hFPA0
This is the simplest way of removing watermark from images in Photoshop. There are other ways to eliminate watermarks. You can leverage multiple Photoshop tools for removing watermarks such as spot removal tools, patch tools, clone stamped tools, brush tools, etc. It depends on when and on what images you will use these Photoshop tools to kick out the watermarks from an image.
Are you searching for a watermark remover?
You can simply contact us– Vector Design Us, Inc. for Photoshop watermark removal.
How to Add Watermark in Photos?
Adding a watermark in Photoshop to a photo is a pretty much easier task than the watermark removal process. Let’s have the knowledge of adding a watermark in an image.

- Open an image in Photoshop.
- Unlock the image and take a new layer. You can take the Text Layer for watermark addition.
- Write your brand name or attach the company logo. Try to add the almost similar color that has in the Background. It will make the watermark erasing process difficult.
- Now reduce the opacity of the watermark layer until it is hardly seen. You can add a blur effect.
- Finally, save the image as a JPG or PNG format or whatever format you need
Thus you can utilize watermark advantage. You can make your images free from stealing.
How to use Content Aware Fill Photoshop
Content-aware fill is one of the most powerful Photoshop tools for modifying an image. If your image contains unwanted objects, people, or even watermarks and you want to remove those, you can use the content-aware fill option. There are other Photoshop methods of removing any objects from an image, but the latest and upgraded way of removing anything from the image is Content-Aware Fill in Photoshop.

- To remove anything from a photo, firstly open the image in Photoshop
- Select the object or mark by various tools like Rectangular marquee tool, pen tool, lasso tool, etc.
- Then click on the Right button from your mouse on the selection. You will get a dropdown.
- Click on the Fill option from the dropdown. You will get the same dialogue box as the above snapshot.
- Select the Content-Aware from the contents option.
- Then press OK.

Look, there is no longer the text ‘Contact’.
Once we click on the OK, Photoshop automatically removes the text. Caution! Content-Aware works better if the object or watermark contrasts with the background. But, in the case of almost similar colors, you have to be more tricky.


