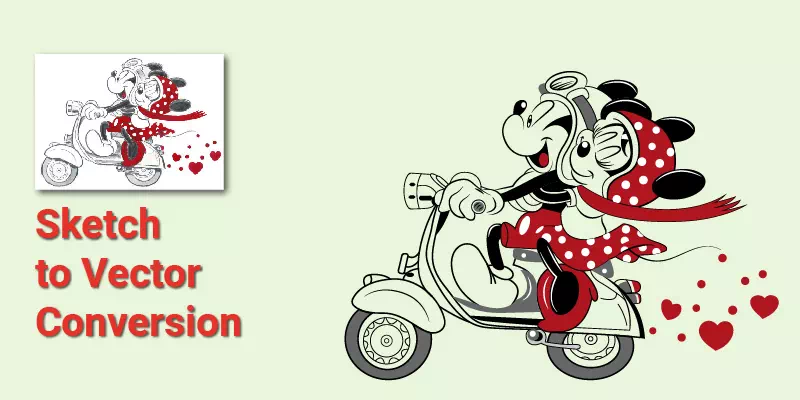
Vector conversion services are the topmost design services in the advertising and marketing industry. To promote products and brand, a company need to get HD quality and distortion-free images in vector files. So, they take raster images or Convert sketch to vector service.
The business companies take sketch design services before producing any product or launching a marketing campaign. Later they take sketches to vector conversion services having a view of their future product shapes and models, marketing and branding elements like product labels, catalogs, brochures, and other ad designs. So, converting sketch to vector is one of the most useful & popular vector conversion services.
How to learn sketch to vector conversion process go through this text tutorial and have an idea of how a professional vector design company converts sketch to vector. One of our vector specialists has created this tutorial. For sure, you are getting a reliable vector conversion tutorial.
If you are a vector conversion service receiver, we also recommend you to read this content so that you can learn how your vector images are created from sketches.
Convert Sketch to Vector
Today, we want to brief a tutorial on the sketch to the vector conversion process in Adobe Illustrator. If you are capable of vector conversion, this tutorial will help you to up your skill. Or if you are looking for vector conversion services, this blog helps you understand the process that’s why you will justify the services we provide. Let’s explore-
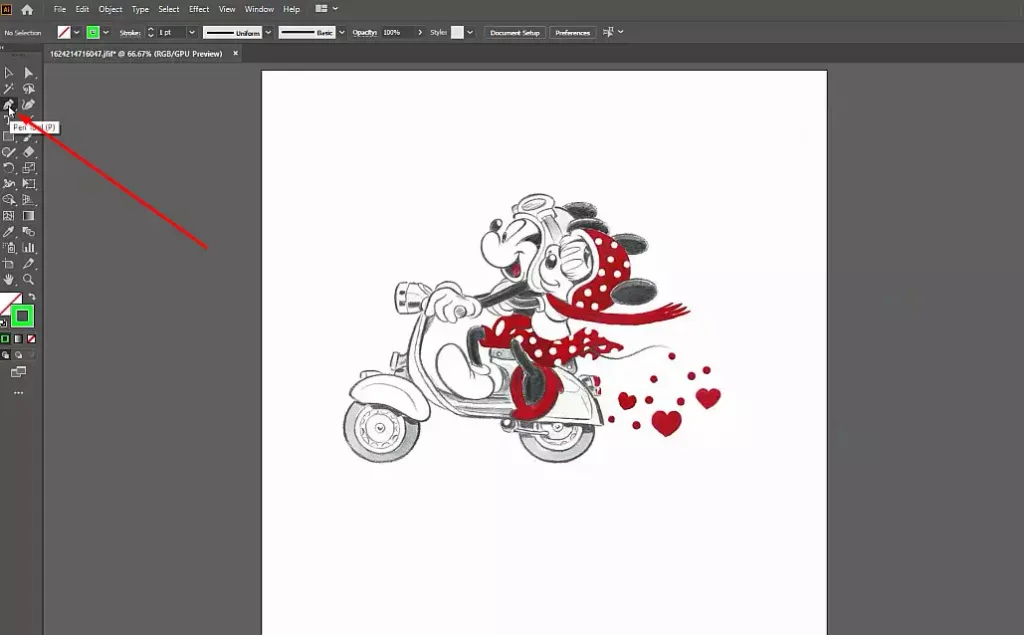
Step 1: Open Sketch in Illustrator
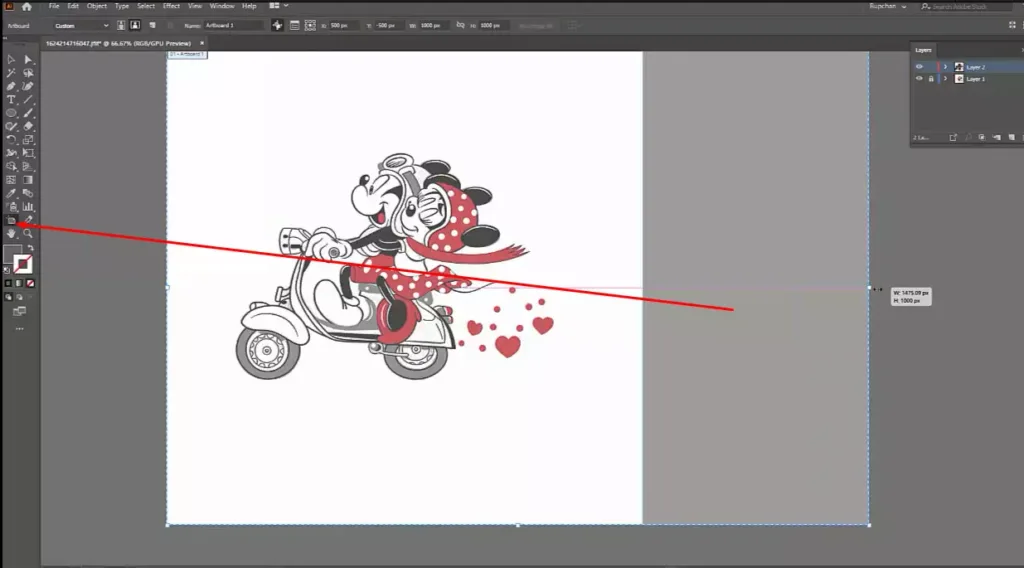
Select a sketch and drag & drop to the adobe illustrator’s artboard.

Step 2: Arrange Layers
Let’s work with layers before starting the path drawing. There are two options- 1. Go to ‘Window’ and find the ‘Layers’ or 2. Press ‘F7’. Here we lock the layer and create a new layer. Then work with the color option. Lock the fill color first. We need to choose a stroke color then.

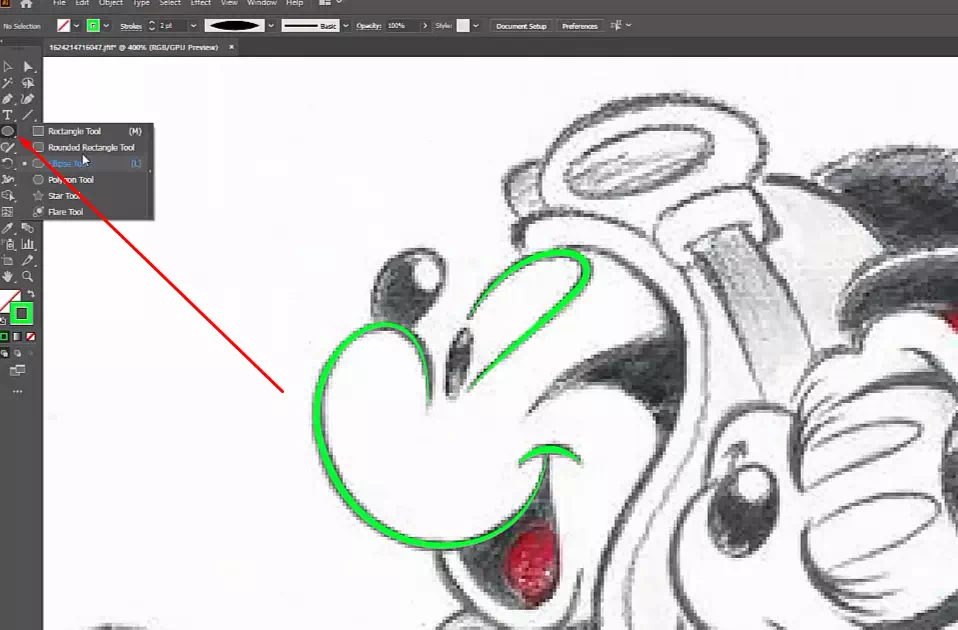
Step 3: Create paths
Now, it’s time to start the path drawing that is considered our main task. To do that we select the ‘Pen Tool’ manually or press ‘P’. The tool is our main weapon to convert sketch to vector. We also use-
Ellipse Tool: When we find an ellipse type shape we use the tool. You can select from the top left corner of the Illustrator or press ‘L’. A liking tool is the ‘Rounded Rectangle Tool’.
Delete Anchor Point Tool: We need to erase some parts of the shape. Then we select the tool either manually or by pressing ‘-’ for a shortcut. Select the unnecessary portion and use the tool.
Selection Tool: This tool is most often needed. Press ‘V’ for shortcut selection. Another alike tool is the ‘Direct Selection Tool’.
Width Tool: Sometimes we need to increase the one corner of a shape instead of other corners. Here Stoke’s uniform can’t help, so you need the ‘Width Tool’. You can select manually or by pressing ‘Shift+W’.
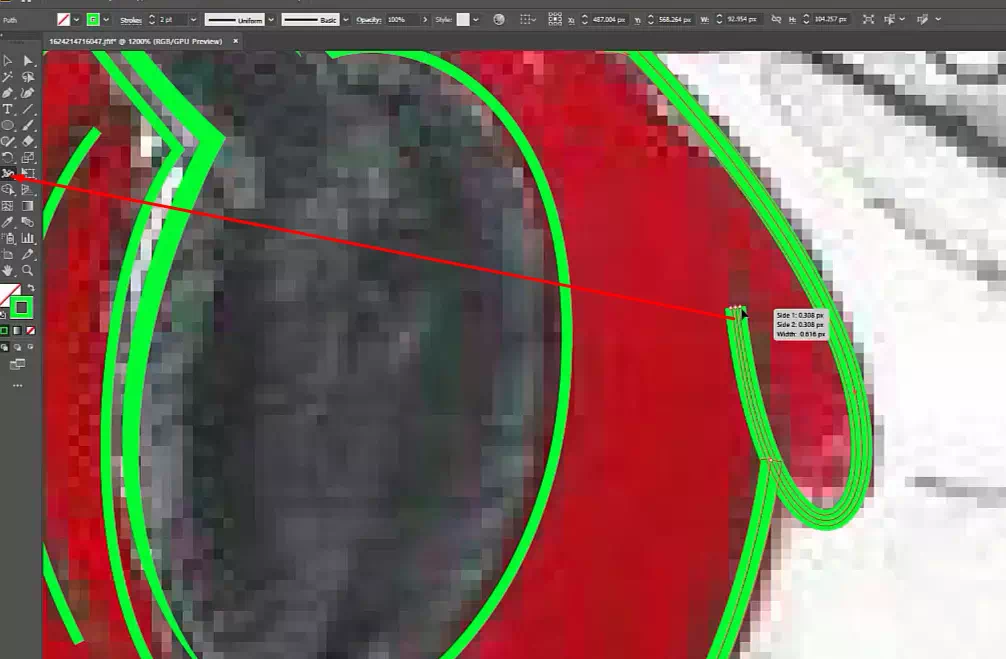
There is a caution, we need to use the ‘Stroke’ for increasing or decreasing points vary on paths. Where we take help by adjusting Uniform and other options. Pressing ‘Ctrl+F10’ is the shortcut selection option instead of going to ‘Window’ and select ‘Stroke’.
Step 4: Groups all Layers and Parts
After completing the path drawing, never forget to group all parts of the vector drawing.
Step 5: Colorize Vector Image
It’s time to colorize the vector drawing. To do so, use the ‘Eyedropper Tool’. Pick the color from sketch and fill the vector portion. ‘I’ is the shortcut key here.

Step 6: Clean the Artboard
Now, we do QC (quality check) before export the Ai file. The task is- find the unexpected objects and remove them.
Step 7: Separate Vector Drawing
Stitch the artboard by using ‘Artboard Tool’ as a need for separate the vector drawing from sketch file.
Step 8: Save the Vector File
Finally, save the Ai file and export the outcome as the need.
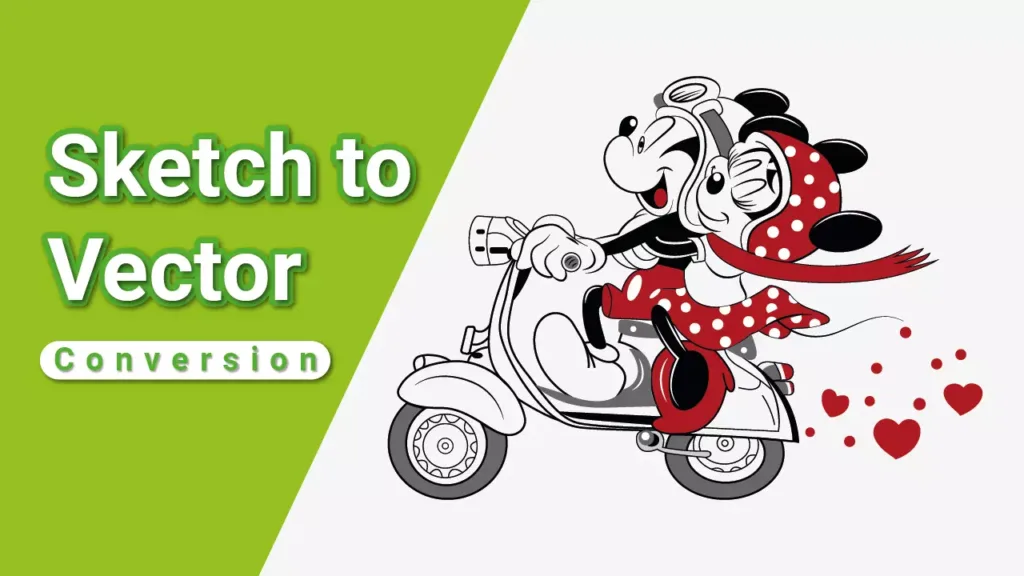
So, this is the detail of the sketch to vector conversion tutorial. Try yourself and share your work with us. Or you can hire us for any type of sketch to vector conversion service.
However, we are Vector Design US, Inc. a vector design and conversion service provider. You will get all types of vector graphics from us. Furthermore, we provide photo editing services. Competitive price is one of our features. We offer overnight vectorization by the most talented graphic designers. Getting our top-most quality vector images and round the clock customer support, you will be satisfied. Confusion? Test one of our services.


