In the world of digital design, vector images are like superheroes for graphics. Transforming old images into stunning vectors is made possible with image to vector conversion. Unlike regular pictures that might get blurry when you change their size, vector images stay clear and sharp no matter how big or small you make them. They are incredibly flexible and can adapt easily to different places and sizes without any trouble. Imagine having a magical coloring book where you can change the colors or shapes whenever you want—that’s how easy it is to edit vector images. When it comes to printing things like business cards or posters, vector images keep their quality, while other pictures might lose their clarity.
The purpose of this guide is to be a helpful map for using these superhero images in the best way possible, particularly when exporting vector images. It will show you how to make sure your pictures always look fantastic, whether you’re putting them on the internet, on paper, or anywhere else. By following the tips in this guide, you can become a superhero too super good at making awesome pictures that everyone will love!
Understand the Platform Requirements:
When you make pictures that can stretch and look good no matter how big or small, it’s like magic! But every place where you want to put these pictures like on the internet, on paper, or in apps has special rules. Imagine each place has its rulebook for how big the pictures should be, what kind of colors they can have, and even if they can be see-through.
For instance, if you want to put it on a website, they might like pictures to have lots of bright colors and be a certain size. Now, if you want to print it on paper, like a poster, they might want a different set of colors and a size that looks good on paper. So, you read the rulebook for each place, and you follow those rules. It’s like making sure your magic drawing wears the right outfit for each party. On social media, they might want a cool and colorful outfit, while for print, they might prefer a more formal one. Always check the rulebook so your magic drawing looks awesome everywhere it goes!Top of Form
Common Vector File Formats:
Certainly! Here are some common vector file formats:
SVG (Scalable Vector Graphics): SVG is a widely used vector format for web graphics. It uses XML to define vector shapes and is supported by most web browsers.
AI (Adobe Illustrator Artwork): AI is a proprietary vector format created by Adobe Illustrator. It is commonly used for graphics and illustrations and is compatible with other Adobe software.
EPS (Encapsulated PostScript): EPS is a versatile vector format that is widely used in print design. It can contain both vector and raster elements and is supported by various graphic design software.
PDF (Portable Document Format): While known primarily as a document format, PDF can store vector graphics. It’s widely used for documents, presentations, and graphic designs with a mix of vector and raster elements.
These formats are commonly employed in different scenarios for their ability to retain image quality at various sizes and their compatibility with popular graphic design tools and platforms.
Exporting Vector Images for Different Media Platforms:
Exporting vector images for different media platforms means getting your cool pictures ready to shine in various places like websites, print, social media, and more. It’s like giving them the right outfit for every occasion—looking sharp on a website, printing perfectly on paper, or fitting just right on social media.
Exporting for Web Platforms:
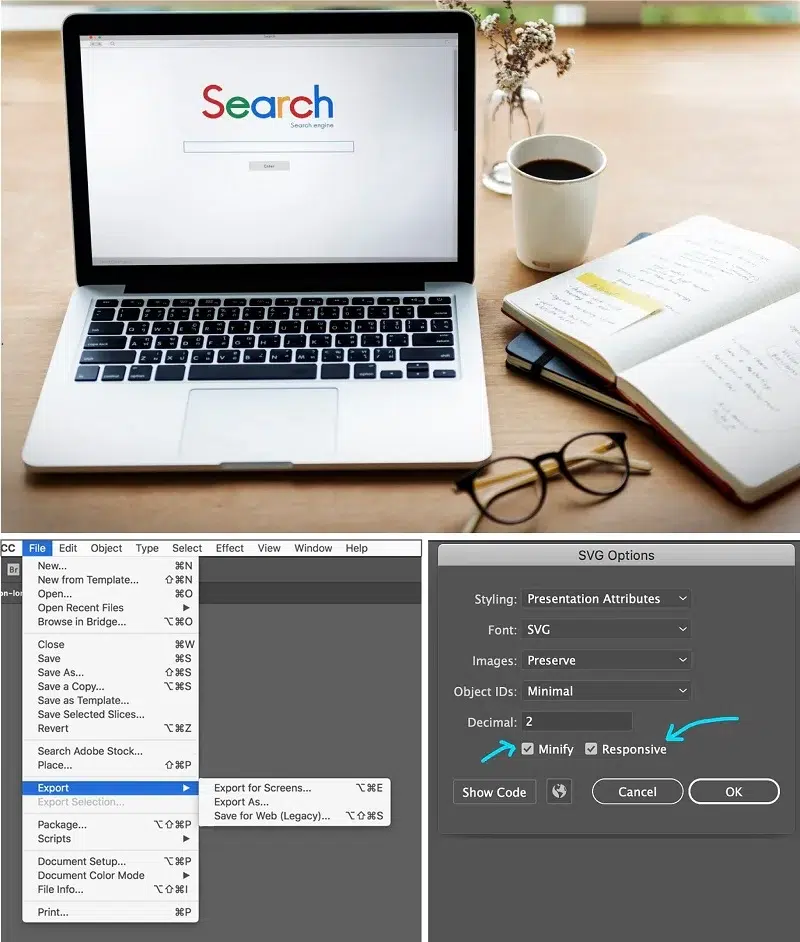
Exporting vector graphics is crucial for a seamless and visually pleasing web experience across devices. Here are key considerations:
SVG for responsive web design: SVG is perfect for responsive web design because it keeps pictures looking sharp and clear, adjusting seamlessly to different screen sizes, whether on a big computer or a small phone. Its adaptability ensures a consistent and high-quality visual experience across various devices.
Export settings for optimal performance: To make websites load faster, make sure your pictures aren’t too big. Use small files. Also, pick the right colors and settings so the pictures look good but don’t slow down the website. It’s like finding a balance between making things pretty and making them load quickly.
Considerations for iconography and logos: When it comes to small pictures like icons, it’s smart to keep things simple. Make sure they are easy to see, even on tiny screens. As for logos, keep them straightforward and easy to recognize everywhere. Avoid making them too complicated so that people can easily identify them no matter where they encounter them. Simplicity is key for both icons and logos!
Exporting for Print:
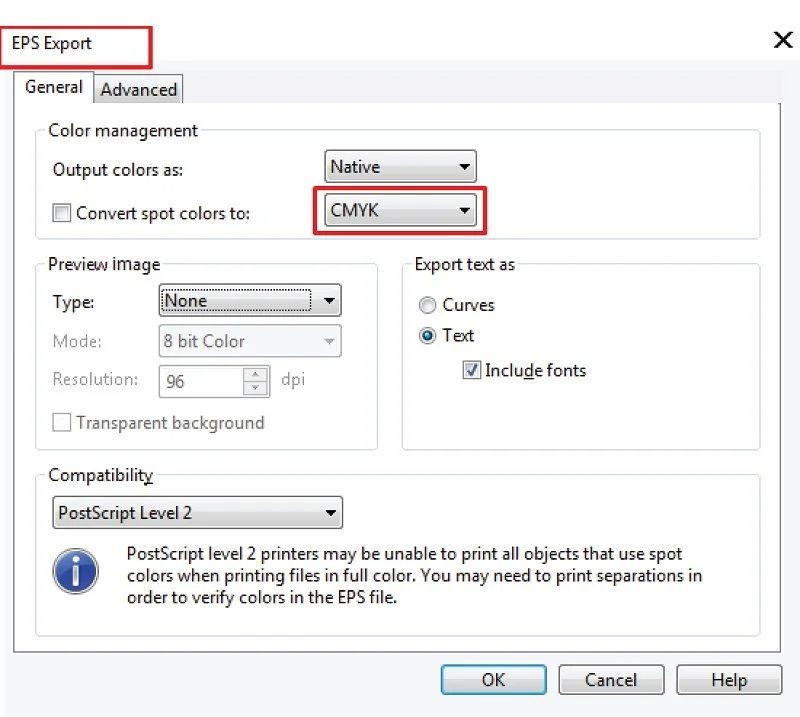
When preparing images for printing, follow these key steps:
Choosing the right format (EPS, PDF):
When you’re getting things ready for printing, it’s important to choose the right format. Two good choices are EPS and PDF. They’re both liked in the print world. EPS is great because it works well with different design software and is quite versatile. On the other hand, PDF is like a universal superhero – it gets along with everyone and keeps your design looking the same on different computers. So, whether you go with EPS or PDF, you’re making a smart move for a successful print job.
Setting up proper color modes (CMYK):
When you’re preparing things for printing, it’s crucial to get the colors just right. Think of it like this: printing uses a special set of colors called CMYK – which stands for Cyan, Magenta, Yellow, and Key (black). So, make sure your colors are in CMYK mode. It’s like speaking the same language as the printer, ensuring that what you see on your screen matches what comes out on paper. This step is like a color code that helps your prints look accurate and vibrant.
Including bleed and trim marks for printing:
Printing something? Give your design a little extra room, called “bleed,” so it doesn’t end up with weird white edges. It’s like a safety zone. Also, add “trim marks” to show the printer where to cut. This way, your design comes out looking perfect and professional, like the finishing touch for a great print!
Exporting for Social Media:
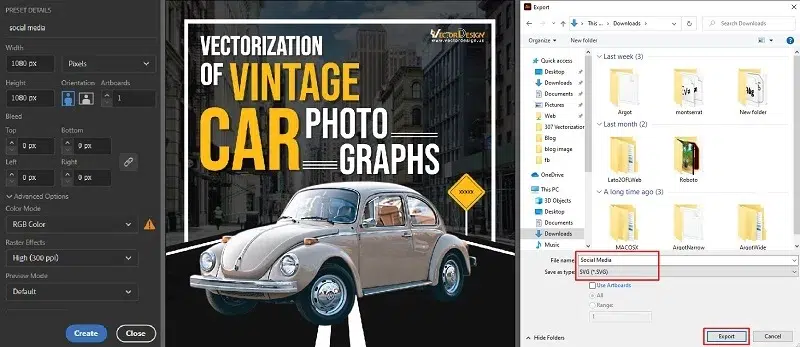
When you’re getting your pictures ready for social media, here are some things to keep in mind:
Recommended File Formats for Different Platforms:
Different social media platforms have their favorite file types. For example, JPEG and PNG are commonly accepted. Check the guidelines for each platform to know what they like best.
Sizing Guidelines for Profile Pictures, Cover Photos, etc.:
Every social media place has its own rules for how big things should be. Profile pictures, cover photos, and other stuff all have specific sizes. Follow these rules so your pictures look super good and fit perfectly on each platform.
Maintaining Quality on Various Social Media Channels:
Each social media channel might do things a little differently. To make sure your pictures look awesome everywhere, keep an eye on the quality. High-resolution pictures are your friends. Check what each platform prefers and adjust accordingly.
Whether you’re on Facebook, Instagram, or other social spots, use the right file types, follow the size rules, and keep your pictures looking top-notch everywhere.
Exporting for Mobile Apps:
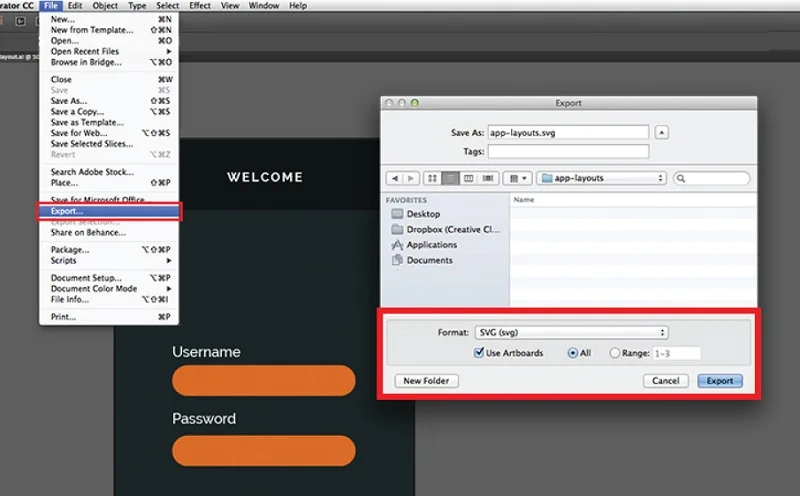
If you’re getting pictures ready for mobile apps, here’s what to think about:
Sizing and Resolution Considerations:
Mobile screens come in different sizes, so pick sizes that work well on various devices. Also, consider resolution—higher resolutions mean clearer images on high-definition screens.
File Format Preferences for App Development:
Different apps prefer different file types. PNG and JPEG are commonly used. Check what the app development guidelines recommend.
Guidelines for Iconography in Mobile UI Design:
Icons in mobile apps need to be clear and recognizable, even on small screens. Keep them simple so users know what they mean. Follow the app’s design guidelines for size and style.
So, when you’re dealing with mobile apps, think about sizes and resolutions, use the right file types, and make sure your icons are easy to understand. This way, your images will look great and work smoothly on different mobile devices.
Exporting for Presentations:
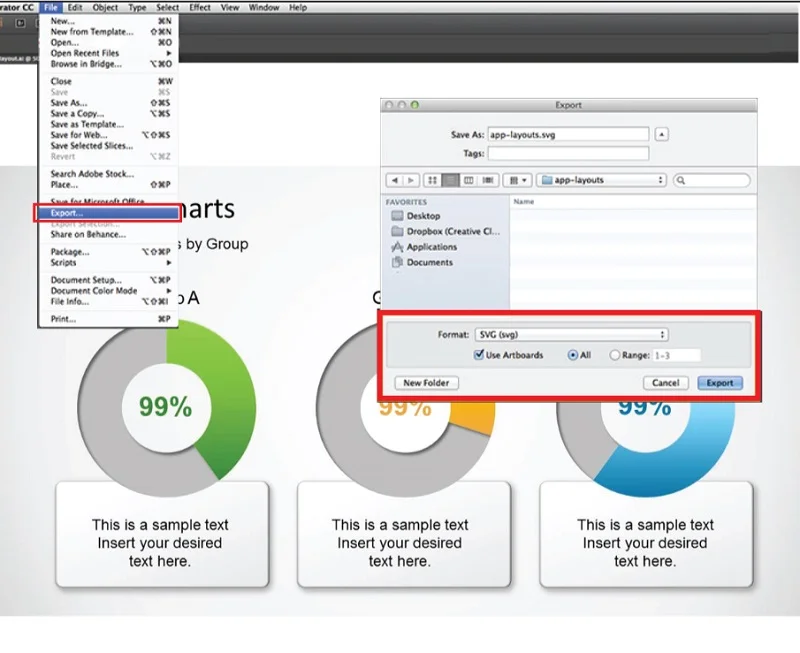
When preparing images for presentations, here’s what you should consider:
Choosing Vector Formats for Presentation Software:
Go for vector formats like SVG or EPS. They keep your graphics sharp and clear even when you zoom in, making your presentations look professional.
Sizing Considerations for Slides:
Pay attention to the size of your images so they fit well on slides. Too big or too small can be distracting. Follow the recommended dimensions for the presentation software you’re using.
Ensuring Compatibility with Various Presentation Tools:
Different presentation tools have different preferences. Make sure your chosen format works seamlessly with the software you’re using, whether it’s PowerPoint, Google Slides, or another tool.
So, use vector formats for crisp graphics, check the size of your images for neat slides, and ensure compatibility with your presentation software. This way, your visuals will shine during your presentation.
Quality Control and Testing:
When we talk about making sure our files are top-notch, two superhero practices come into play quality control and testing. Let’s break it down:
Checking for Errors or Artifacts
Purpose: Ensure error-free and glitch-free exported files.
Process: Conduct visual inspections and use QA tools for automated error detection.
Testing on Different Platforms and Devices
Purpose: Verify compatibility and consistent performance.
Process: Test on various operating systems, devices, and browsers; seek user feedback.
Collaboration with Users or Stakeholders
Purpose: Gather feedback to identify potential issues.
Process: Share files with users for testing, and encourage feedback on user experience.
Version Control and Documentation
Purpose: Maintain a record of changes and versions.
Process: Implement version control, and document adjustments made during quality control.
Automation for Consistency:
Purpose: Enhance efficiency and consistency.
Process: Utilize automated testing tools, and develop scripts for routine checks.
Security and Privacy Checks:
Purpose: Ensure adherence to security and privacy standards.
Process: Conduct security testing, and verify the protection of sensitive information.
These practices collectively contribute to delivering high-quality and reliable exported files across diverse platforms and devices.
Conclusion:
In wrapping up our journey through Exporting Vector Images, let’s keep it simple. Choose the right format for your pictures and follow the rules of the platform you’re using—whether it’s the web, print, social media, or presentations. If you’re putting pictures on websites, go for SVG to make them look good on all screens. For printing, think about EPS and PDF, and don’t forget about colors and marks. Each social media platform has its style, so customize your pictures to fit in perfectly. If your pictures are headed to mobile apps or presentations, size matters, and so do formats. Before sharing, always check for mistakes using tools that catch errors. The big secret? Tailoring your exports for each place. It’s like speaking the language of every platform, making your pictures not just good, but great everywhere they go.
FAQ’s:
What file format is best for exporting vector images?
The best file formats for exporting vector images include SVG, AI, EPS, and PDF. These formats maintain the quality of your graphics when resized and are widely supported across various platforms.
How can I ensure my vector images look good on a website?
When exporting vector images for websites, consider using SVG (Scalable Vector Graphics) format. SVG is well-supported by web browsers, ensuring your graphics maintain quality and scalability, providing a crisp appearance on different devices.
What considerations should I keep in mind for social media platforms?
Social media platforms may have specific size requirements. Before exporting, check the recommended dimensions for each platform. Additionally, consider exporting in formats like PNG or JPEG, which are commonly supported, and ensure good image quality.
Are there specific settings for vector images in presentations?
When exporting vector images for presentations, use formats like PDF or high-resolution PNG to maintain quality on larger screens. Pay attention to the slide dimensions and adjust the export settings accordingly for a professional and sharp presentation.
How do I export vector images for print materials?
For print materials, such as brochures or posters, use vector formats like AI or EPS. These formats are suitable for high-quality printing, and it’s essential to set the resolution to at least 300 DPI (dots per inch) to ensure crisp and clear prints. Always consider the bleed and trim settings based on the printing requirements.


