
Product photo editing plays a pivotal role in the success of eCommerce businesses. High-quality product photos can significantly impact customer perception and buying decisions. They instill confidence in the product’s appearance, build trust in the brand and convey professionalism. Well- editing product images showcase product details, colors, and features accurately, leading to increased conversion rates and customer satisfaction.
This content aims to guide eCommerce businesses and sellers on the importance of product photo editing and the benefits it brings. It will provide valuable insights into various photo editing techniques, tools and tips to create compelling product images that boost sales and contribute to the overall success of an online store.
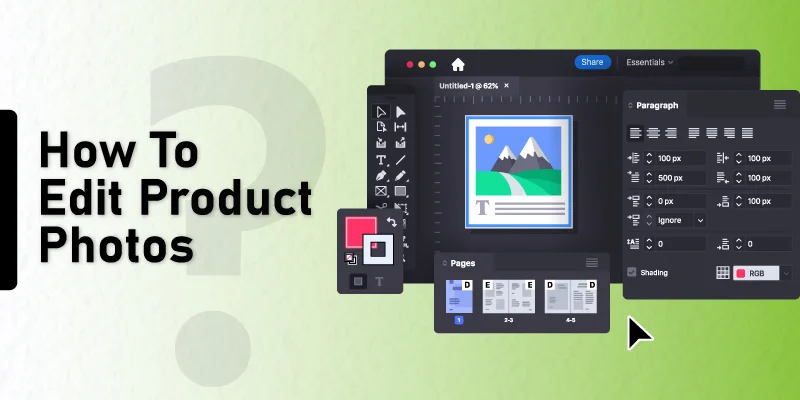
How To Edit Product Photos
There are so many editing techniques for product images. Some of them are discussed here:
Crop and Resize

Cropping and resizing are crucial steps in product photo editing. To showcase products effectively, it’s important to crop the images to remove any unwanted elements or distractions. Additionally, resizing the images to match the desired dimensions for the eCommerce platform ensures a consistent and professional appearance. Proper cropping and resizing enhance visual appeal and optimize loading times.
Adjust and White Balance

Adjusting exposure and white balance is essential to achieve accurate and appealing product colors. Correcting exposure helps to balance the brightness and darkness of the image. It ensures that the product is well-lit and visible. White balance adjustments eliminate color casts caused by different lighting conditions, ensuring that the product’s colors appear natural and true to life. Fine-tuning these elements enhances the overall quality of the product photos, making them more attractive to potential buyers.
Enhance Colors and Contrast

Enhancing colors and contrast is a vital step to make product photos visually captivating. By boosting colors, products appear more vibrant and eye-catching. Adjusting contrast adds depth and dimension to the image, making the product stand out from the background. This process elevates the overall aesthetics of the product, making it more appealing and enticing to the customers.
Remove Background for a Professional Look

Removing the background is crucial for achieving a professional and polished product photo. By eliminating distracting elements and replacing the background with a clean, consistent color or transparent layer, the focus remains solely on the product. This technique is particularly useful for e-commerce sites, as it allows the product to stand out prominently. Background removal enhances the overall product appeal and ensures that customers can easily envision the item without distractions, increasing the chances of making a purchase.
Retouch and Remove Imperfections

Retouching and removing imperfections are essential steps to ensure product photos look flawless and visually appealing. By carefully retouching blemishes, scratches or any unwanted marks, the product appears in its best possible condition. It encourages customer trust and confidence in the item’s quality. Moreover, retouching can enhance product details, making them more vivid and enticing.
Add Shadows and Reflections

Adding shadows and reflections to product photos can significantly enhance their overall presentation and realism. By carefully applying shadows and reflections, the product gains depth and dimension. It creates the illusion of a three-dimensional object. Properly executed shadows and reflections provide a sense of professionalism, making the product photos look polished and sophisticated.
Optimize Your Photos to Reduce the Load Time

Optimizing product photos for web use is crucial to improve website loading times and enhance user experience. By compressing images without compromising quality, you can reduce their file sizes and ensure faster page loading. This optimization not only enhances the overall performance of your eCommerce site but also improves search engine rankings. Because, faster-loading pages are favored by search algorithms. Use appropriate image formats (such as JPEG for photographs and PNG for images with transparency) and resize images to their display size to further reduce load times without sacrificing visual appeal.
Maintain Consistency

Consistency is key to establishing a strong brand identity and ensuring a professional look for your eCommerce site. Maintain uniformity in your product photo editing by using the same editing style, color palette and background across all product images. Consistent editing helps create a cohesive and visually appealing online store. Additionally, it builds trust and credibility, as consistent images convey a sense of professionalism and reliability, encouraging customers to make purchases with confidence.
Use Clipping Path

Clipping path is a valuable technique in product photo editing, particularly for images that require precise and clean cutouts. By using a clipping path, you can isolate the product from its background with accuracy. It allows you to place the product on a new background or utilize it in various marketing materials. This method is especially helpful for e-commerce sites that need consistent backgrounds for a polished and professional appearance. Clipping paths ensure that the focus remains on the product.
Apply HDR (High Dynamic Range)
")
Applying High Dynamic Range (HDR) editing to product photos can significantly enhance their visual appeal. HDR involves merging multiple exposures of the same image to create a balanced and vibrant final result. You can get the dynamic and lifelike product images through this process. This editing process is especially beneficial for showcasing products with intricate details or those in challenging lighting conditions.
Focus Stacking

Focus stacking is a powerful technique used in product photo editing to achieve greater depth of field and sharpness. It involves combining multiple images of the same product, each with a different focal point, to create a final image that is entirely in focus. This method is particularly useful for products with intricate details. By using focus stacking, you can ensure that all parts of the product are sharp and clear.
Add Watermarks or Logos

Adding watermarks or logos to product photos is a crucial step in protecting your brand and ensuring proper attribution. By incorporating a unique watermark or logo, you establish ownership and prevent unauthorized use of your images. This practice enhances your brand recognition and safeguards your product photos from misuse in the digital space.
Create 360-Degree Views

Creating 360-degree views of product photos involves capturing multiple images from different angles and stitching them together to offer a comprehensive visual experience. This interactive technique allows customers to virtually explore products, boosting engagement, trust and confidence in their purchase decisions, ultimately enhancing the overall shopping experience.
Batch Editing

Batch editing streamlines the photo editing process by applying consistent adjustments to multiple images simultaneously. It saves time and ensures uniformity across product photos, maintaining brand identity and professional presentation. With batch editing, photographers and e-commerce businesses can efficiently enhance and optimize product images for a consistent and polished look.
Use Smart Objects

Using Smart Objects in photo editing software, such as Adobe Photoshop, allows you to work non-destructively on your product photos. By converting image layers into Smart Objects, you can apply filters, adjustments and transformations without permanently altering the original image data. This gives you the flexibility to make changes or revert back to the original photo at any time, making the editing process more flexible and reversible. Smart Objects are especially beneficial when you need to resize or scale product images without losing quality.
Background Blur

Background blur, also known as bokeh. It is a popular technique used in product photography to create a visually appealing and professional look. By blurring the background while keeping the main subject in focus, product photos can stand out and draw attention to the item being showcased. This effect can be achieved through various methods, including using a wide aperture, specialized lenses, or post-processing tools in photo editing software. Background blur can add depth and a sense of elegance to product images, making them more enticing to potential customers.
Adjust Levels and Curves

Adjusting levels and curves is a crucial step in product photo editing to fine-tune the overall tonal range and contrast of the image. By manipulating the histogram and curves graph, you can brighten or darken specific areas, enhance highlights and shadows, and improve the overall color balance. This technique helps to bring out details and create a more visually striking product photo with a balanced exposure. Adjusting levels and curves can significantly enhance the overall quality and visual appeal of product images, making them more attractive to potential customers.
Remove Dust and Scratches

Removing dust and scratches is essential to ensure that your product photos appear clean and professional. Dust and scratches can be distracting and take away from the focus on the product itself. Using photo editing software, you can use healing brushes, clone stamp tools or spot healing tools to remove any imperfections from the image. By doing so, you can present your products in the best possible light and create a positive impression on potential customers.
Popular Editing Software for product photos
the choice of editing software for product photos depends on the level of editing required, budget and personal preferences. Let’s explore some best softwares for product photo editing:
- Adobe Photoshop: This is the industry-standard photo editing software. It offers advanced tools for retouching and manipulates product images.
- Adobe Lightroom: Adobe lightroom is a powerful tool for organizing, editing, and managing large batches of product photos with non-destructive editing capabilities.
- Capture One: This is a professional-grade editing software known for its exceptional color accuracy and high-quality image processing.
- GIMP: A free and open-source alternative to Photoshop, providing a wide range of editing features for product photo enhancement.
- CorelDRAW: Primarily used for vector graphics, it also offers photo editing features for creating precise and detailed product images.
- Affinity Photo: A feature-rich software that offers comprehensive photo editing tools, suitable for professional-level product photo editing.
- Canva: Canva is a user-friendly online tool with pre-designed templates. It is suitable for basic photo editing and creating visually appealing product images.
- PaintShop Pro: A versatile software with various editing tools, making it suitable for both beginners and advanced users.
- Pixlr: It is a free online photo editor that allows quick and easy editing of product images without the need for installation.
Product Photo Editing Tips and Tricks
Product photo editing plays a crucial role in presenting your products in the best light and attracting customers. Here are some valuable tips and tricks to enhance your product photos:
- Proper Lighting: Ensure well-balanced lighting to avoid harsh shadows or overexposed areas. Natural light or softboxes can create a pleasing, even illumination.
- Clean and Prepare: Clean products before shooting to remove dust and smudges, ensuring a polished appearance.
- Shoot in RAW: Use RAW format for maximum flexibility during editing, preserving more image data and allowing for better adjustments.
- White Balance Adjustment: Correct color temperature to ensure accurate representation of product colors.
- Background Removal: Eliminate distracting backgrounds to emphasize the product and create a professional look.
- Retouching: Use spot healing and cloning tools to remove imperfections and enhance the product’s appearance.
- Enhance Contrast and Clarity: Adjust contrast and clarity to make the product stand out and add depth to the image.
- Optimize for Web: Compress images for web use to reduce loading times and improve user experience.
- Maintain Consistency: Maintain a consistent style and theme across all product images to create a cohesive brand identity.
- Test Different Styles: Experiment with various editing styles to find the one that best suits your products and target audience.
Conclusion
Throughout this guide, we explored a range of product photo editing techniques. High-quality product photos play a pivotal role in shaping a brand’s image and driving sales. When customers are presented with clear, visually appealing images, it creates a positive impression and builds trust in the brand. So, take the initiative to enhance your product presentation through editing and watch as your photos become a key driver of success in your business.
Related Blog
product photo shooting antedating gear
top product photographers in Europe


