Clipping Path Services

  • Price Starts from $0.5 Per Image
  • 6 Hours Fastest Delivery
  • 100% Money-Back Guarantee
  • Handmade Services
  • Secure & Reliable Photo Editing Service Provider
  • 10 Years of experience
  • Services from Professional Artists
  • Get High-Resolution File
  • PayPal, Master/Visa Card Accepted
Customer Reviews 4.7 out of 5
4.7/5
Best Clipping Path Services Top banner-01- Vector Design US, Inc.

5K+ Clients from famous brands to small business trust Vector Design US, Inc.

ABC Printing Company
Digital Press
Sign Ware House
GSG
Oakridge Design
Vista Print

How We Work

Step 1

Request a Quote

Send us your image(s) and we’ll send you a quote within minutes.

Step 2

Make payment

Approve your quote by making payment through PayPal.

Step 3

Production

Get hand-drawn clipping path service according to your guidelines.

Step 4

Ready to go!

Leverage the unique & exclusive clipping path that impress

Professional Bulk Clipping Path Services

Clipping path services

As we said, the clipping path is a medium of selecting an image to modify or change, it is so much crucial photo editing technique. We are providing the best services to product photographers, eCommerce product sellers, and those who need image editing services. In the case of eCommerce product image modification, there are no other options, but clipping paths. Clipping path is necessary for almost all types of image manipulations and image masking service is crucial for soft-edge graphics.

Simple/Basic Clipping Path

Basic Clipping Path beforeBasic Clipping Path after
Price: $0.50 / Image

Get our high-end clipping path for your simple product images or any other photos. It is the primary level of clipping path. It is often called the basic clipping path. The images that contain no hole, but straight, rectangular, oval, or curved shape with one or two anchor points are under the simple clipping path category. For example- ball, cup, plate, book, mobile, etc. Working with these images requires less effort and so, its price is comparatively lesser.

  • Highest quality photo enhancement
  • Images look wonderful
  • Flawless clipping path
  • Backdrop cutting
  • Picture compression
  • Add image borders

Medium Clipping Path

9990326 PACKAGING WATERMARK Before9990326 PACKAGING WATERMARK Before
Starts From: $2 / Image

This clipping path is harder than the simple clipping path because product photos of the medium clipping path category contain holes and eventually, they require numerous anchor points while creating paths with the Photoshop pen tool. Such images contain more curves and twists. For example- machinery items and parts, bracelets, shoes, sets of watches, jewelry sets, and more. We provide all types of clipping path services by professional clipping path experts.

  • Elegant and luxurious look
  • Professional clipping path
  • Products on the white background
  • Top-quality based on requirements
  • Cheapest clipping path
  • State-of-the-art-technology

Complex Clipping Path

Complex Clipping Path after- Vector Design US, Inc.Complex Clipping Path after- Vector Design US, Inc.

Starts From: $4 / Image

Complex clipping path technique is applied to those product images that are too complex to edit with the pen tool. They contain multiple holes, closed paths, and require humorous anchor points due to their complex shapes. For example- furniture, chain, necklace, net, jewelry, furry doll, and the like. Complex clipping tests the capability of the designers to remove product background. It is one of the toughest photo editing works.

  • Work with complex images
  • Images contain multiple holes
  •  Photos look luxurious and expensive
  • Perfect images for online stores
  • Comprehensive clipping path around the edges

Super Complex Clipping Path

Super Complex Clipping Path before- vector design us, inc.Super Complex Clipping Path after- vector design us, inc.
Starts From: $8 / Image

The product photos like machinery, cars, bicycle, motorbike, people in a frame, etc. are the images for super complex clipping path service. It s the ultimate type of clipping path that is the most tiresome work. Due to the complex product shapes and having countless anchor points, the super complex path needs appropriate skills, experienced designers, and available time to edit. A photo editor is perfect when he can work on super complex images.

  • Clipping path and additional corrections
  • Complex product photograph editing
  • Expert photo editors work with such images
  • Required mush time and effort
  • Designers’ patience and latest tools

Multi Clipping Paths

Multi Clipping Paths before- vector design us, inc.Multi Clipping Paths after- vector design us, inc.
Starts From: $4 / Image

Multi clipping path is needed for images that contain multiple objects or subjects. If your product model wears a cap, shirt, pants, jewelry, watch, and you need to modify these items distinctively, you need multiple clipping paths. This clipping path helps to select and edit each of the items independently. The images like group people, jewelry sets, products collage, and more. Think such images require multipath service.

  • Best multi-path for group image or product images
  • Complex work
  • Enabled every image fixing
  • Multipath is best for color correction

Compound Clipping Path

Compound Clipping Path before- vector design us, inc.Compound Clipping Path after- vector design us, inc.
Starts From: $10 / Image

Compound clipping path is next to the medium clipping path and prior to the complex clipping path. Applying this technique is pretty much hard and designers need practice. It is applied to images that contain multiple holes and curves that result in countless anchor points. However, the product images that come up with this category are group products, jewelry sets, cosmetics collections, collages, group apparel, and more.

  • Background remove from net typed images
  • Utilize ultimate type of Clipping path technique
  • Leverage the latest photo editing tools
  • Expert editors effort to the less
clipping path- vector design us, inc.

What are the Benefits of this service?

Clipping path is the first step of editing any image including product images. Since clipping path is a photo editing technique and works to select an image or a part of a product photo. It has various types of benefits that a designer, a photographer, and the product owners get equally. The advantages of the clipping path are the following-

  • Clipping path is an easy photoshop pen tool work that enables you to select and edit any image at home.
  • It helps to select any image whether it is easy, simple, or complex shaped.
  • It helps to bring any changes in the image or modify a part of an image.
  • A designer can change the background of a product image.
  • You can remove background by selecting applying the clipping path method.
  • Clipping path helps to cut out images, remove unwanted backdrops, to extract images from their ugly background.
  • Designers can replace the white background or keep the transparent background or use a completely different product image background.
  • Photoshop clipping path gives freedom to the product photographer to use any background or setting whiling taking product photos.
  • For creative graphic design, clipping path can be a great way to image composite.
  • Not only that but also the clipping path is a cost-effective photo editing service.
 

Which images are suitable for the clipping path services?

Clipping path technique works best on the hard-edge product images. If you want to select an image that has a shard outline, you can use clipping path. Such images are shoes, machinery, jewelry, crookeries, kitchen items, and the like.

The product photos that contain soft-edge need an image masking service to select the image. Due to the soft and delicate edge, you cannot grab the edge. So, here you have to use the image masking technique. Such images are hairy female models, furry animal or doll, blanket, thin cloth items, and more.

The transparent or translucent images like glass bottles, smoke, water, etc. need transparent masking or translucent masking instead of clipping path. Nevertheless, some images need both clipping and image masking services. It depends on the edges and experienced photo editors like us can understand it.


What are the differences between clipping path and image masking?

While we are talking about the clipping path and masking, one question may arise in your mind and that is, what are the basic differences between the two terms- clipping path vs. image masking?

Basically, both the clipping path and the image masking are the background removal technique. The purpose of the two Photoshop image processing techniques is the same. But their ways of application are different. Image extraction or product photo isolation from the ugly background is done by these two photoshop image editing procedures.

For the hard, sharp, and smooth edge images, you need a clipping path. Various types of clipping paths are necessary for the various types of clipping paths- basic clipping path for the straight outline image, complex clipping path for the complex shaped image.

Clipping path cannot produce the best background removal result on the soft-edge images that contain multiple thin lines. Such images are hair, fur, see-through cloth items, transparent or translucent images. in this type of image, if you use a clipping path forcefully, you definitely will not get the desired result.

Clipping Path Services

We are providing the top-notch clipping path for e-commerce product owners, product photographers, retailers, and so on. Our experienced clipping path experts use the latest photo editing technology and produce top-class images for online stores. If you are looking for the best photoshop experts for clipping paths, contact us. You will get here from us the cheapest clipping services, quality image editing, background whitening, etc. Head over to our portfolio images, get an idea of our clipping work capacity and finally if you find us appropriate, take our clipping path and other image manipulation services.

Best Clipping Path Services Top banner-01- Vector Design US, Inc.

Clipping Path Work Sample

Clipping Path Service Prices

The following images displayed on Vector Design US, Inc. are our recent portfolios. The regular prices of services may vary from the starting prices shown here depending on many other factors. To know about the actual price of your required services, please Submit a Quote.

Basic Clipping Path

Basic

$ 0.5 /Per Image
  • Background removal of simple items
  • White background or colorful bg
  • Background replacement or changing
  • Transparent background
  • Cropping/Resizing
  • Straightening
  • Pixel perfect cut out image
  • Deep Itch/ Silo
  • Eliminating simple product image backdrop
Medium Clipping Path after- Vector Design US, Inc.

Advance

$ 2.5 /Per Image
  • Remove background from a harder images
  • Changing bg, removing simple objects from bg
  • Basic background retouching
  • Removing objects, people, shadows
  • Adding or Remove watermarks
  • Compressing and changing file formats
  • DIP correction, basic exposure correction
  • Resizing, adding border as per marketplaces
  • Adding fancy backdrops and basic color correction
Super Complex Clipping Path after- vector design us, inc.

Professional

$ 8 /Per Image
  • Removing background from complex images
  • Adding natural drop shadows
  • Creating multi-path for selecting every component
  • Manual clipping path with pen tool in Photoshop
  • Removing backdrop from group people or packshot
  • Simple retouching and color correction
  • Removing blur effect, highlighting subject
  • Retouching messy backdrops, adding props or people
Compound Clipping Path after- vector design us, inc.

High End Editing

$ 12+ /Image
  • Clipping path for extra-complex images
  • Net, fence, quilt, real estate, interior items, etc.
  • Creating multi-paths for selecting multi-items
  • Applying mirror shadow, reflection shadows
  • Multi-path for color correction of multi items
  • Clipping path for image restoration
  • Clipping path for ghost mannequin effect
  • Clipping path for high-end retouching
  • End-level complex images

Choose the Best clipping path service

How to choose the best clipping path service provider?

Choosing and selecting the best clipping and image cut-out service provider is not difficult. When you require photo editing and retouching services, just meditate on the features and facilities, customers support, image editing quality, pricing, etc. Here we are presenting a list of the traits of a well-capable clipping path service provider company-

Why outsource the service from us?

Being an American company, you need not outsource photo editing services from Asian countries, rather send us your images. We are, from New York, a digital image manipulation company well-equipped with modern photo editing gears and a big team formed with highly skilled and experienced photo editing experts. We can support you by providing a bulk number of product photo editing services at the cheapest prices that an Asian editing company provides. Let’s keep the bucks inside our country and thus show respect to the proud land.


How to do clipping path in Photoshop

Clipping path in Photoshop is not too hard to do for professional graphic designers. Even an apprenticed graphic designer can create a clipping path for modifying. A skilled photoshopper can create a path more perfectly than a Photoshop beginner.

However, the expert photoshop designer utilizes the Pen tool and create path. Using other selection tools, you can create a clipping path around the subject of an image. Let’s have a step-by-step short tutorial of creating clipping path in Photoshop-

Step 1- As a Photoshop beginner, take an easy product image that contains almost a round or rectangular shape without embedded holes and open it in Photoshop.

Step 2- Select the Photoshop Pen tool from the left toolbar.

Step 3- Create outline or line art by the image or subject edge. You can make the image 200%+ Zoom so that you can see the outline clearly. Move the pen tool 1 or 2 pixels inside from the outline to create a flawless path.

Step 4- After coming back to the starting points, you can see a path has got created.

Step 5- If you want to make the path a selection and remove the background, press Ctrl+ Enter and Invert the selection. Press Ctrl + Shift + I to invert the selection and to remove the backdrop, hit the delete key from your keyboard. You will get the image background removed and a transparent background.

Step 6- To add a white background for the eCommerce product photo, take a new layer, move it to the bottom of all layer and apply white color. Done.

How to make a clipping path from a selection in Photoshop

Well, this is a reverse question. The appropriate question should be ‘how to make a selection from a path’. By the way, we are going to create a path, then transform it into selection. And finally, remove the image background in Photoshop. Let’s have a step-by-step guideline.

Step 1- Get a photo in Photoshop.

Step 2- Take the Rectangular or Ellipse tool from the Photoshop toolbar. Ensure the Path option is selected from the top bar, and drag the tool on the image to create a path.

Step 3- Now go to the Layer panel, click on the path. Here you will get Work Path. Make a double click on it and thus a path will be created.

Step 4- You can transform the path into a selection by clicking Selection option from the top bar or by hitting the Ctrl + Enter.

Step 5- If you desire to withdraw the image background, make the selection inverse by hitting Ctrl + Shift + I, and in the end, hit the Delete button. You will get a transparent background.

How to create a clipping Mask in Photoshop

Clipping mask in Photoshop is not a hard task as it sounds. The beginners may think it difficult, but the expert designers understand how an easy task it is. However, if you want to know about the clipping mask technique in Photoshop, just go through this step-by-step tutorial content. Definitely, you will get a short, but crispy Photoshop guideline.

Step 1- Take a new blank File.

Step 2- Create a shape or write something.

Step 3- Open another image in a new layer. Keep the image above of all layers that you want to mask with.

Step 4- Now go to the Layer option from the top bar and click on the Create Clipping Mask option.

Step 5- Done! You will get your image the same as the below image that we have created by the clipping mask technique.

clipping path 3- vector design us, inc.

Get Clipping Path Services for eCommerce Product Photos

Thousands of product Photographers, eCommerce owners, Advertising agencies, magazines & newspaper, studios, etc. take our photo editing services and boost their businesses with 100% satisfaction.

How We Provide High-End Services?

How to create good quality clipping Paths?

Before knowing the way of creating the best quality clipping path, you should have an idea of a bad or worse quality clipping path.

The worse quality path is the outcome of the patient less work using the automatic online tools for creating path and also a try to use the automatic Magic Wand tool of Photoshop.

You can use multiple tools of Photoshop to create Clipping Path in Photoshop. But all of them cannot produce a good quality clipping path.

Only the best way of creating a flawless vector path is the appropriate utilization of the Pen tool of Photoshop. You can create a hand-drawn flawless clipping path with a pen tool. Till now the manual process of clipping path is the best way to create a natural clipping path that helps to produce the best cutout image or background removed image.

Let’s have a look at how to use the Photoshop pen tool and how to create a good quality clipping path.

Step 1- Take an image in Photoshop and zoom in 200% or 300% so that you can see the edge of the image clearly.

Step 2- Select the Pen Tool from the left toolbar of Photoshop.

Step 3- Soften your hand, be attentive, and try to create an outline by the edge of your image. Draw a line just one or two pixels inside from the edge. Since your image is zoomed in, if you lose one or two pixels after removing the background, it will not be an issue.

Step 4- Finish the clipping path creation when you reach the starting point.

Step 5- Press Ctrl + Enter to transform the path into selection.

Step 6- Press Ctrl + Shift + I to invert the selection and hit the delete button to remove the ugly background. In this way, you can kick out the unwanted backdrop from your image.

Step 7- Now you can keep the background transparent or you can place another white background instead.

However, in this way, we create a good quality clipping path that works to modify any portion of any image.


How to make multiple clipping paths in Photoshop?

Though it is thought that the clipping path is always for the removal of background, it is not true always. A clipping path is indeed a technique of creating a path and selecting an image, a background, or any portion of an image to modify or bring changes to it. Multiple clipping path service will make you capable to separate any object from an image or extracting a product image from a collage image.

Multiple clipping paths help to select multiple objects in an image. Suppose, you have a model image and now you want to remove the backdrop and modify colors of other objects in the same image. Now you have to select the background and the other parts individually so that you can apply different colors for the different portions.

Now the question is that how to do multiple clipping paths?

Okay, have a look at the step-by-step tutorial below to know the detail about the process of multiple clipping paths.

Step 1- Open your image that you want to work on. You should open it in a photo editing tool li Photoshop.

Step 2- Take path layer and create a path around the background and make it a selection and remove the background by hitting the Delete button.

Step 3- Take another path layer. Now if you want to modify the wristwatch of your model, create a path around the watch and convert it into a selection, and then modify the object.

Step-4 Take another path layer and create a path to select the dress. And now you can change or modify the color of the dress.

Remember, if you create multi-paths on the same path layer instead of taking a new layer when you will bring any changes to the image, all the objects will get changed. So, multiple clipping paths will enable you to bring different changes to the different parts of the same image. You may need to change or modify color, shape, light, shadow, etc. in different parts of an image.

However, in this way, you can create multiple paths on the same image and bring about any modification regarding every aspect. Multipath is a very effective way for photo editing.


How to make a Clipping Mask in Illustrator

Clipping mask in Illustrator is useful for creating a nice background of a text format, background of a pattern, or you can create a seamless pattern image. Here we are going to show you how to create a clipping mask in Illustrator step by step.

Step 1: Open a background image in Adobe Illustrator. You are going to see how to clip mask with text.

Step 2: Write something, make the text bold and bigger in font size. Keep this text layer on top of the background.

Step 3: Go to Pathfinder and make it a Compound Shape.

Step 4: Select all the layers together and click on the right side of your mouse. Here you will get an option ‘Make Clipping Mask’. You can get this option by pressing Ctrl+7 from the keyboard.

Step 5: Finally, you will see the result. The background image will go behind the text layer and it will get cut off as per the text size. Isn’t it amazing?

How to make a clipping Path in Illustrator?

Perhaps you know the ways of clipping path in Photoshop, but you may know about the clipping path in Illustrator. Even it is possible to remove background from image in Illustrator. The designers do this by applying the clipping mask technique. However, now we are going to show you how to make a clipping path in Illustrator and remove image background in Illustrator step by step.

Step 1: Open an image in Adobe Illustrator.

Step 2: Select the pen tool of Illustrator, select the stroke color, and create a path around the image.

Step 3: If you have multiple objects in your image, create paths in the same way. Now fill the selection with color.

Step 4: Make a Compound Shape if you have multiple objects in your image.

Step 5: Keep all the layers selected and click the right button from the mouse and Click on the Clipping Mask option from the dialogue box.

Now you can see that your image or image objects are isolated from the background. You will get a white backdrop removing messy background from your image.


Can you provide bulk editing service?

Ans: Yes, we provide a bulk amount of clipping path services for the eCommerce product photos. We have skilled and experienced professional photo editors. We use all the latest photo editing software. Our image editing company and customer support team are open 24/7 days. Our 100+ designers have been working being divided into 3 shifts. However, we can provide 3000+ product photos including rush photo editing support.

How do you ensure the best service for clipping path tasks?

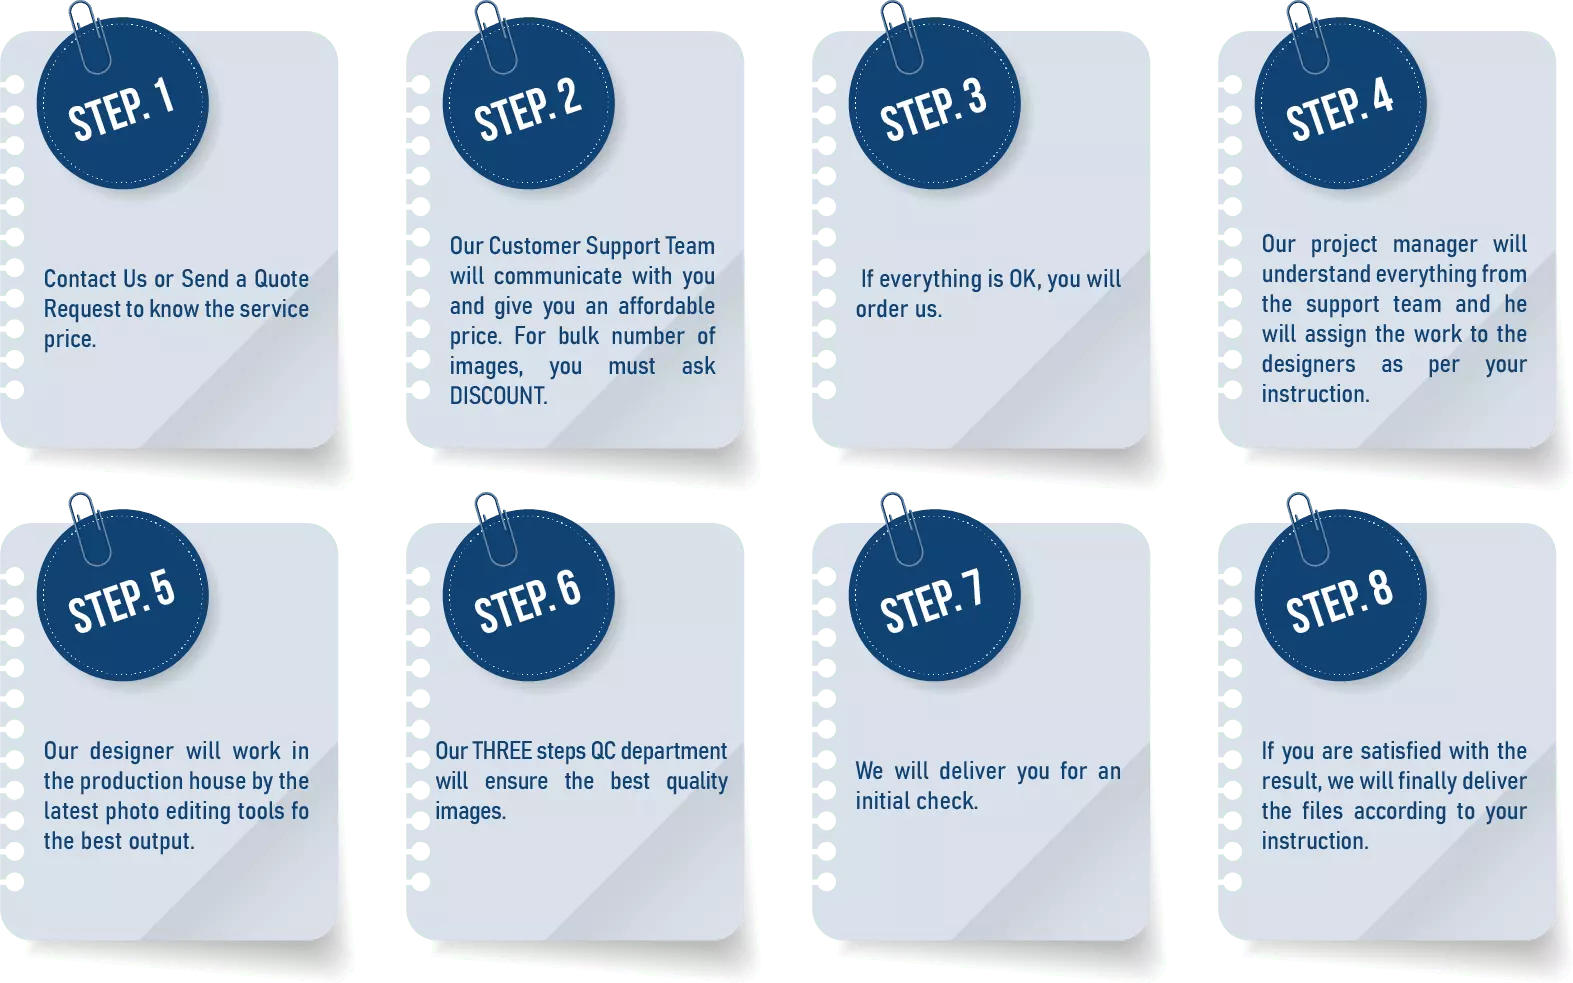
Ans: We have a well-equipped graphic design production house. Our experienced designers use all the latest photo editing software and always intend to follow the trends. We have the most professional customer support team who are from the same design background so, they understand your instruction better. Our THREE steps Quality Controllers ensure the best product photos before the final delivery.

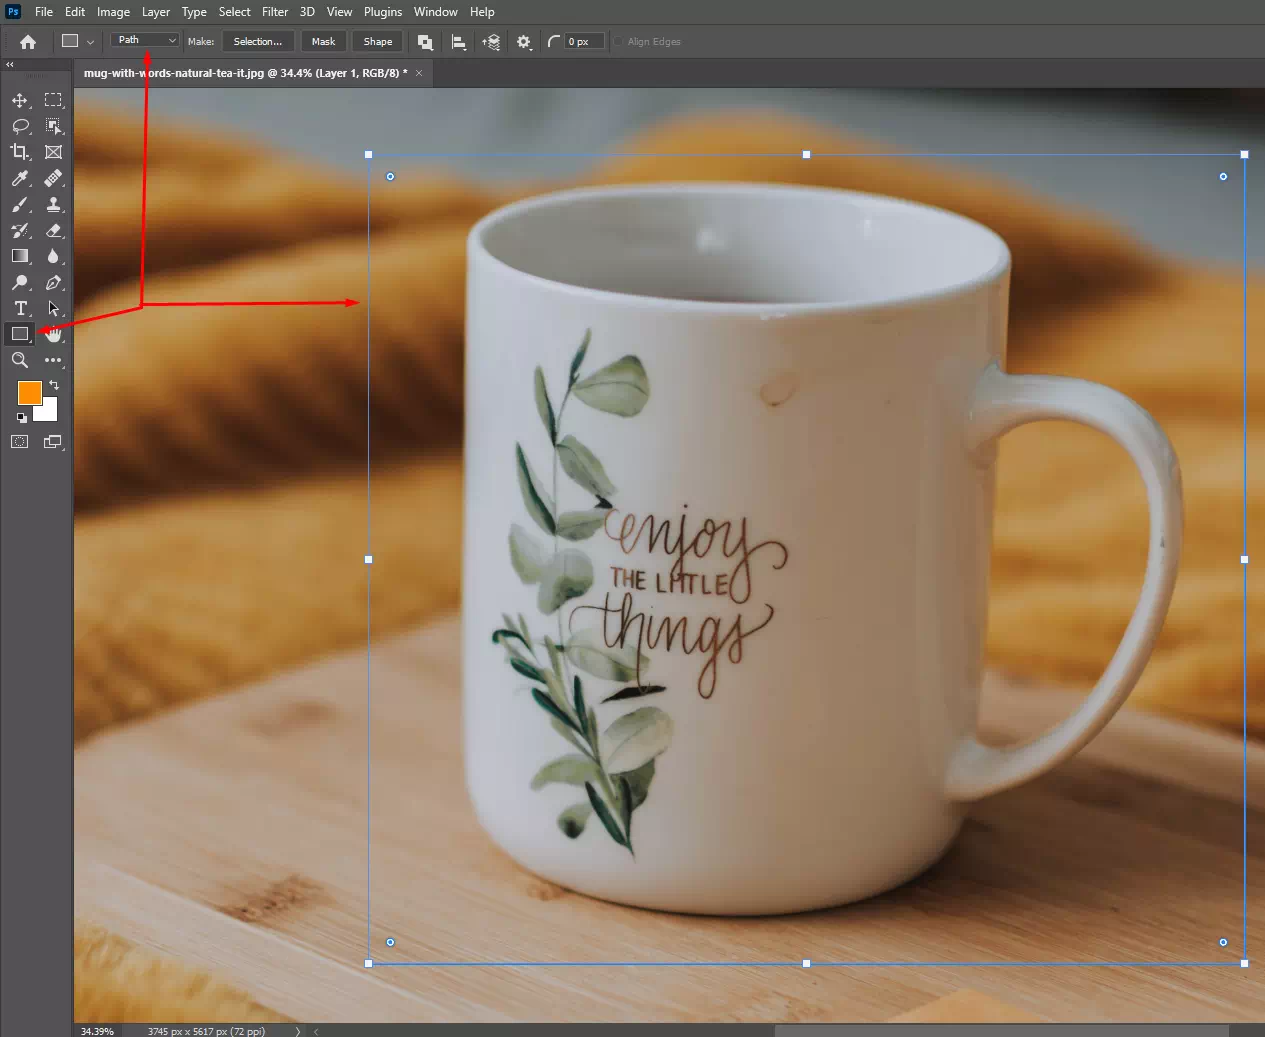
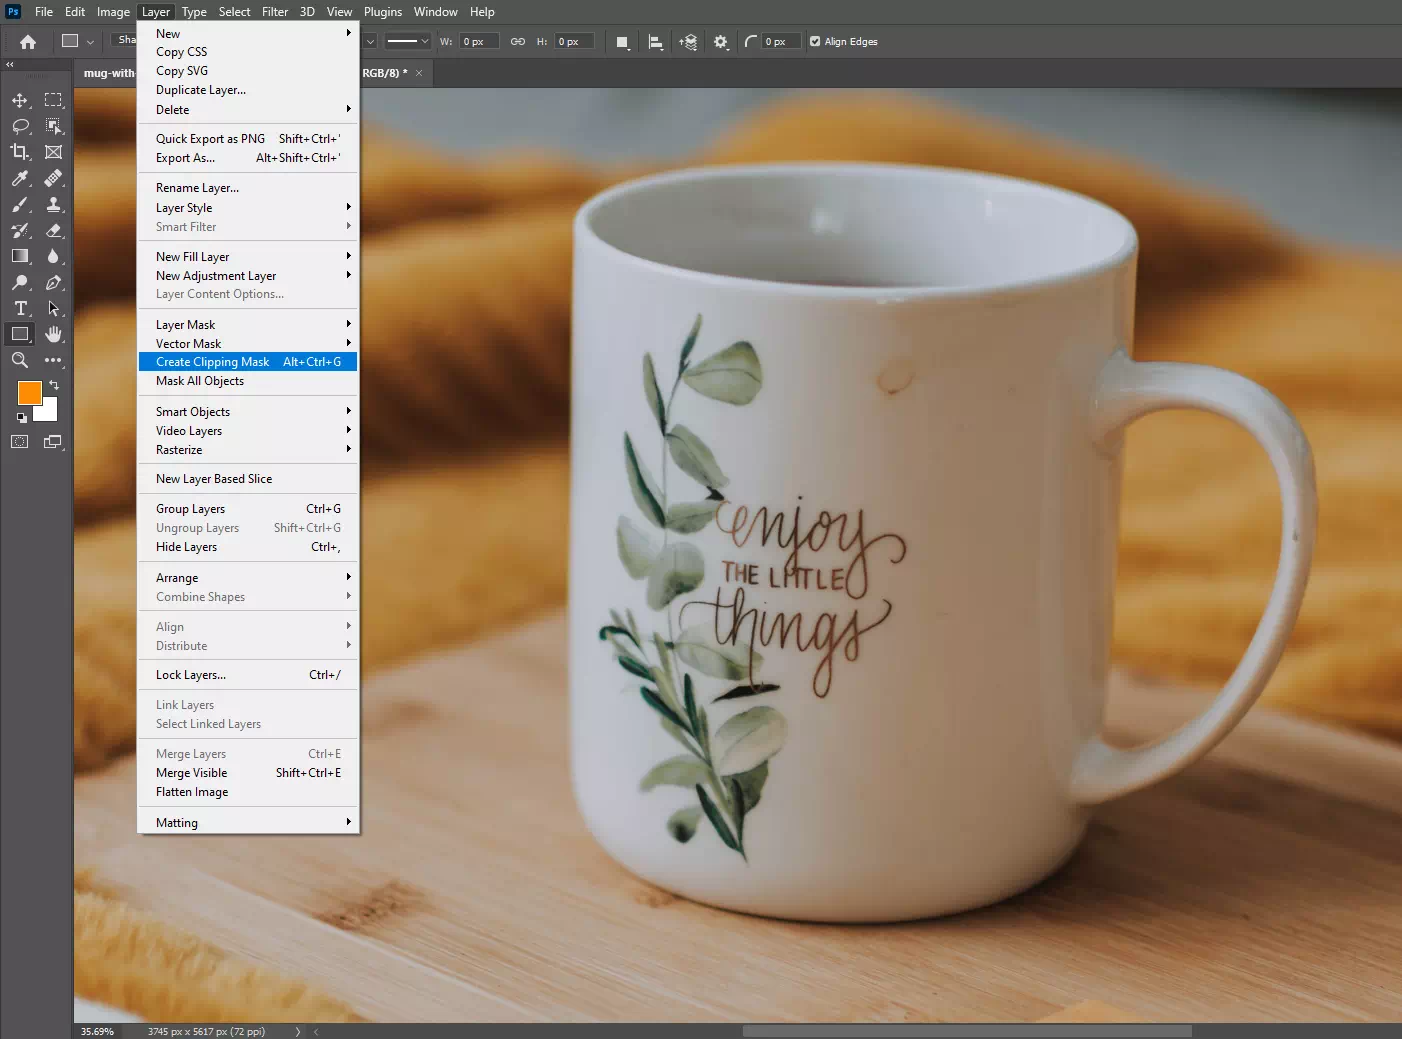
What is a deep etching service?

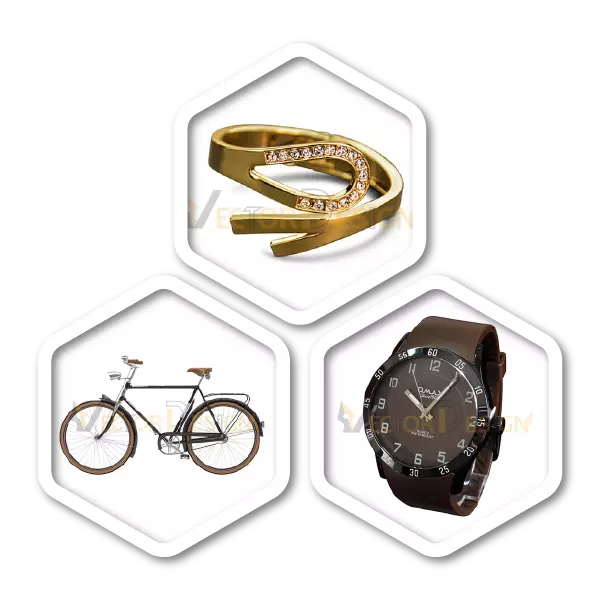
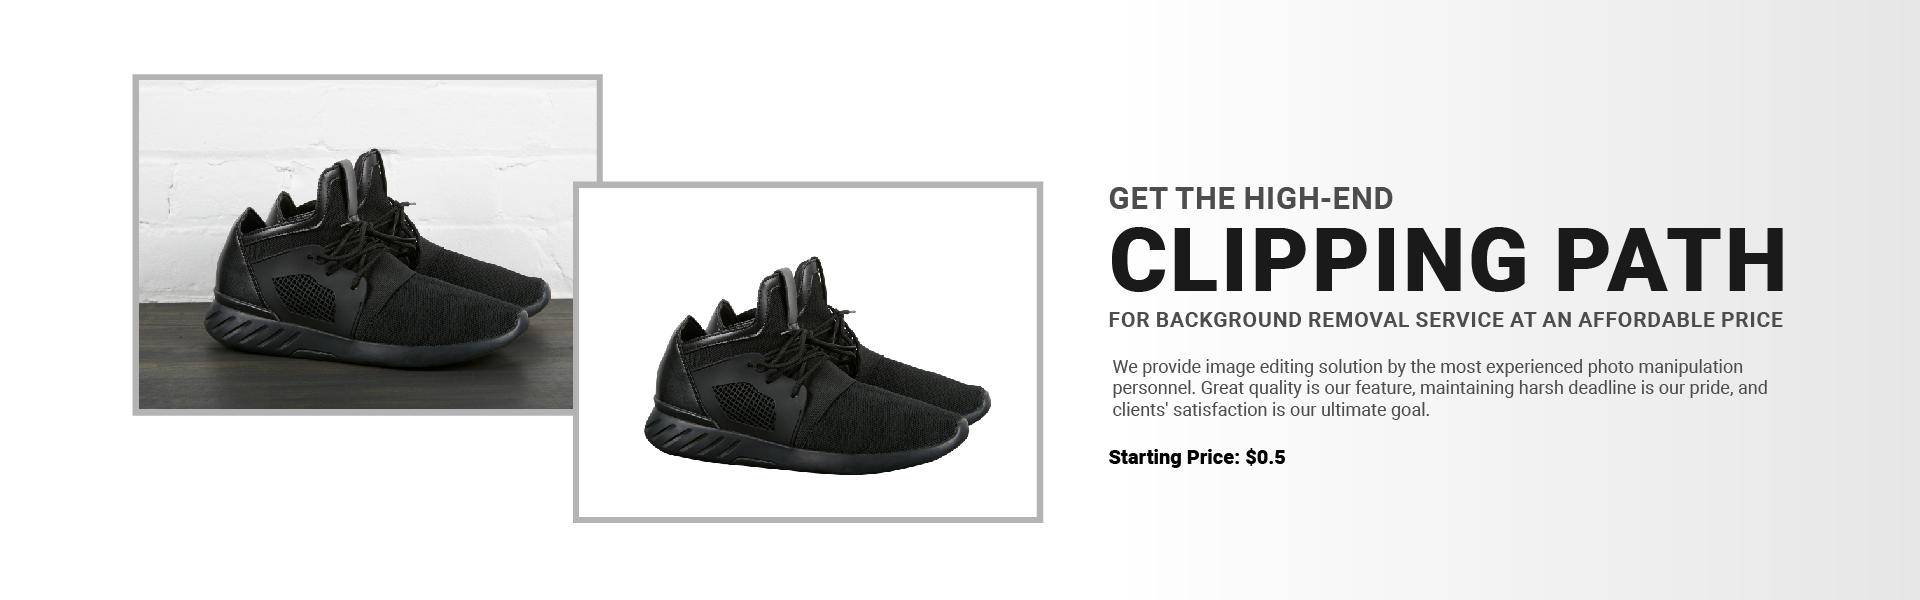
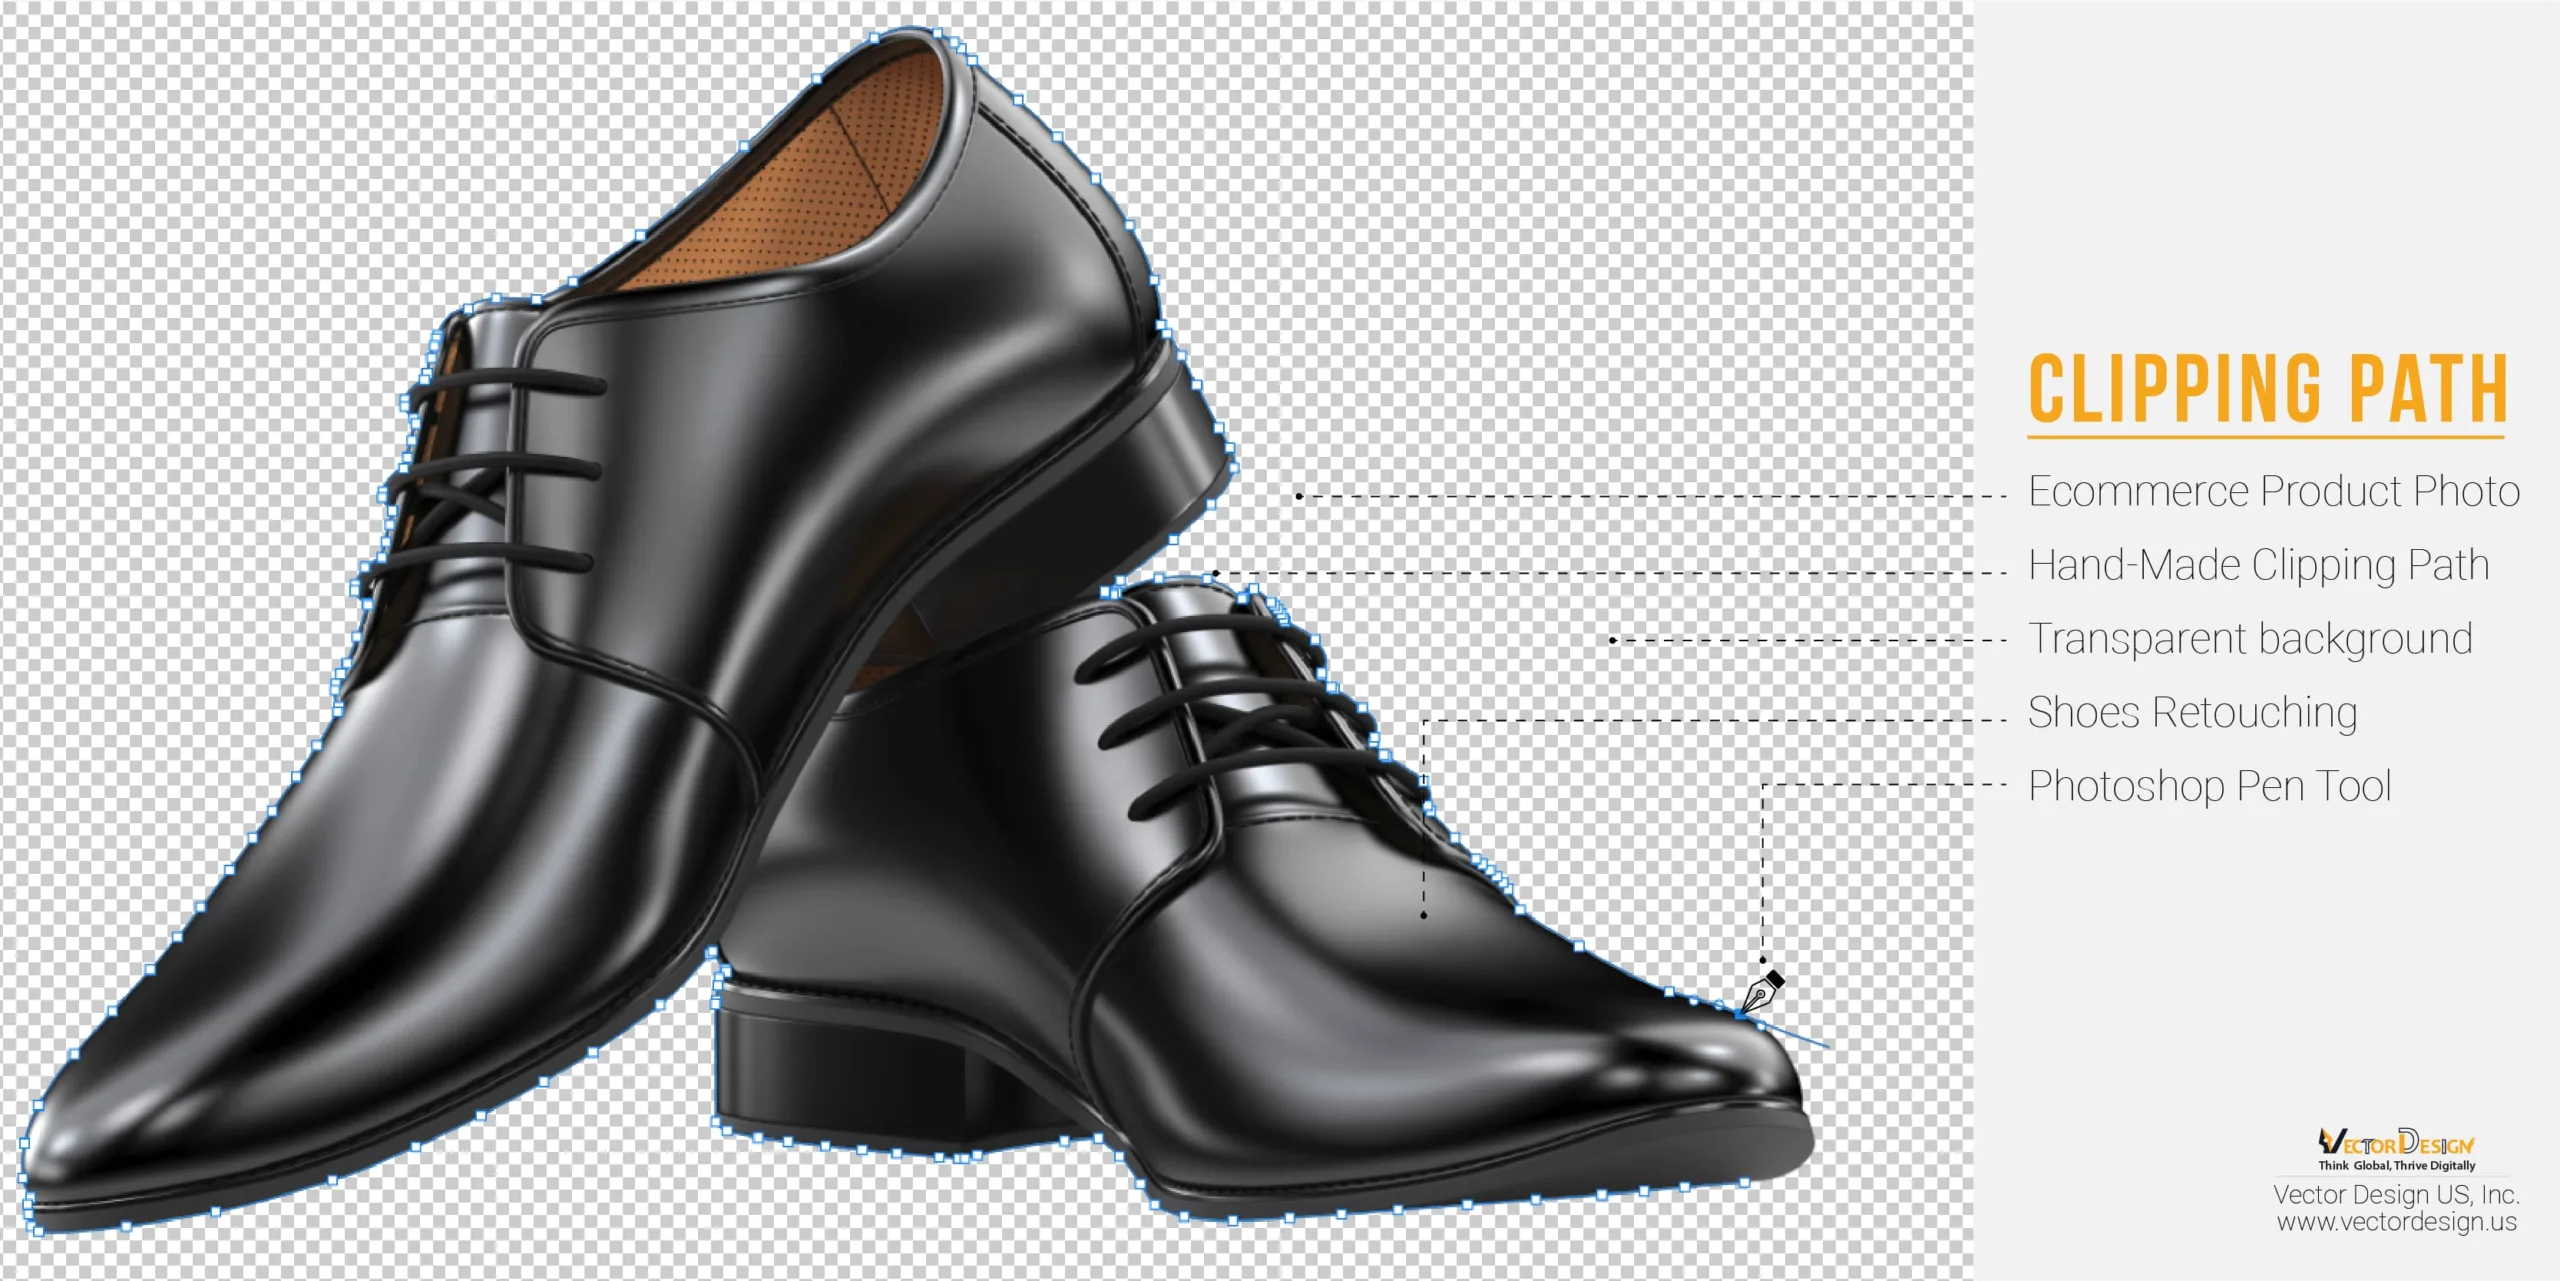
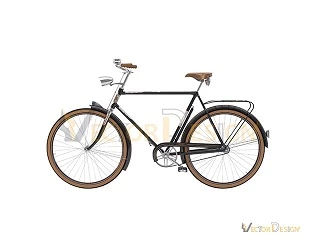
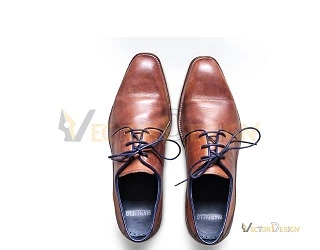
Ans: Deep etching refers to the clipping path service. What is clipping path is the deep etching. It is also provided by utilizing Photoshop tools and options. The purpose of deep etching is to remove the image background, to select objects in an image, and to bring about changes to enhance the beauty. We have been providing deep etching services professionally. If you need product photo editing and enhancing services, knock us.

What do you mean by Image processing?

Image processing is the process of converting the image into a digital one so that some useful functions can be applied to it. It can be done in Photoshop or Illustrator. We can enhance the quality of the image along with revealing any information from it. The process is done through three simple steps. They are-

  1. importing the image with a scanner,
  2. analyzing/ compressing/ enhancing the image,
  3. getting the final result. The libraries that are involved in image processing are Scikit-image, OpenCV, Mahotas, SciPv, Pillow, SimpleTK, and Matplotlib in Python.

At present, it is one of the fast-growing industries for being able to translate the language of the digital image.

What are four different types of image processing methods?

Image processing is the way of converting the image into a digital one so that some useful functions can be applied to it. Four types of Image processing include enhancement, restoration, encoding, and compression.

  • Enhancement: it improves the overall look of the image by adjusting the brightness, contrast, color correction, etc.
  • Restoration: restoration is the process of restoring the quality or any flawed portion of the image.
  • Encoding: it allows the image pixels to be compressed, encrypted, and altered for writing them to the stream.
  • Compression: compression deals with decreasing the file size of the image so that it takes less space.

What is digital image processing?

Digital Image Processing or DIP refers to the process of digital image manipulation using a digital computer through advanced features and tools. It is a part of the signal processing subfield where the focus is primarily on the images. In this process you input a digital image in the system; it processes it through a different algorithm and finally gives you the output- a manipulated image. It enhances the quality, adds a filter, and improves visualization. Adobe Photoshop is one of the most powerful and popular programs for digital image processing. DIP is an essential part of e-commerce, showbiz, and social media.

What are the steps in image processing?

Image processing is the way of converting the image into a digital one so that some useful functions can be applied to it. There are a few fundamental steps in image processing-

  • Acquisition: In the first step, you have to get the photo and import it into image processing software. It is a preprocessing step. 
  • Enhancement: In the second step, you have to make the necessary enhancement processes such as adding filters, increasing brightness, adjusting the colors, etc. 
  • Restoration: it works for improving the overall appearance of the digital image.
  • Compression: Here, you decrease the file size to prepare it for the internet. 

Where is image processing used?

Image processing is the way of converting the image into a digital one so that some useful functions can be applied to it. The technique has many usages in different fields. Social media is one of the biggest platforms that people use frequently. The medical field uses it for PET scan, X-Ray imaging, UV imaging, and many more other things. It helps in disease diagnosis greatly. Image processing is widely used in Computer vision. It helps the computer to see, identify, and process. Further, it is used in pattern recognition to recognize different patterns in an image. Also, in video processing, the image processing technique is used.

What is an image PPT?

PPT or PowerPoint Presentation uses images along with texts, video, and audio. But all types of pictures are not prepared for getting attached to the PPT. They often need cropping, rotating, and resizing before attaching. It effectively improves the visualizations of the slides. Infographics are one of the most interesting and effective methods for this purpose. It presents the information clearly and audiences feel more connected to it. To get the maximum benefit you can use high-resolution images so that all the texts in them become more visible and readable.

What is Your Clipping Path Work Process Step by Step?

Ans: Thanks for your inquiry. Not only the clipping path but also all our photo editing work process is as the following-

Step One: Contact Us or Send a Quote Request to know the service price.

Step Two: Our Customer Support Team will communicate with you and give you an affordable price. For bulk amount of images, you must ask DISCOUNT.

Step Three: If everything is OK, you will order us.

Step Four: Our project manager will understand everything from the support team and he will assign the work to the designers as per your instruction.

Step Five: Our designer will work in the production house by the latest photo editing tools for the best output.

Step Six: Our THREE steps QC department will ensure the best quality images.

Step Seven: We will deliver you for an initial check.

Step Eight: If you are satisfied with the result, we will finally deliver the files according to your instruction.

Best Photo Editing Service - Low Pricing

Edit Images By Adobe Photoshop Experts. Fast Production. Unbeatable Quality. No Automation. Satisfaction Guaranteed. Simple Ordering Process. Get It Done Today! Upload your Images & Get a Price Quote!

FAQs

What is the Photoshop clipping path service?

ANS: Photoshop clipping path service is an advanced image editing technique used to isolate a specific portion of an image for further editing. It involves drawing a vector path around the desired object and then using Photoshop’s powerful tools to manipulate or remove the unwanted parts of the image.

Who needs clipping path service?

ANS: Clipping path service is mainly required by professionals and businesses that deal with digital images, such as photographers, graphic designers, advertising agencies, and e-commerce stores. This technique is particularly useful for product photography, as it allows e-commerce stores to display their products in a consistent and visually appealing manner.

What are the advantages of a clipping path service?

ANS: A clipping path service offers several benefits, including precise image editing, versatility for various image editing purposes, time-saving for businesses, consistency in image appearance, and ultimately leading to increased sales. This service can help to remove the background of an image, isolate the subject, and manipulate and enhance the image’s appearance, leading to professional and polished results that can be used for marketing and promotional purposes

What is the difference between clipping path and masking?

ANS: Clipping path and masking are two techniques used in image editing to isolate a subject from its background. Clipping path is a vector-based technique that involves drawing an outline around the subject to remove it from its background. Masking, on the other hand, involves creating a soft-edged selection by using a layer mask to hide or reveal portions of an image. In short, clipping path is best for simple subjects, while masking is best for more complex subjects.

What is the purpose of clipping a layer?

ANS: Clipping layers is a technique used in digital art and photography to combine two different images. This can be used to create interesting effects and as a way to create layered designs. Clipping layers allows artists to composite multiple images together, control the transparency of certain layers, and even adjust the layer order. It is a powerful technique that can help digital artists create unique and interesting visuals quickly and easily.

Which type of objects can be clipping paths?

ANS: Clipping paths are used to isolate objects from their background and can be applied to a variety of graphics. This technique is widely used for product images, as it allows for professional results with minimal effort. Clipping paths can also be used on vectors and bitmaps, making them a versatile tool for designers looking to create stunning visuals with ease.

Customer Reviews of Vector Design US, Inc.

Aron Nace Photographer

Excellent work! Very easy to communicate with Vector Design Us, Inc. and final results corresponds totally with what I was expected. Will definitely work with them again for clipping path and background removal.

Styn Branj Photographer

Excellent deep etch work better then promise. I am very happy about this 100% real manual service of photoshop. Really great, many many thanks and recommend them.

Thomas Arvin Art Director

Great service for a good price, very happy with the image editing. The end result was a clean more than desire. I highly recommend this company for quality work. Thanks for your clipping path help.

Michel Wick Product Owner

This was absolutely one of my best experiences on Vector Design US.Inc...They are absolutely brilliant at what they do. if you've got photoshop requirements they are the expert you need. I've already allocated a few other projects to this company for my brand. Don't hesitate they deliver what you want..highly recommended.